Django에서 CQRS 패턴을 구현해 보겠습니다. 쓰기 작업은 RDBMS인 MariaDB를 이용하고, 읽기 작업은 NoSQL 데이터베이스인 MongoDB를 사용합니다. 두 데이터베이스 간의 동기화는 Kafka를 통해 이벤트 기반으로 처리합니다.
[준비단계]
1. MariaDB 연결 확인
• 터미널에서 MariaDB가 정상적으로 설치되고 접속이 가능한지 확인합니다.
2. MongoDB 연결 확인
• MongoDB가 올바르게 설치되고 실행 중인지 확인합니다.
3. Kafka 서버 구동 및 설정 확인
• Kafka가 정상적으로 구동되고 설정이 올바른지 확인합니다.
• 터미널에서 Kafka의 토픽을 확인하고, Kafka 브로커와 연결할 수 있는지 테스트합니다.
[CQRS 구현 개요]
• 쓰기 작업: MariaDB에 데이터를 저장합니다. Django의 ORM을 활용해 데이터베이스 모델을 정의하고, 데이터 저장 API를 설계합니다.
• 읽기 작업: MongoDB에서 데이터를 조회합니다. Django에서 MongoDB를 연결하고, 필요한 데이터를 효율적으로 조회할 수 있도록 API를 설계합니다.
• 동기화: Kafka를 통해 MariaDB에 저장된 데이터를 MongoDB로 동기화합니다. 쓰기 작업이 발생할 때 Kafka에 이벤트를 발행하고, 이를 소비하는 Consumer가 MongoDB에 데이터를 기록합니다.
데이터 쓰기 프로젝트
가상 환경 생성
python3 -m venv myvenv
가상 환경 활성화 (Mac 기준)
source myvenv/bin/activate
필요한 패키지 설치
pip install django
pip install djangorestframework
pip install mysqlclient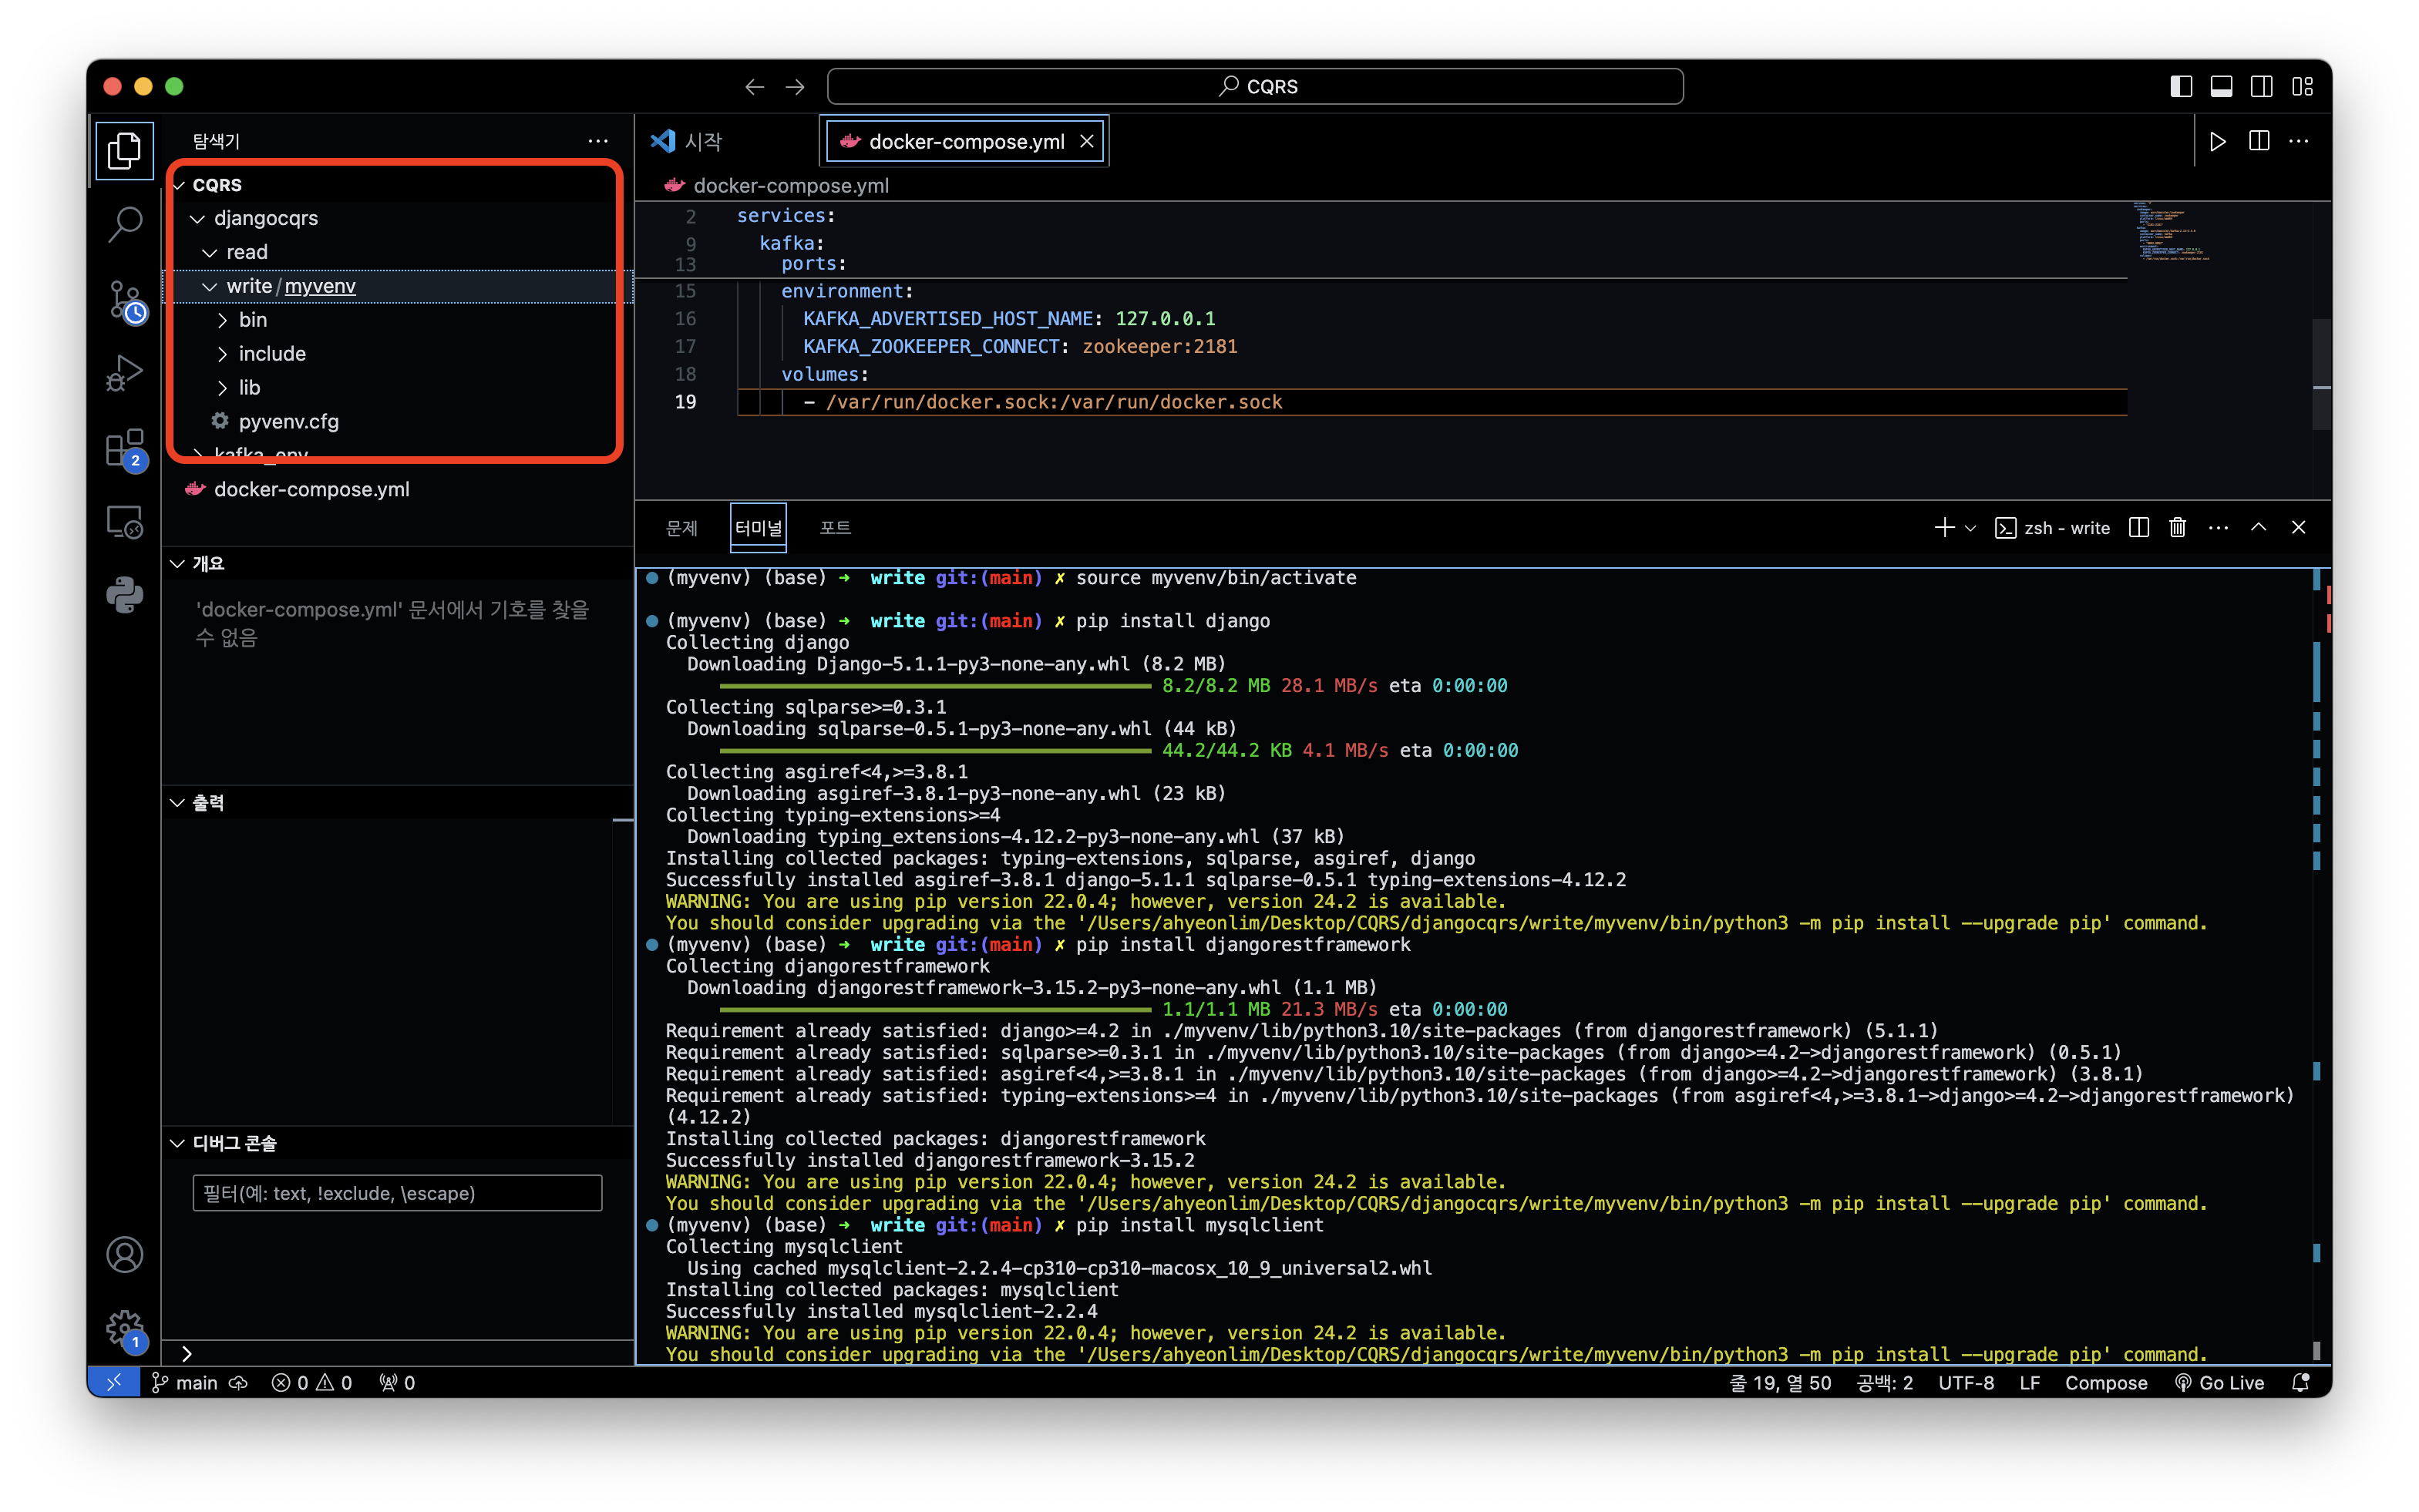
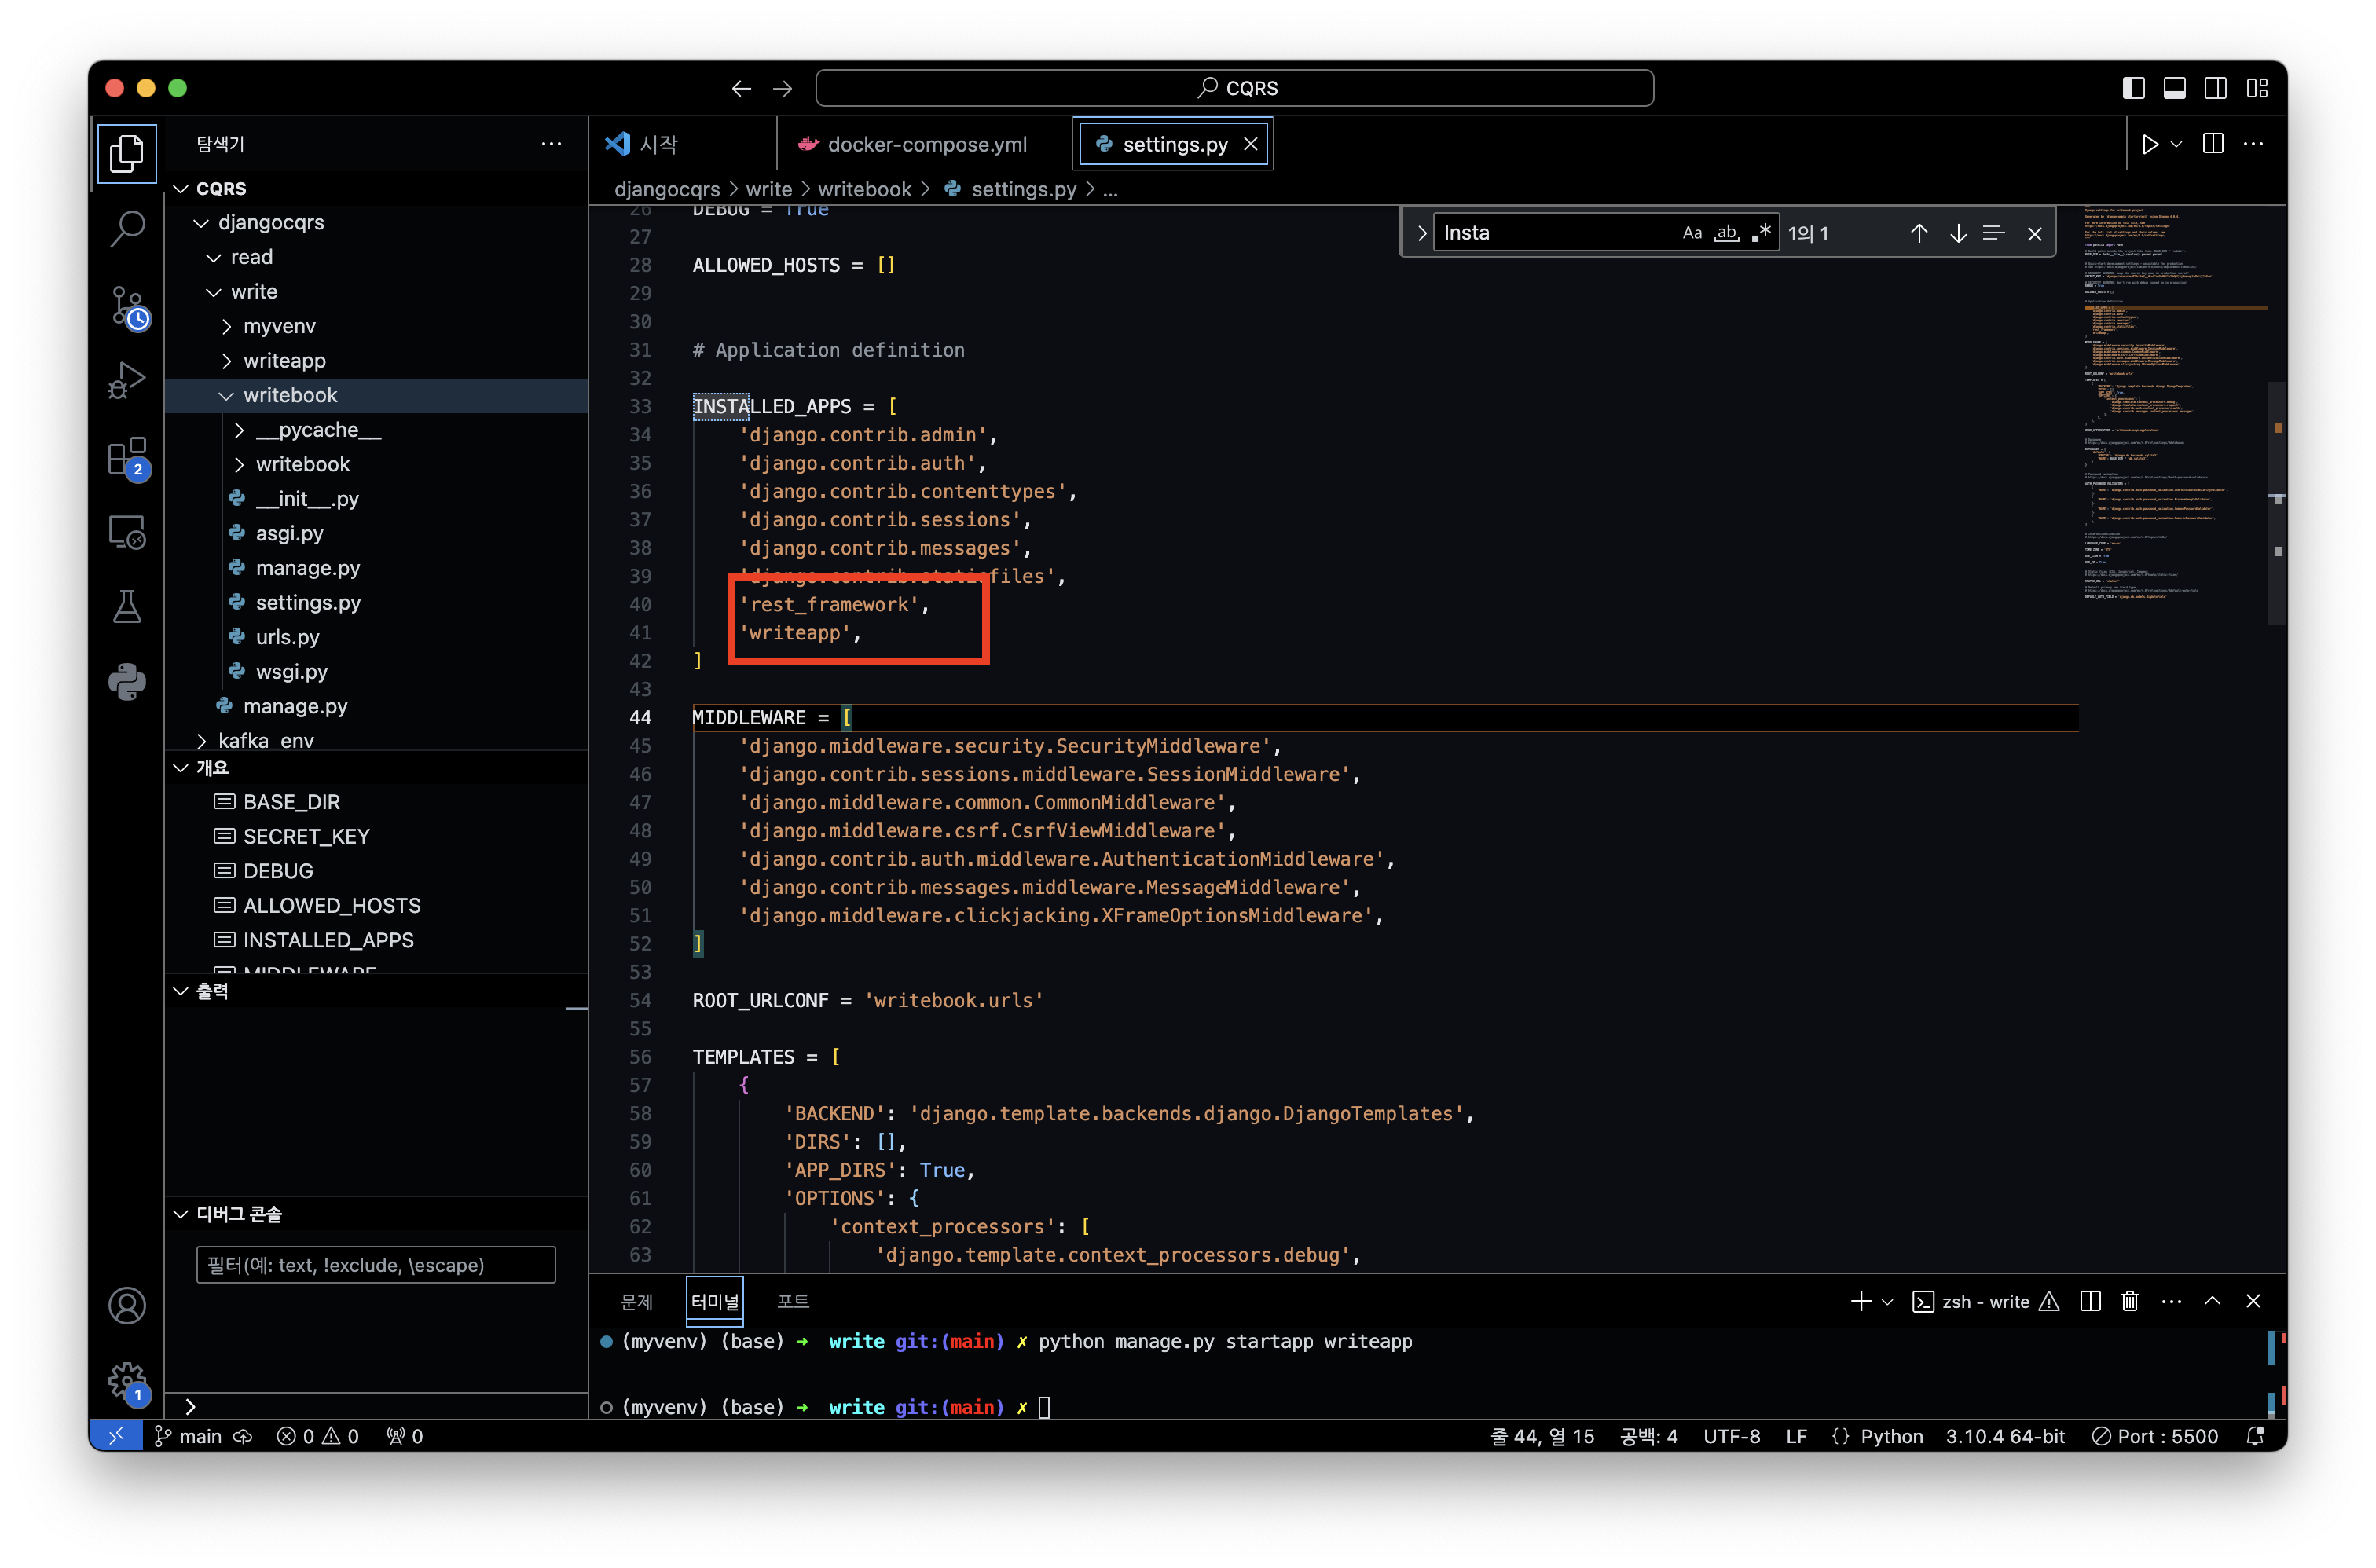
프로젝트 생성
django-admin startproject writebook .
애플리케이션 생성
python manage.py startapp writeapp
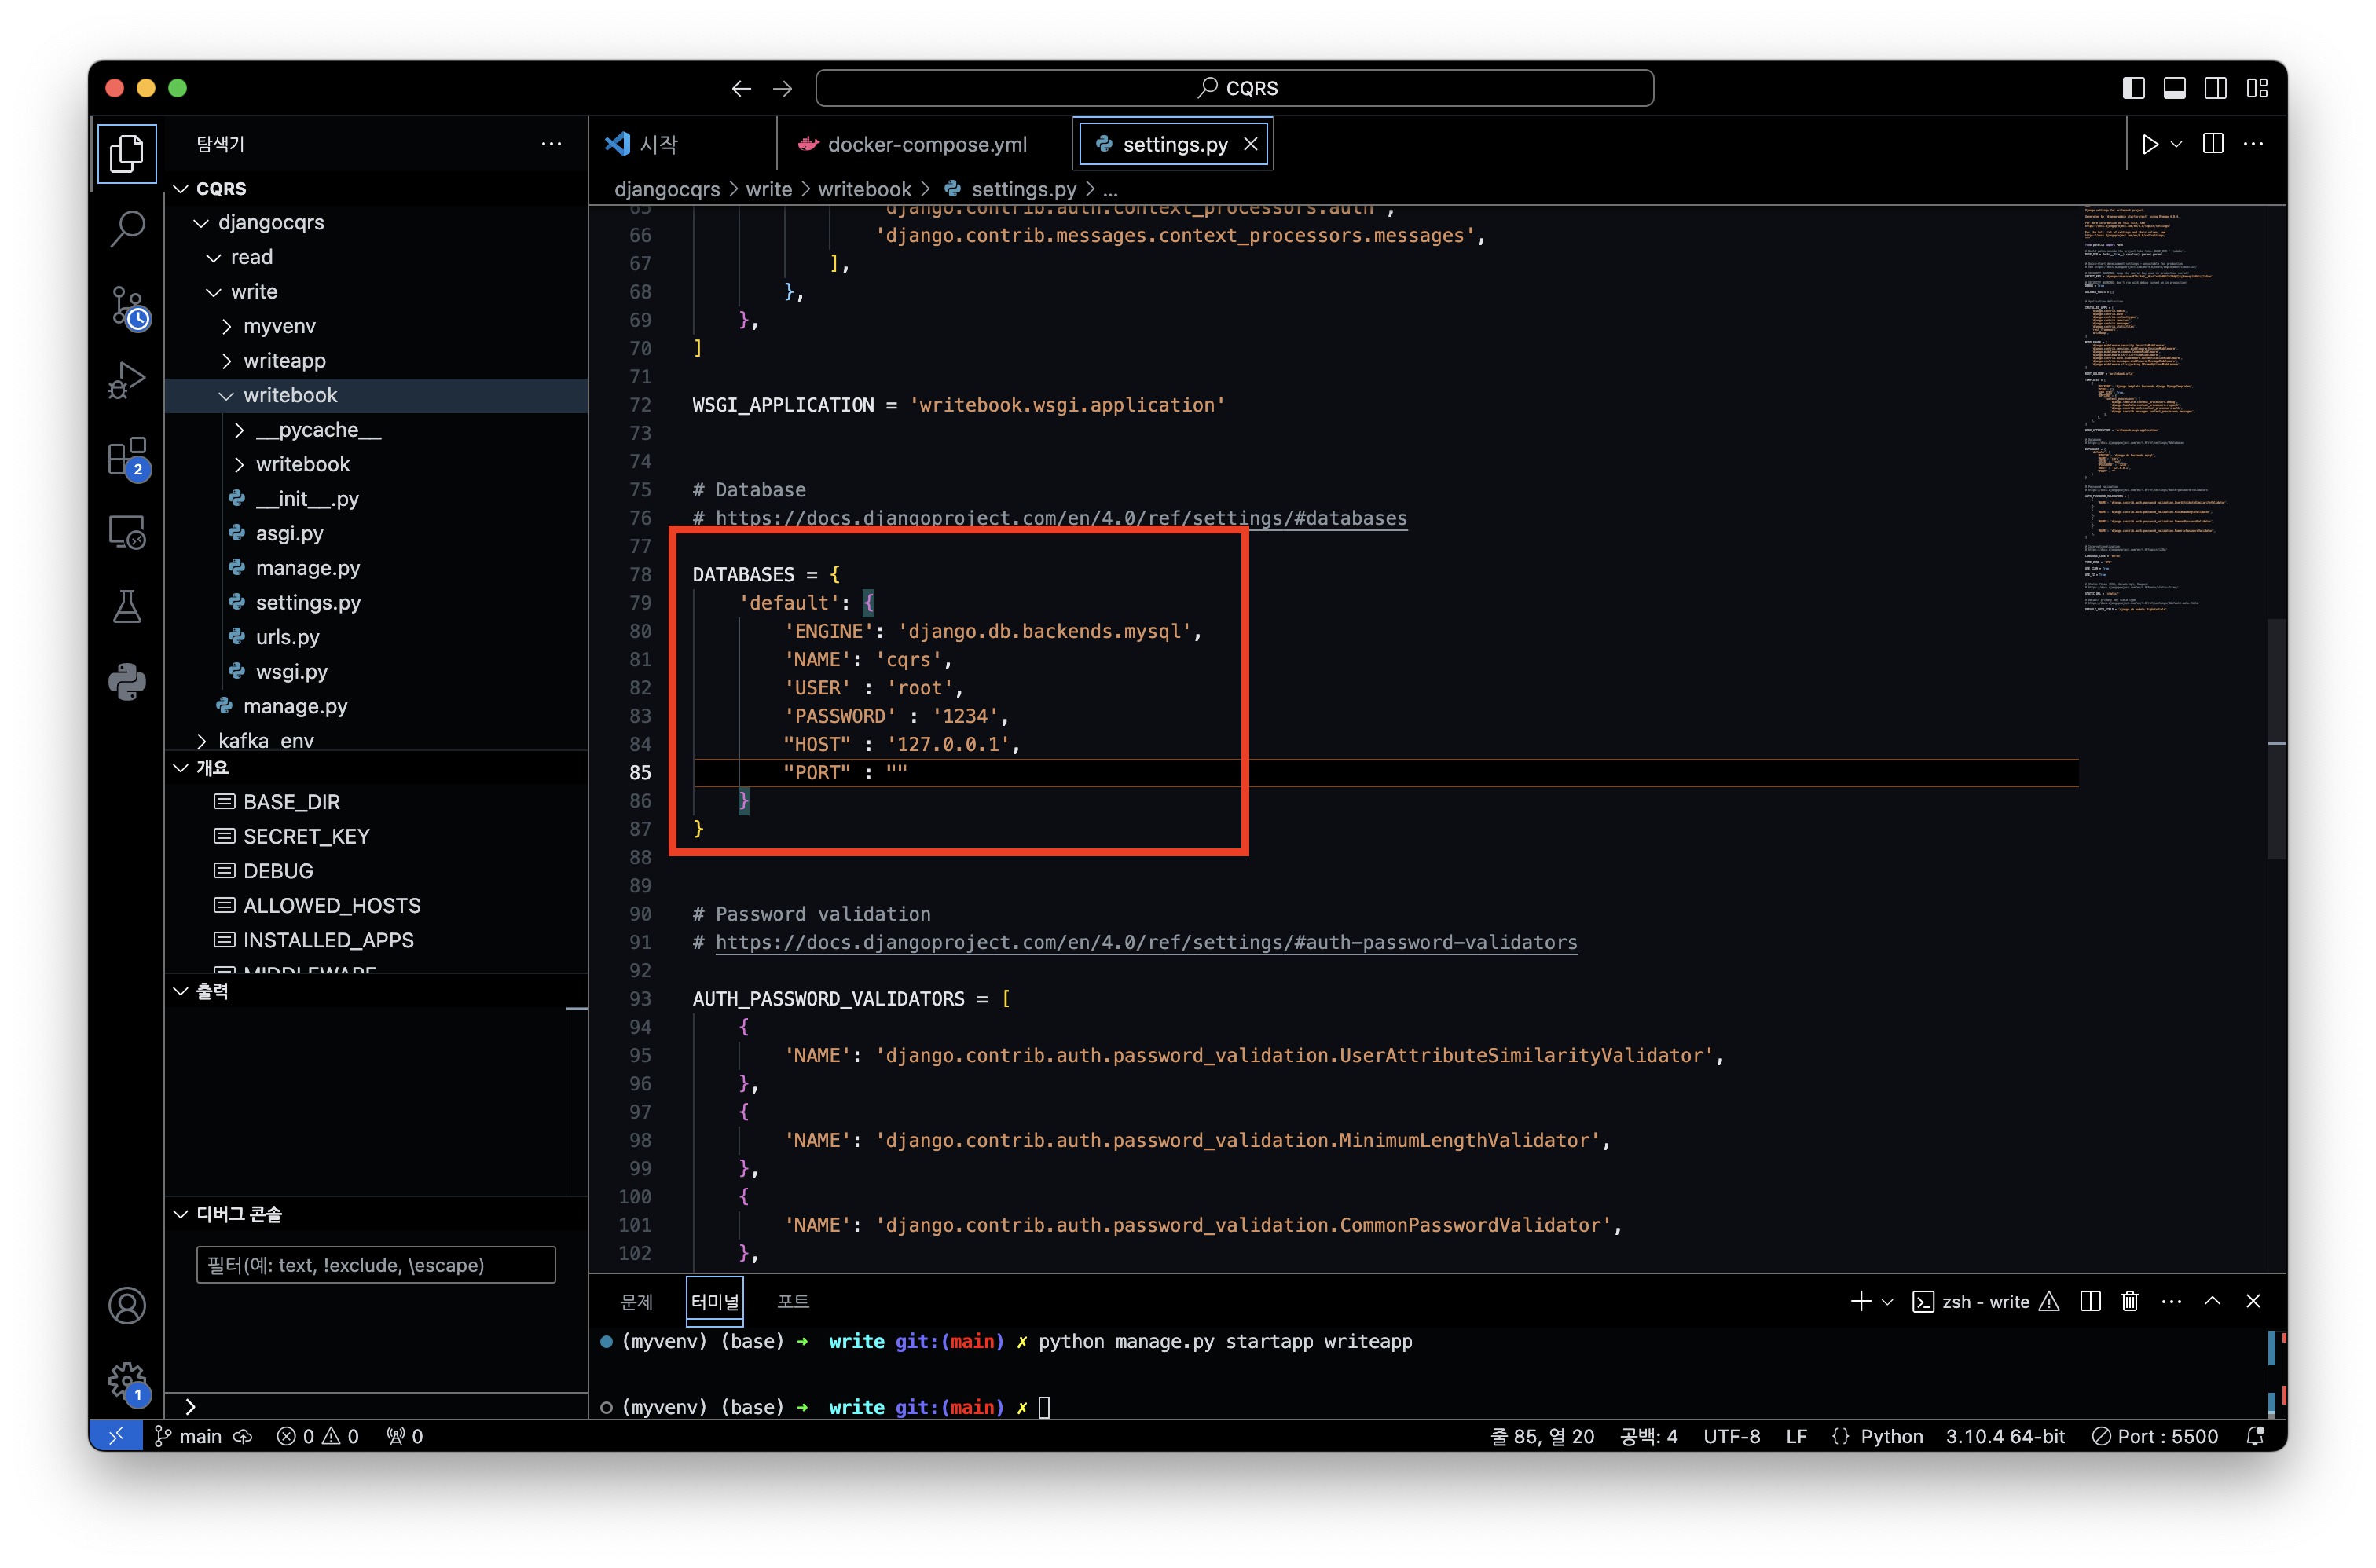
settings.py 파일에서 수정 INSTALLED_APPS 부분에 'rest_framework', 'writeapp'(자신의 앱 이름) 를 추가해주고 , DATABASES 정보를 수정합니다.
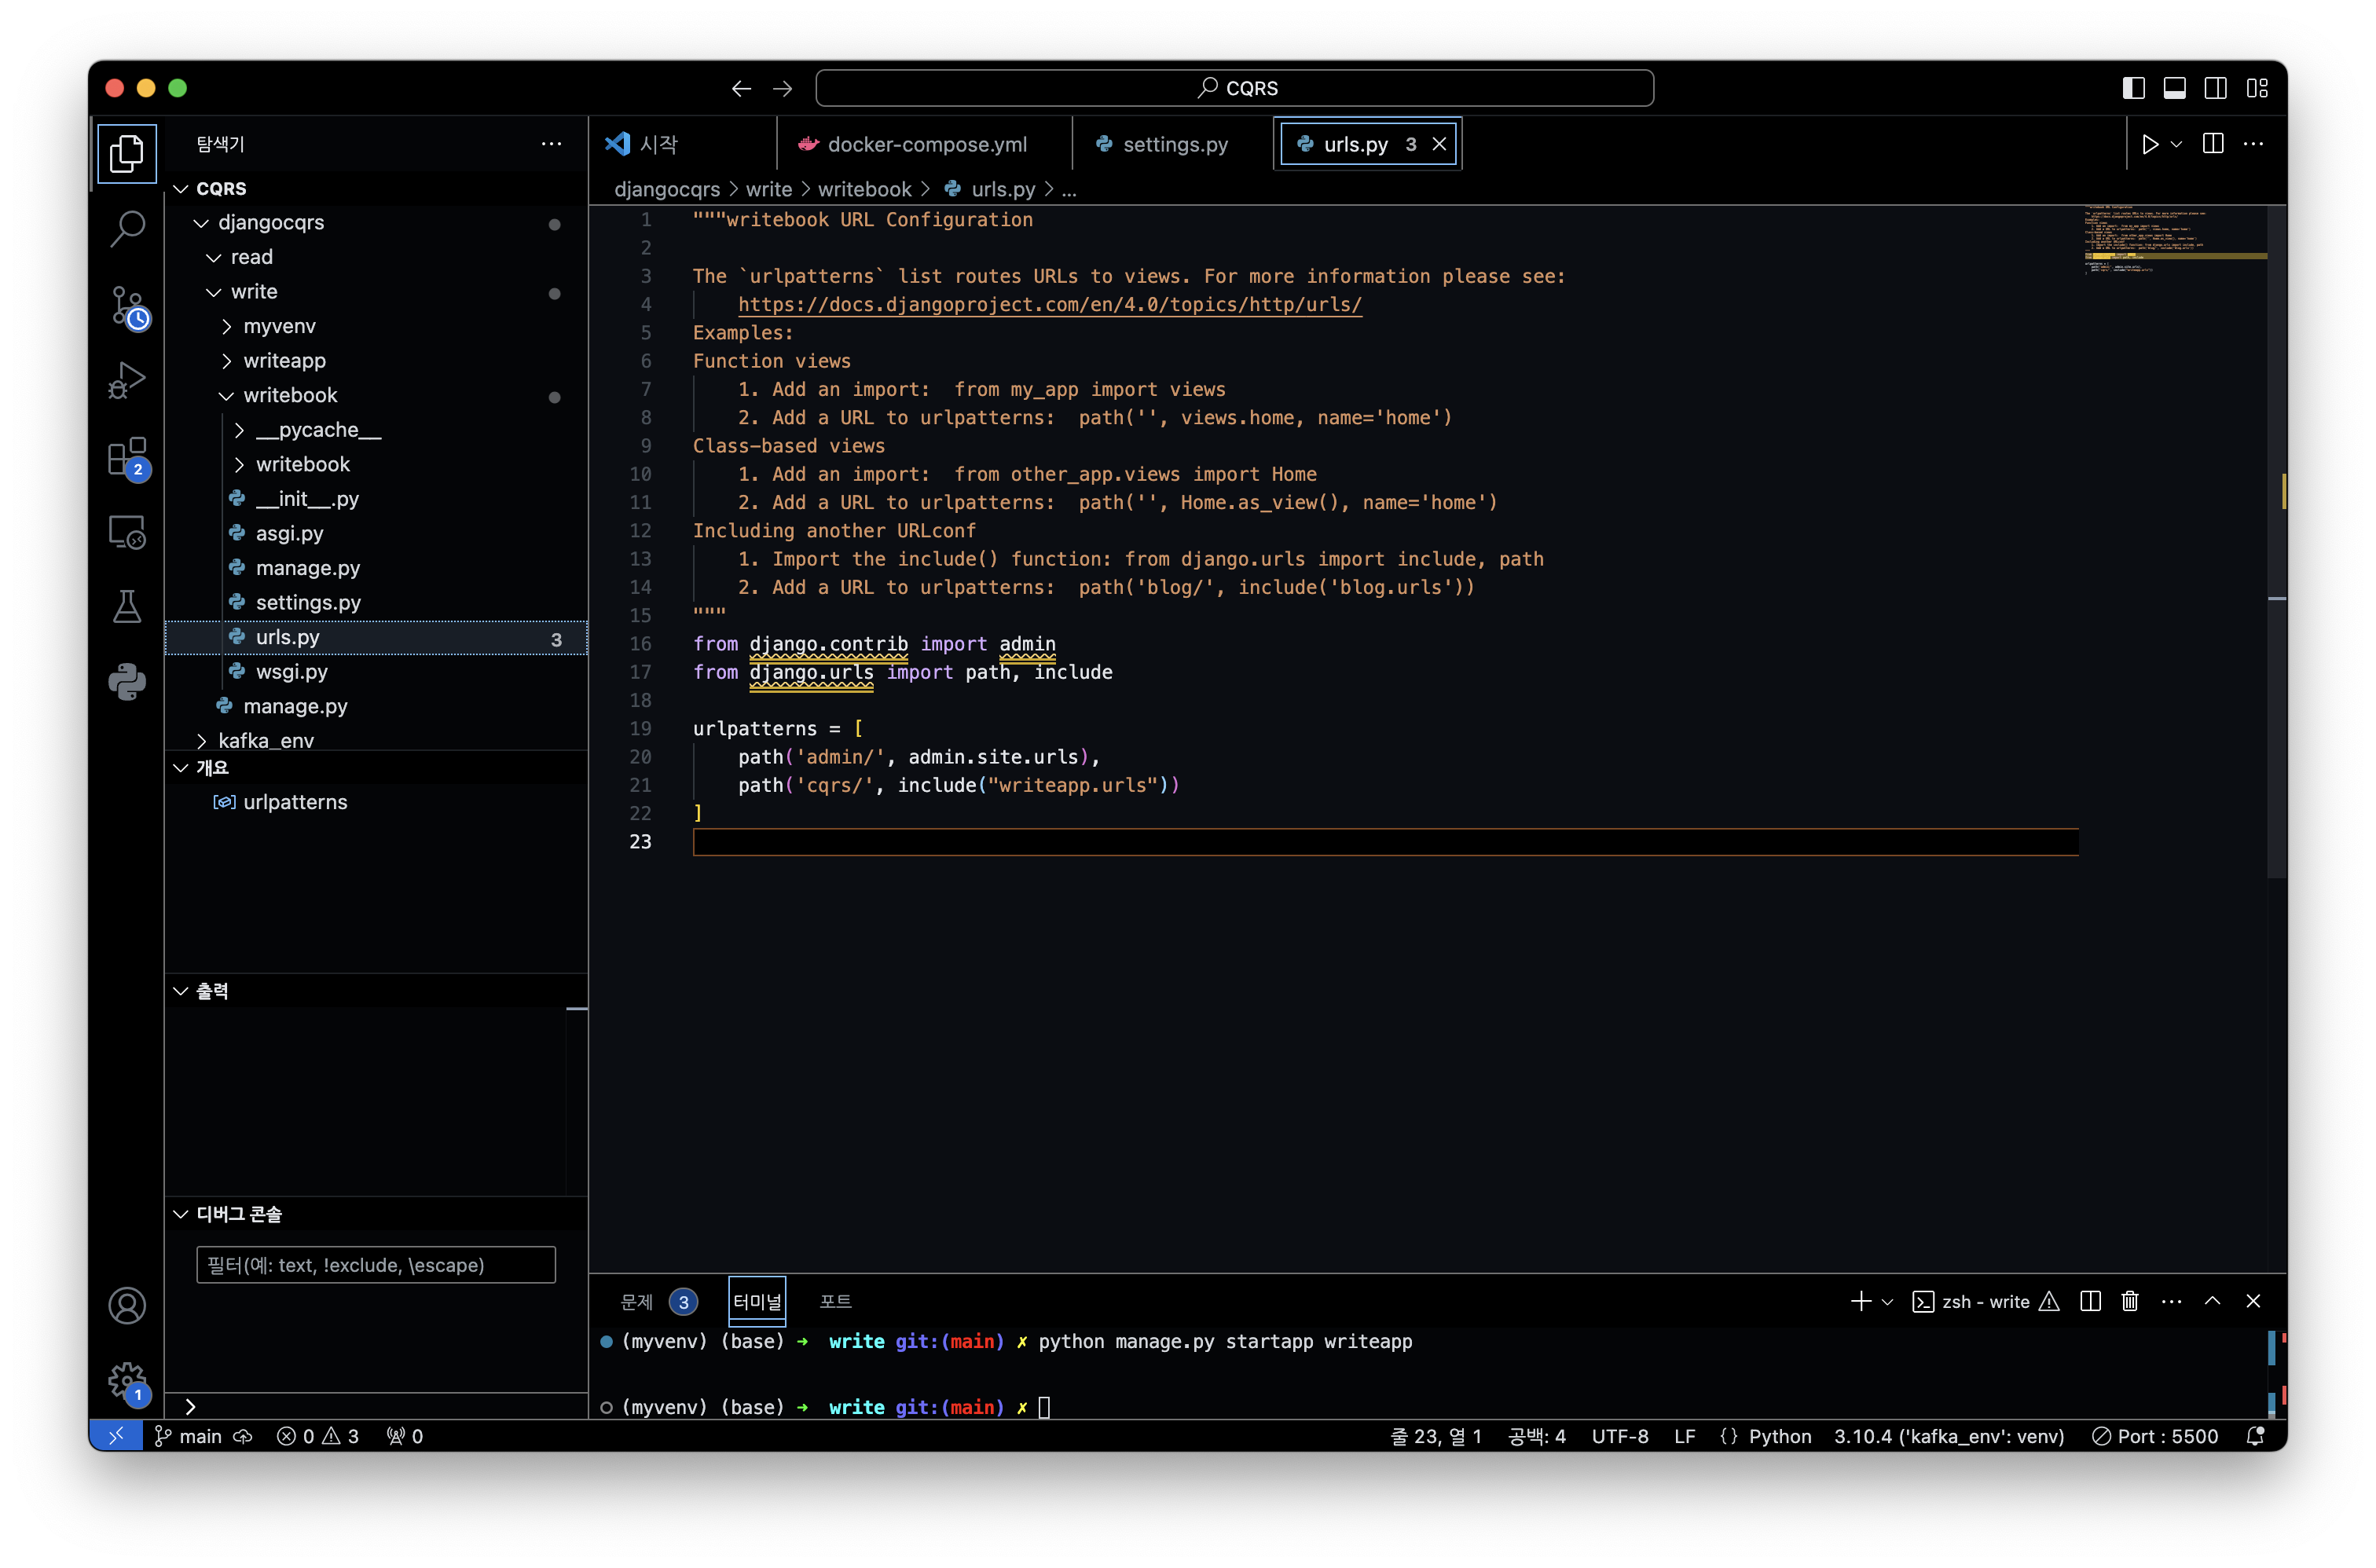
Django 프로젝트에서 urls.py 파일을 수정하여 CQRS 요청을 처리하도록 설정을 합니다. urls.py 파일에서 cqrs로 시작하는 모든 요청을 writeapp에서 처리하도록 라우트를 설정하여, “cqrs”로 시작하는 모든 요청이 app의 URL 설정을 따르도록 구성합니다.
from django.contrib import admin
from django.urls import path, include

urlpatterns = [
   path('admin/', admin.site.urls),
 path("cqrs/", include("writeapp.urls"))
]
이렇게 설정하면 /cqrs/로 시작하는 모든 요청이 writeapp이라는 앱의 urls.py 파일로 전달됩니다. 이를 통해 CQRS 구조에서 데이터 쓰기 관련 요청을 한 곳에서 관리할 수 있습니다.
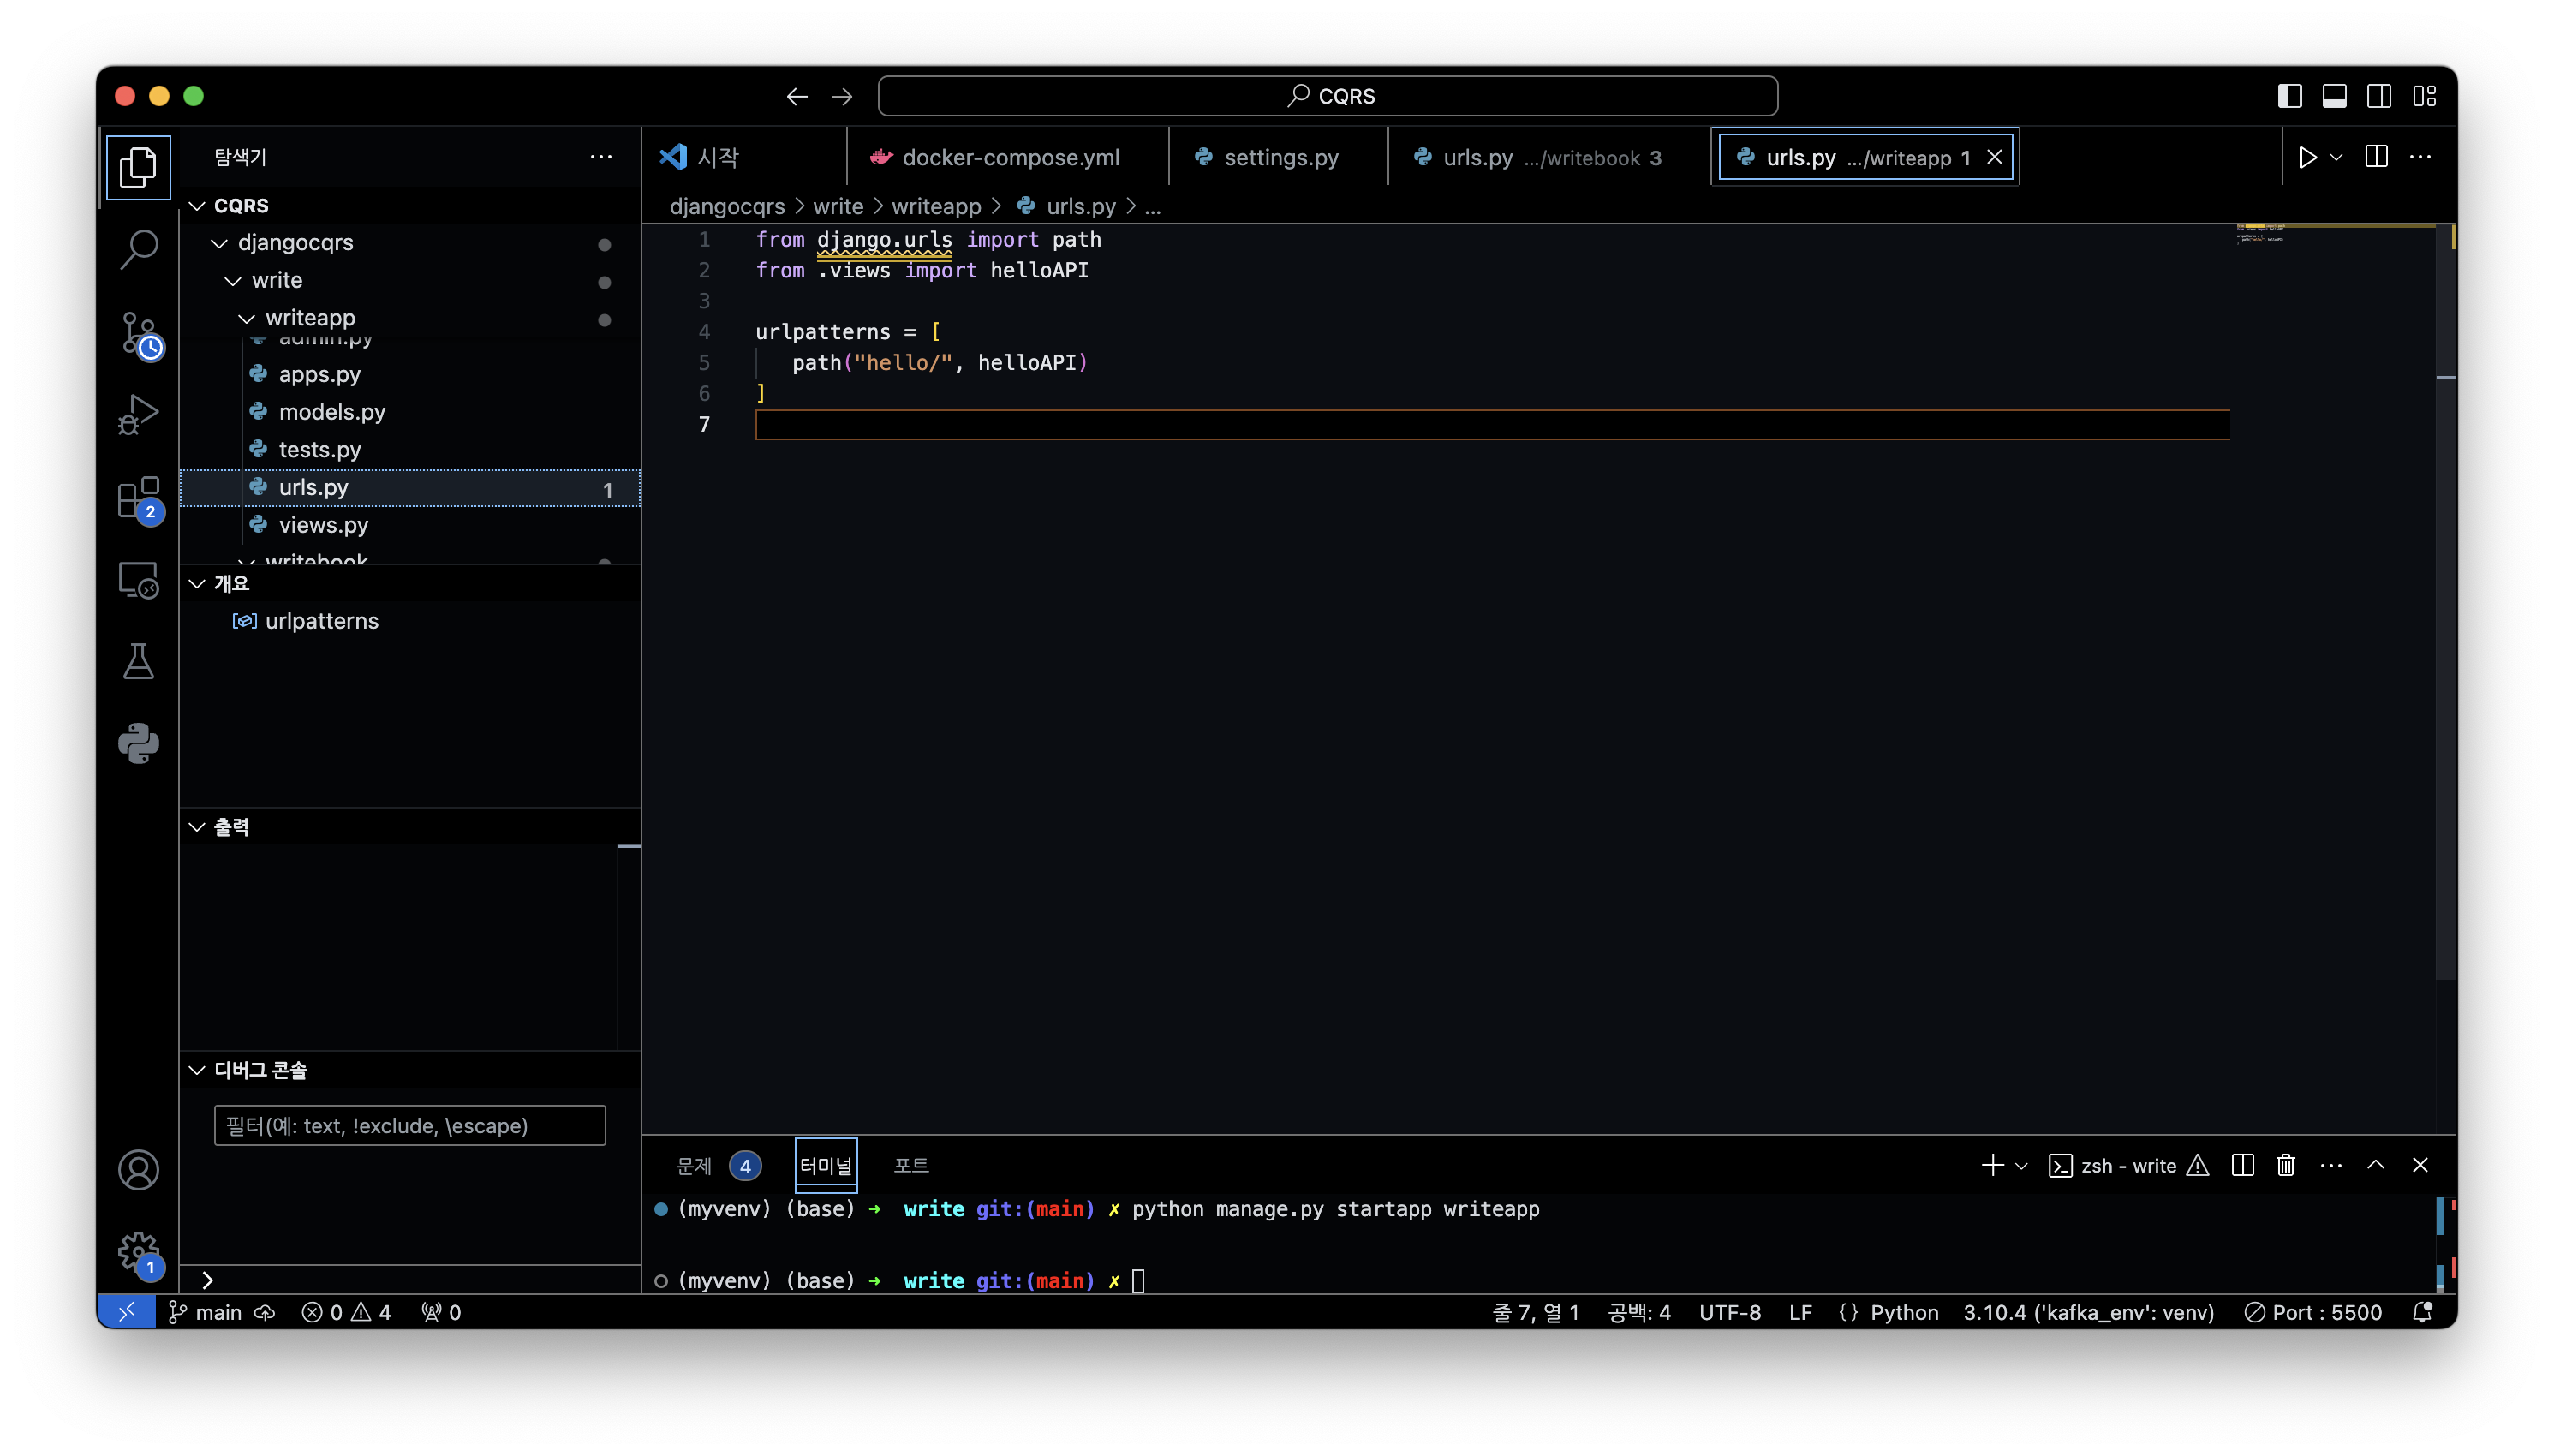
writeapp 디렉터리에 urls.py 파일을 생성하고, API 요청을 처리하는 부분을 작성합니다. 여기서는 간단히 hello/라는 엔드포인트를 만들어, 해당 요청이 들어올 때 helloAPI라는 뷰를 호출하도록 설정합니다.
from django.urls import path
from .views import helloAPI

urlpatterns = [
   path("hello/", helloAPI)
]
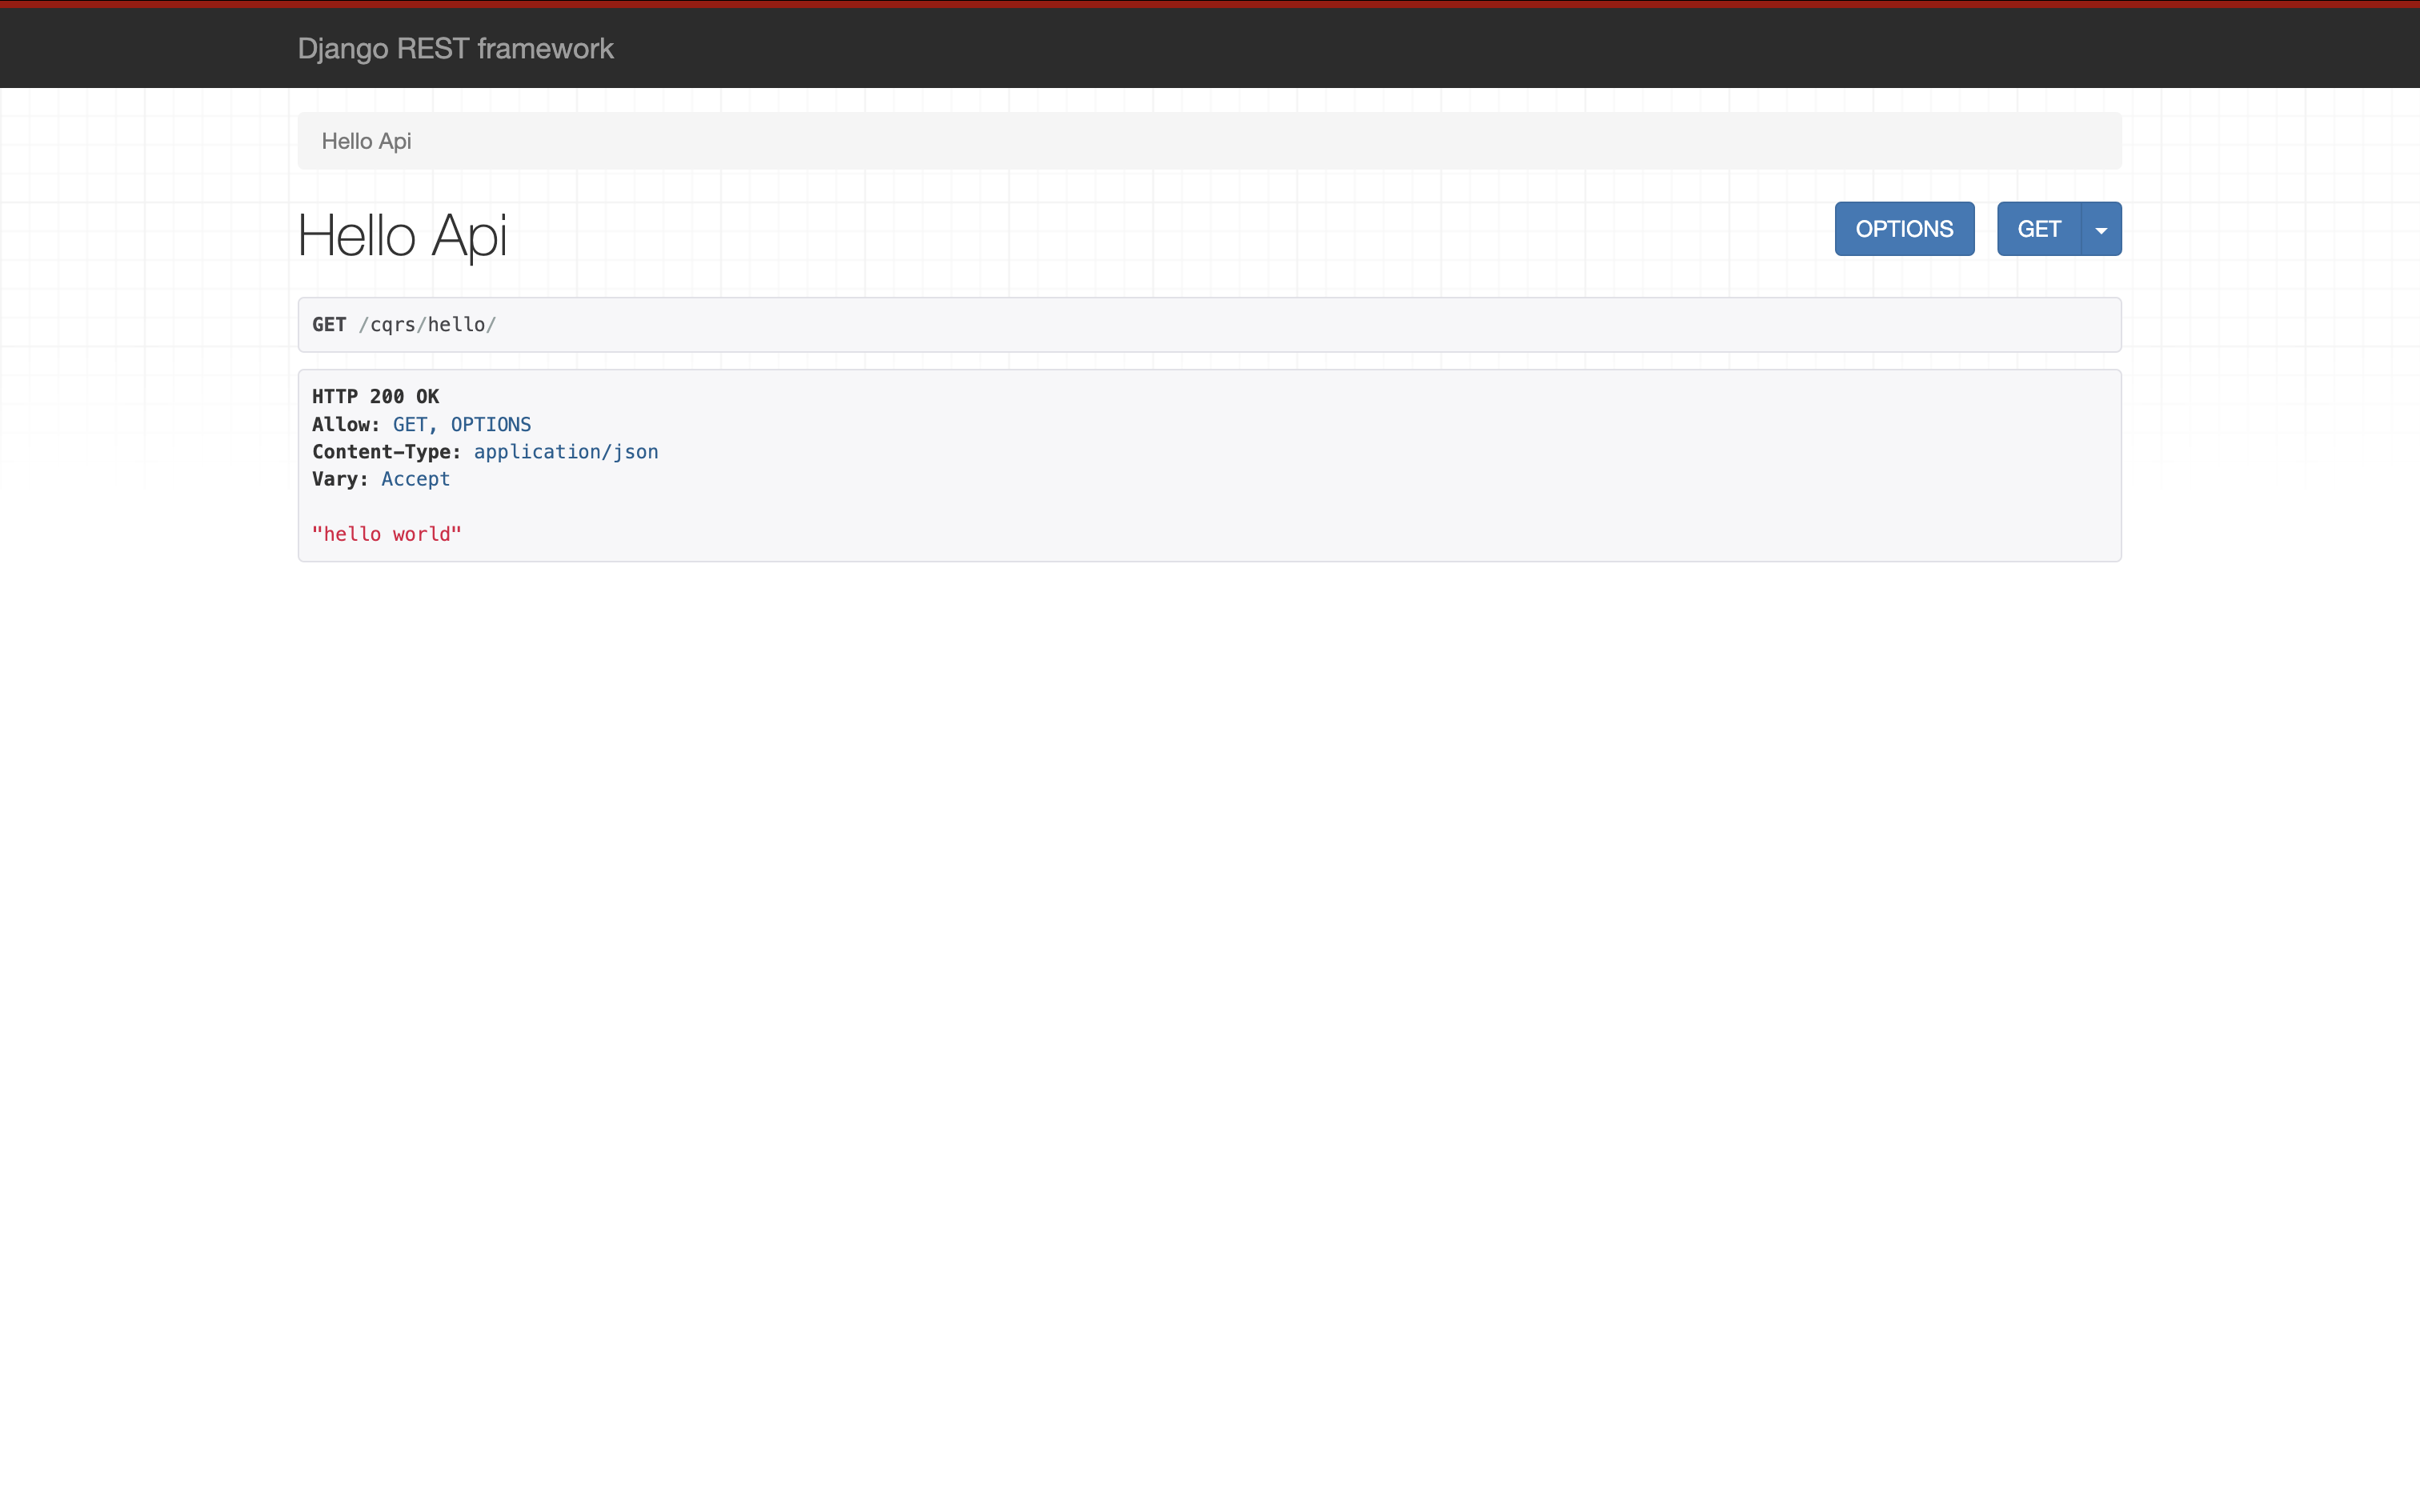
views.py 파일에서 helloAPI라는 간단한 GET 요청 API를 작성합니다. Django REST Framework의 api_view 데코레이터를 사용해 API를 정의하고, 응답으로 “hello world” 메시지를 반환합니다.
이 API는 GET 요청을 처리하며, 요청이 들어오면 “hello world”라는 메시지를 JSON 형식으로 응답합니다.
from rest_framework.response import Response
from rest_framework.decorators import api_view


@api_view(['GET'])
def helloAPI(request):
   return Response("hello world")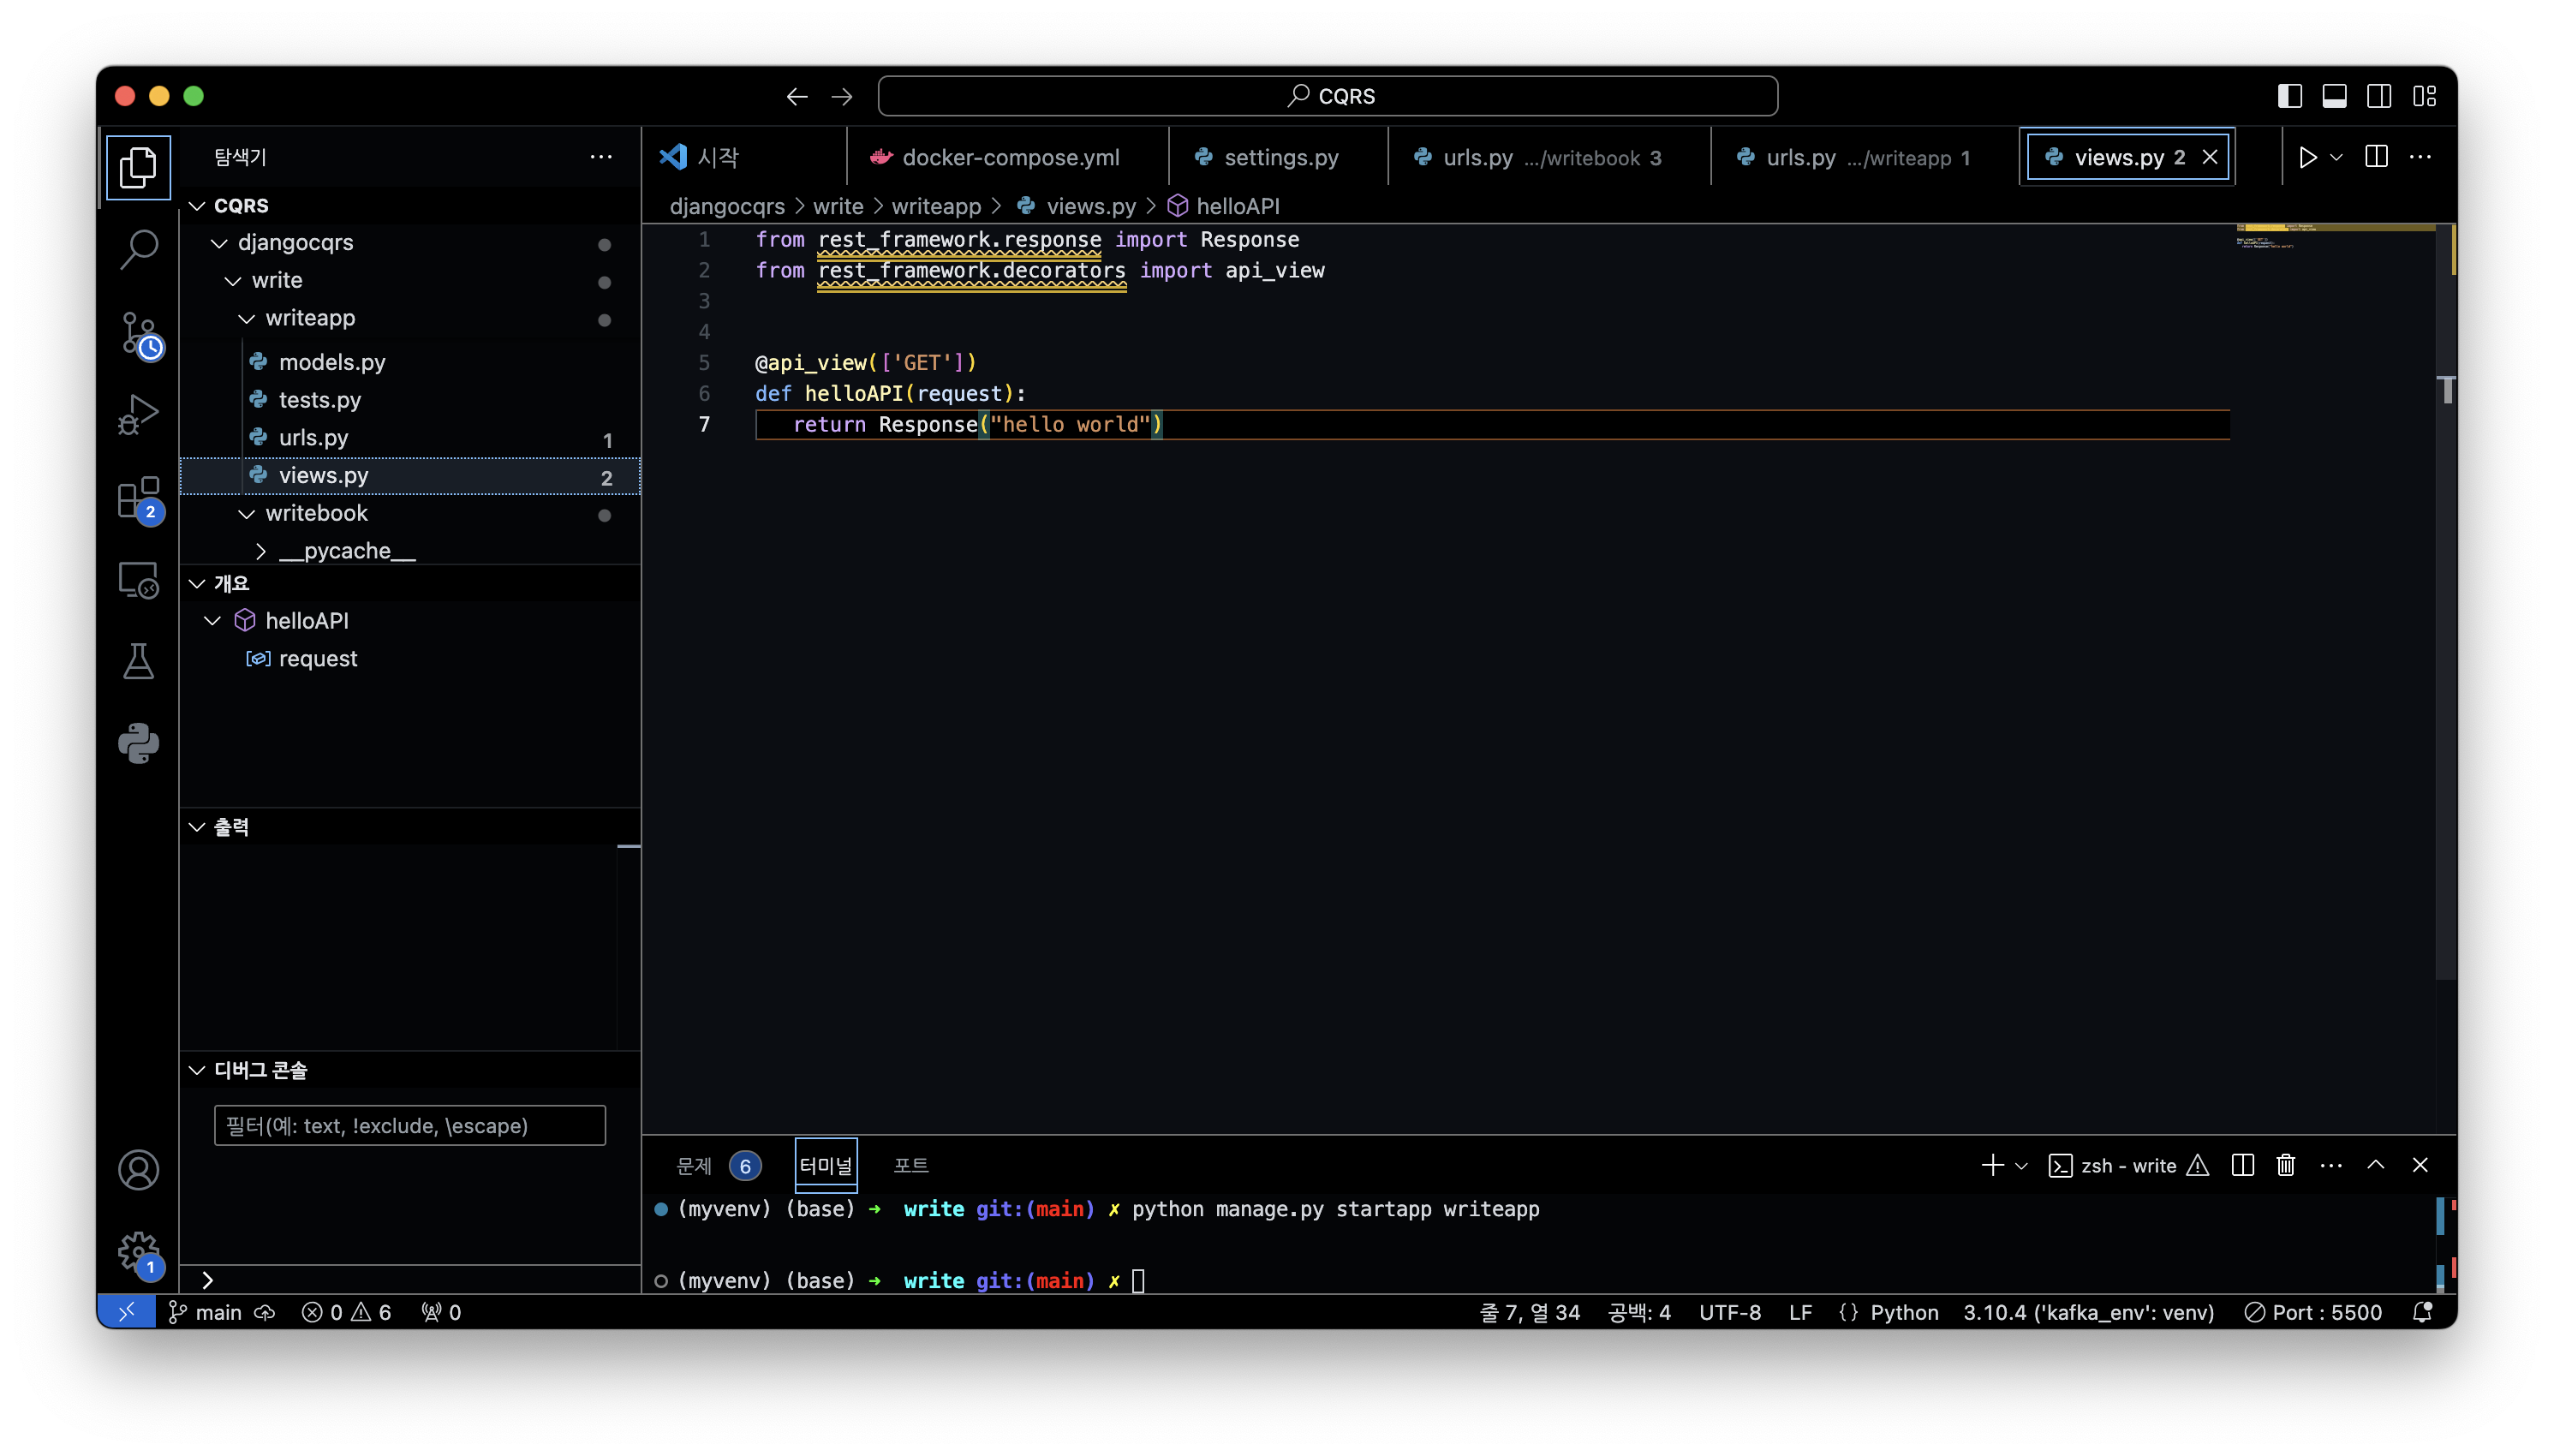
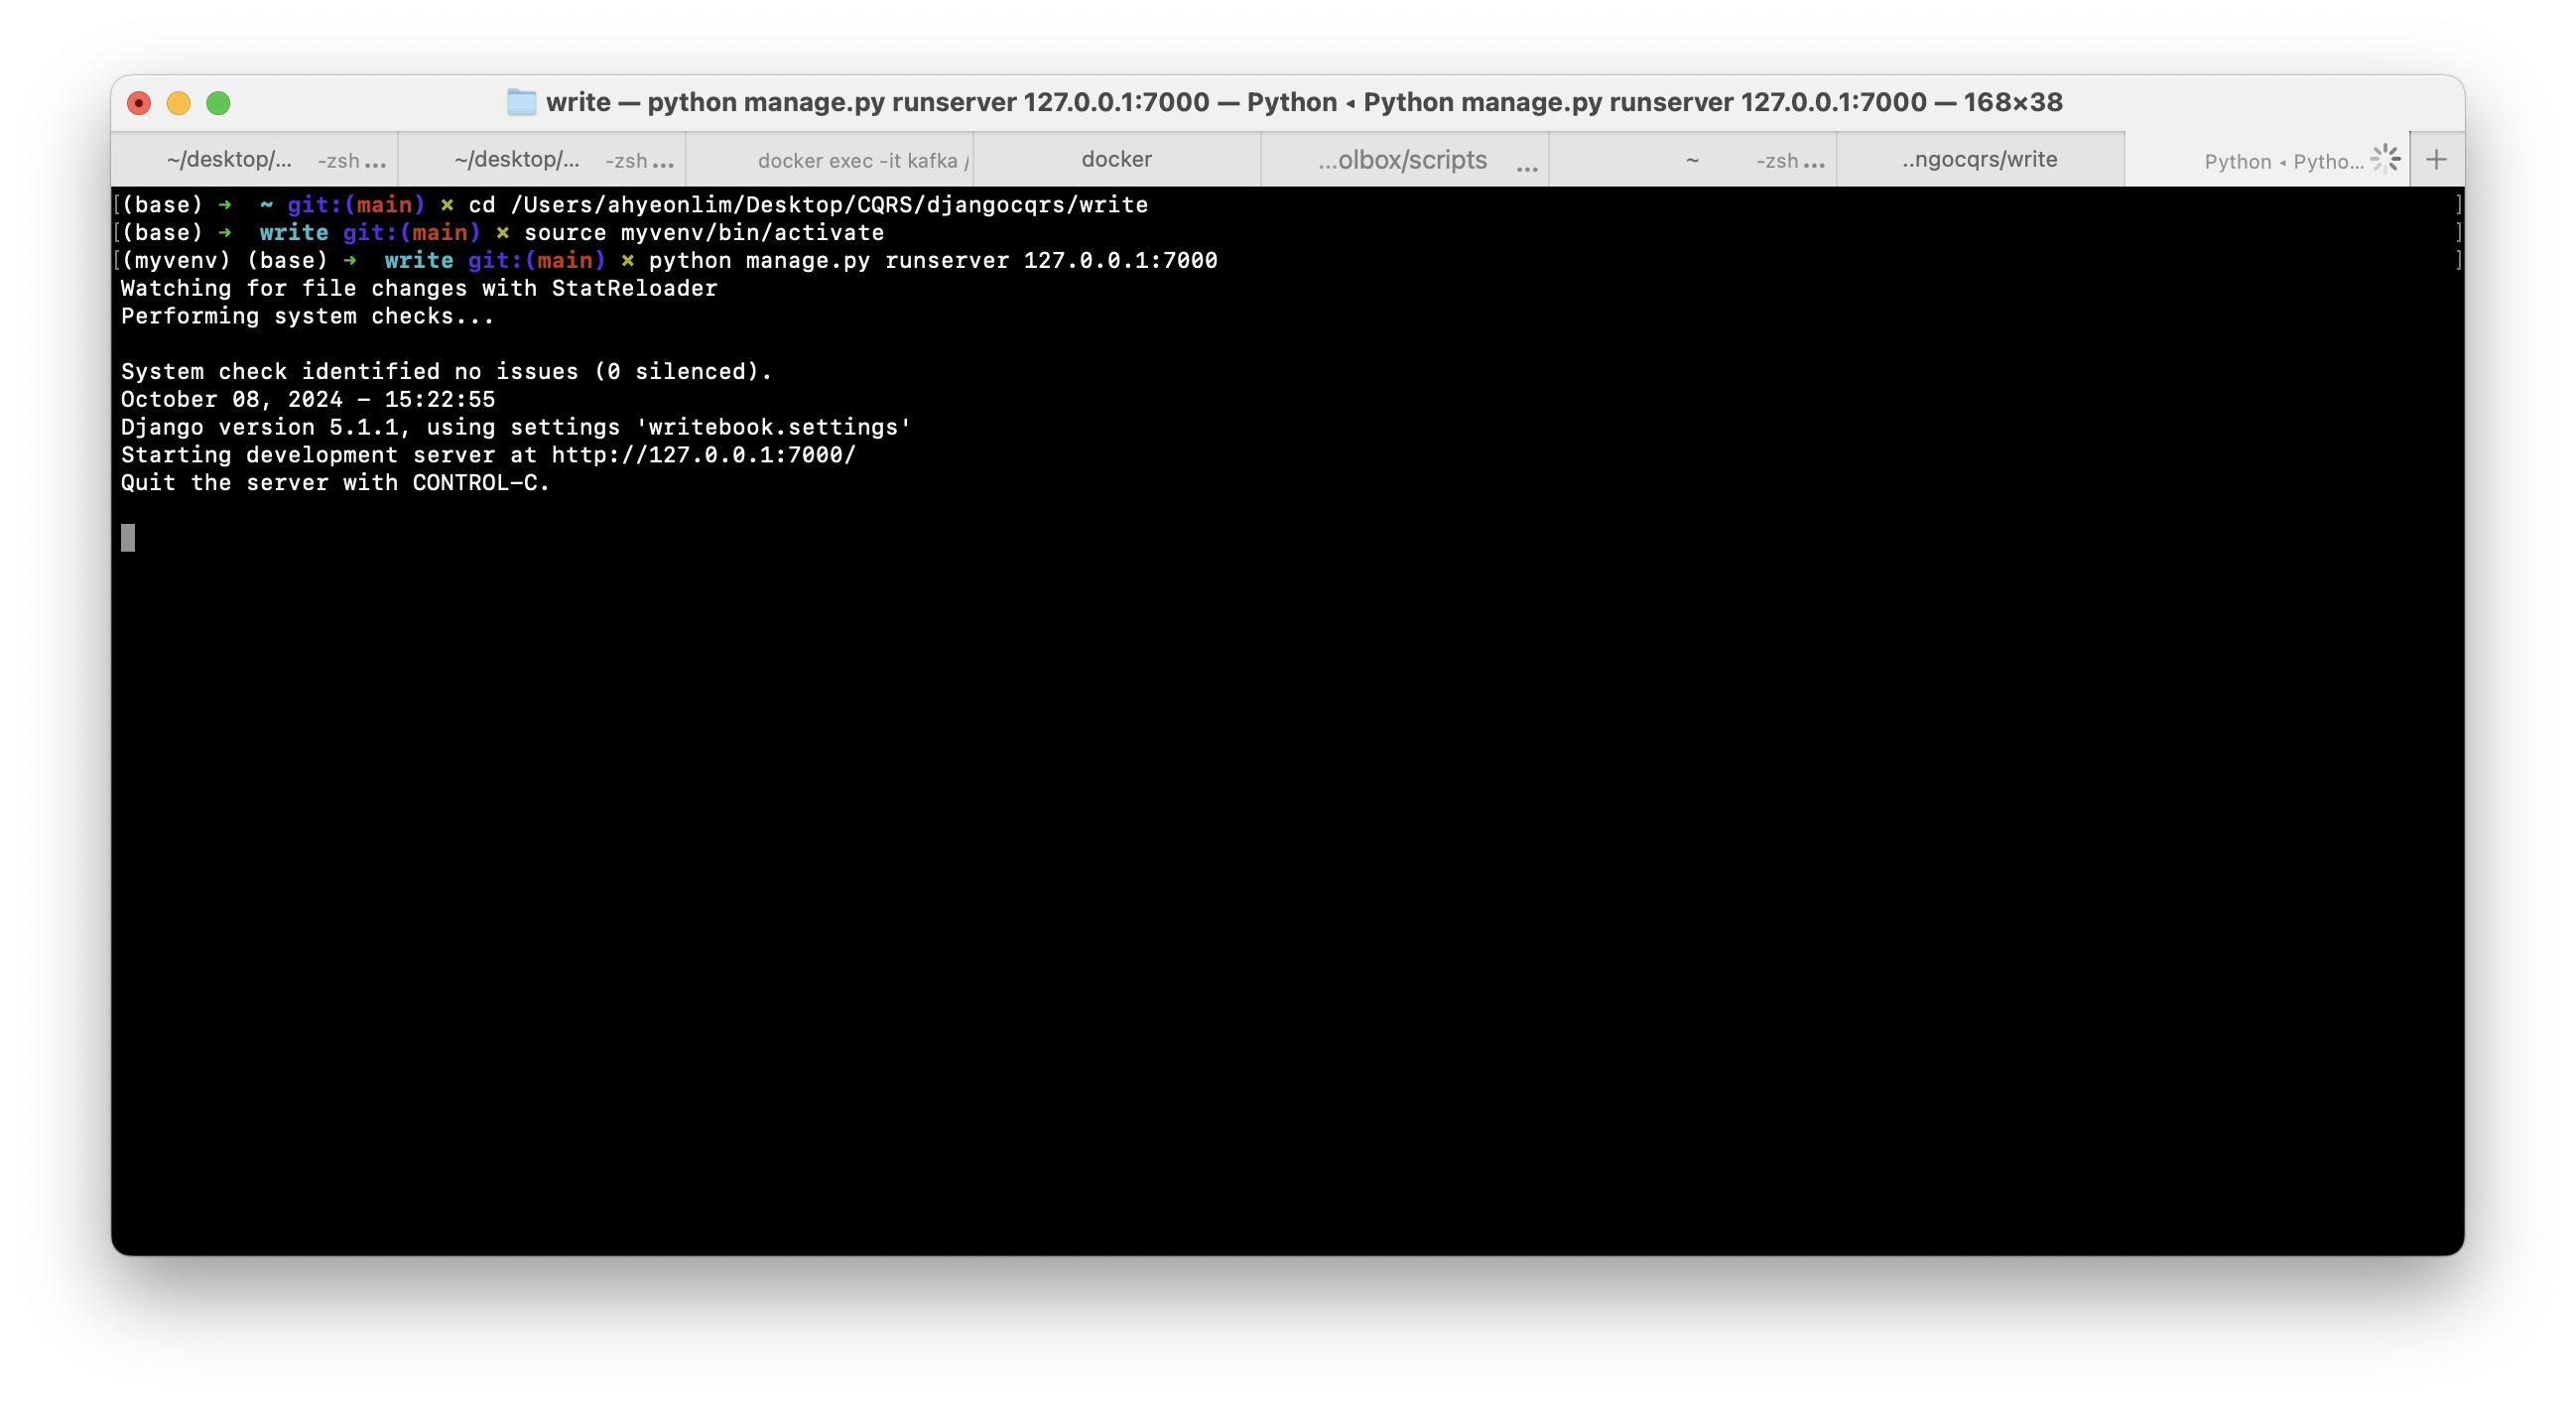
python manage.py runserver 127.0.0.1:7000
브라우저에서 http://127.0.0.1:7000/cqrs/hello/ 로 확인하면 아래와 같은 화면을 볼 수 있습니다.
만약, mysqlcllient를 설치했는데도 python manage.py runserver 를 실행시켰을 때 아래와 같이 MySQLdb 모듈을 로드할 수 없다는 오류가 계속 발생한다면
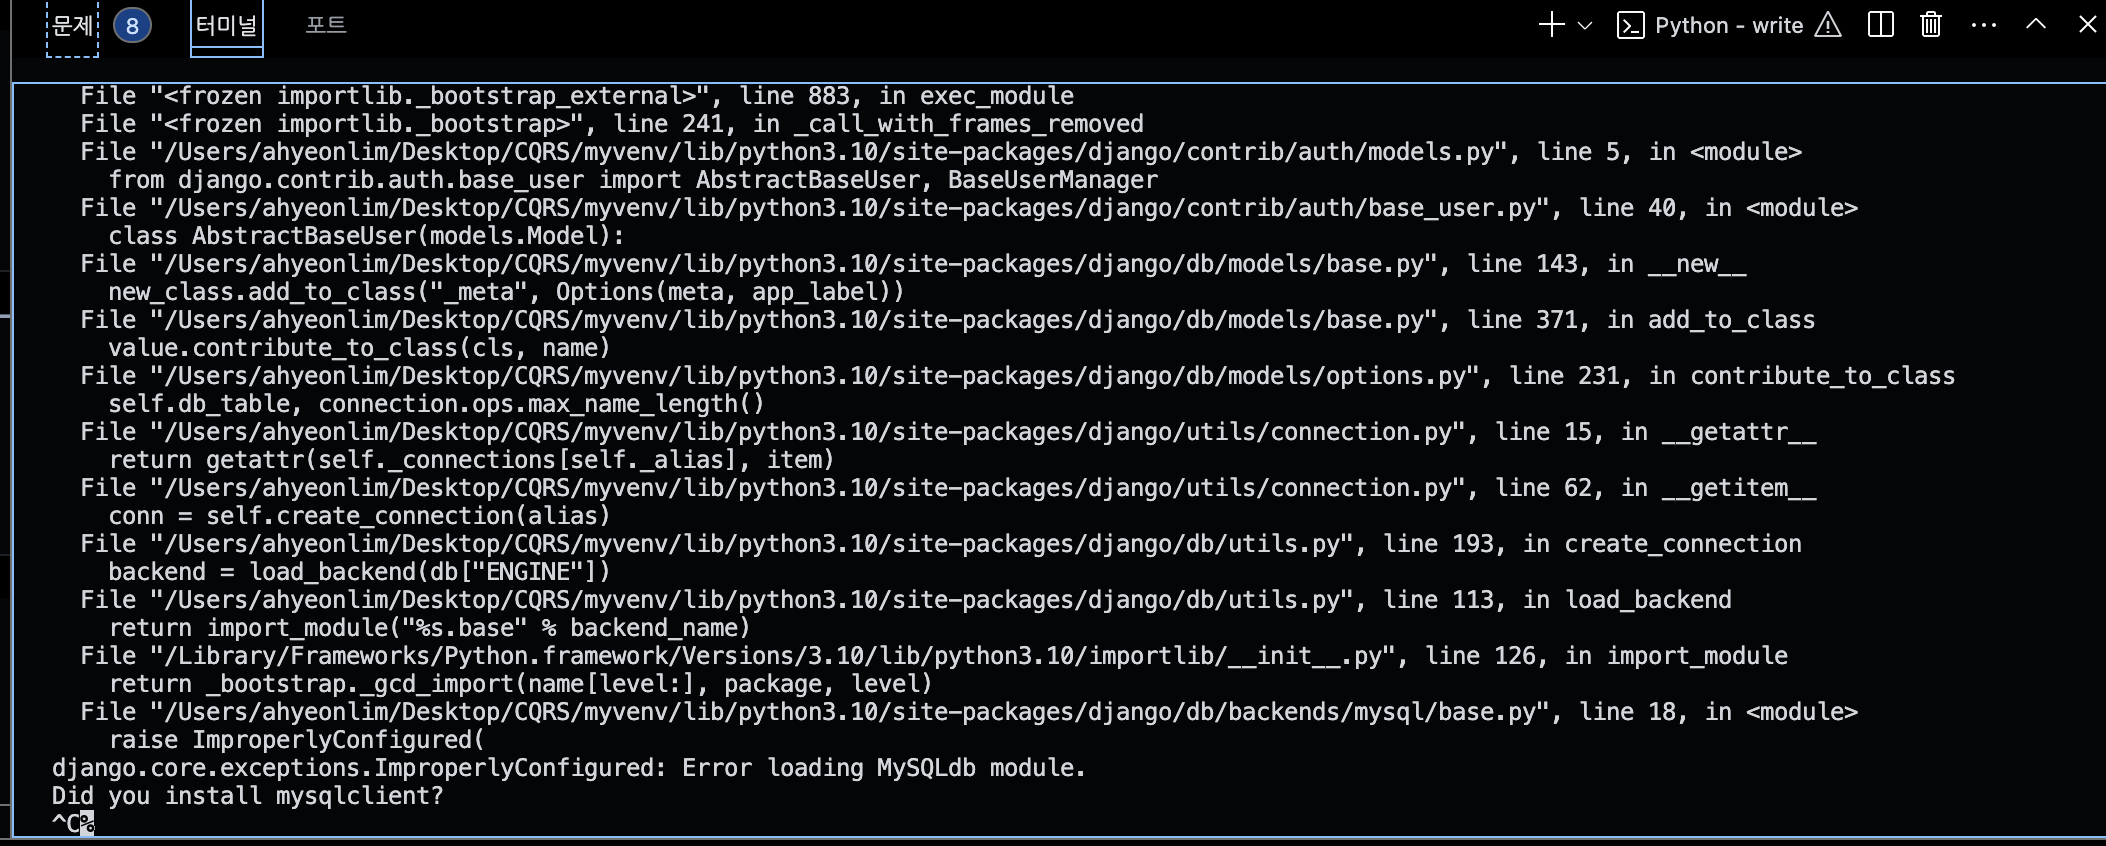
pymysql을 설치하고 settings.py 파일 상단에 추가해줍니다.
pip install pymysql
import pymysql
pymysql.install_as_MySQLdb()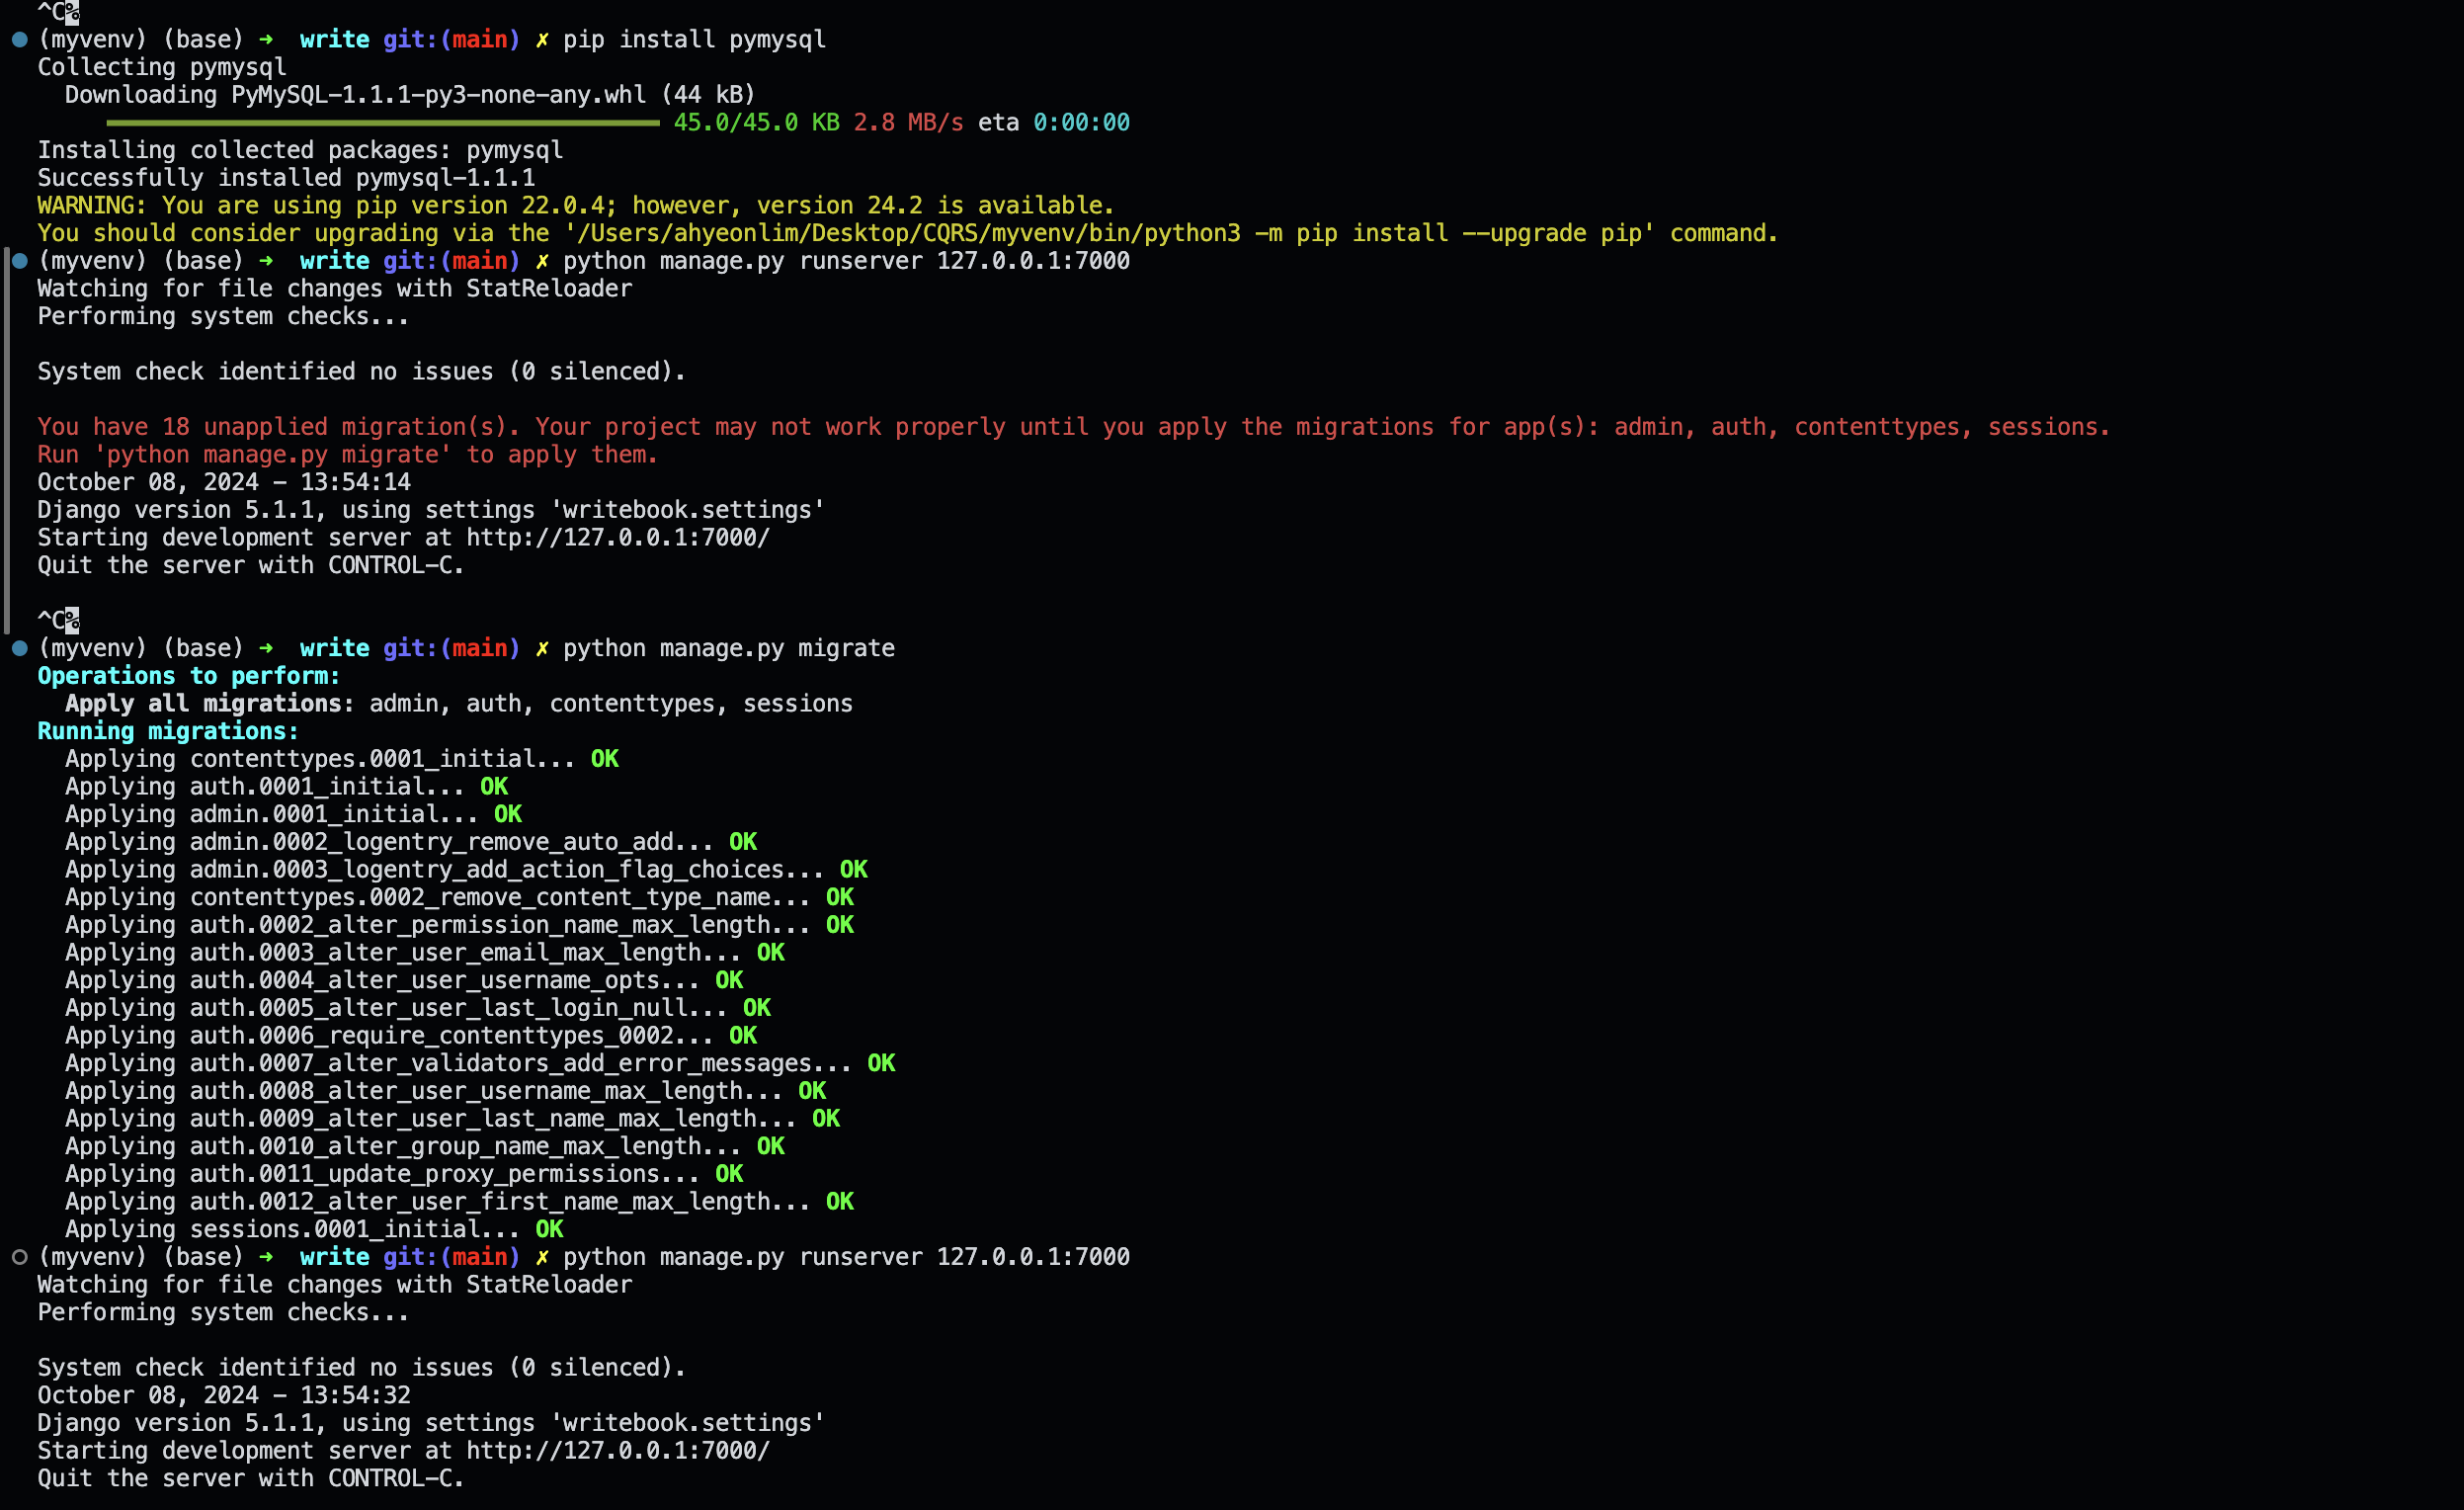
모델 생성
writeapp 의 models.py 파일에 작성
from django.db import models

class Book(models.Model):
   bid = models.AutoField(primary_key=True)
   title = models.CharField(max_length=50)
   author = models.CharField(max_length=50)
   category = models.CharField(max_length=50)
   pages = models.IntegerField()
   price = models.IntegerField()
   published_date = models.DateField()
   description = models.TextField()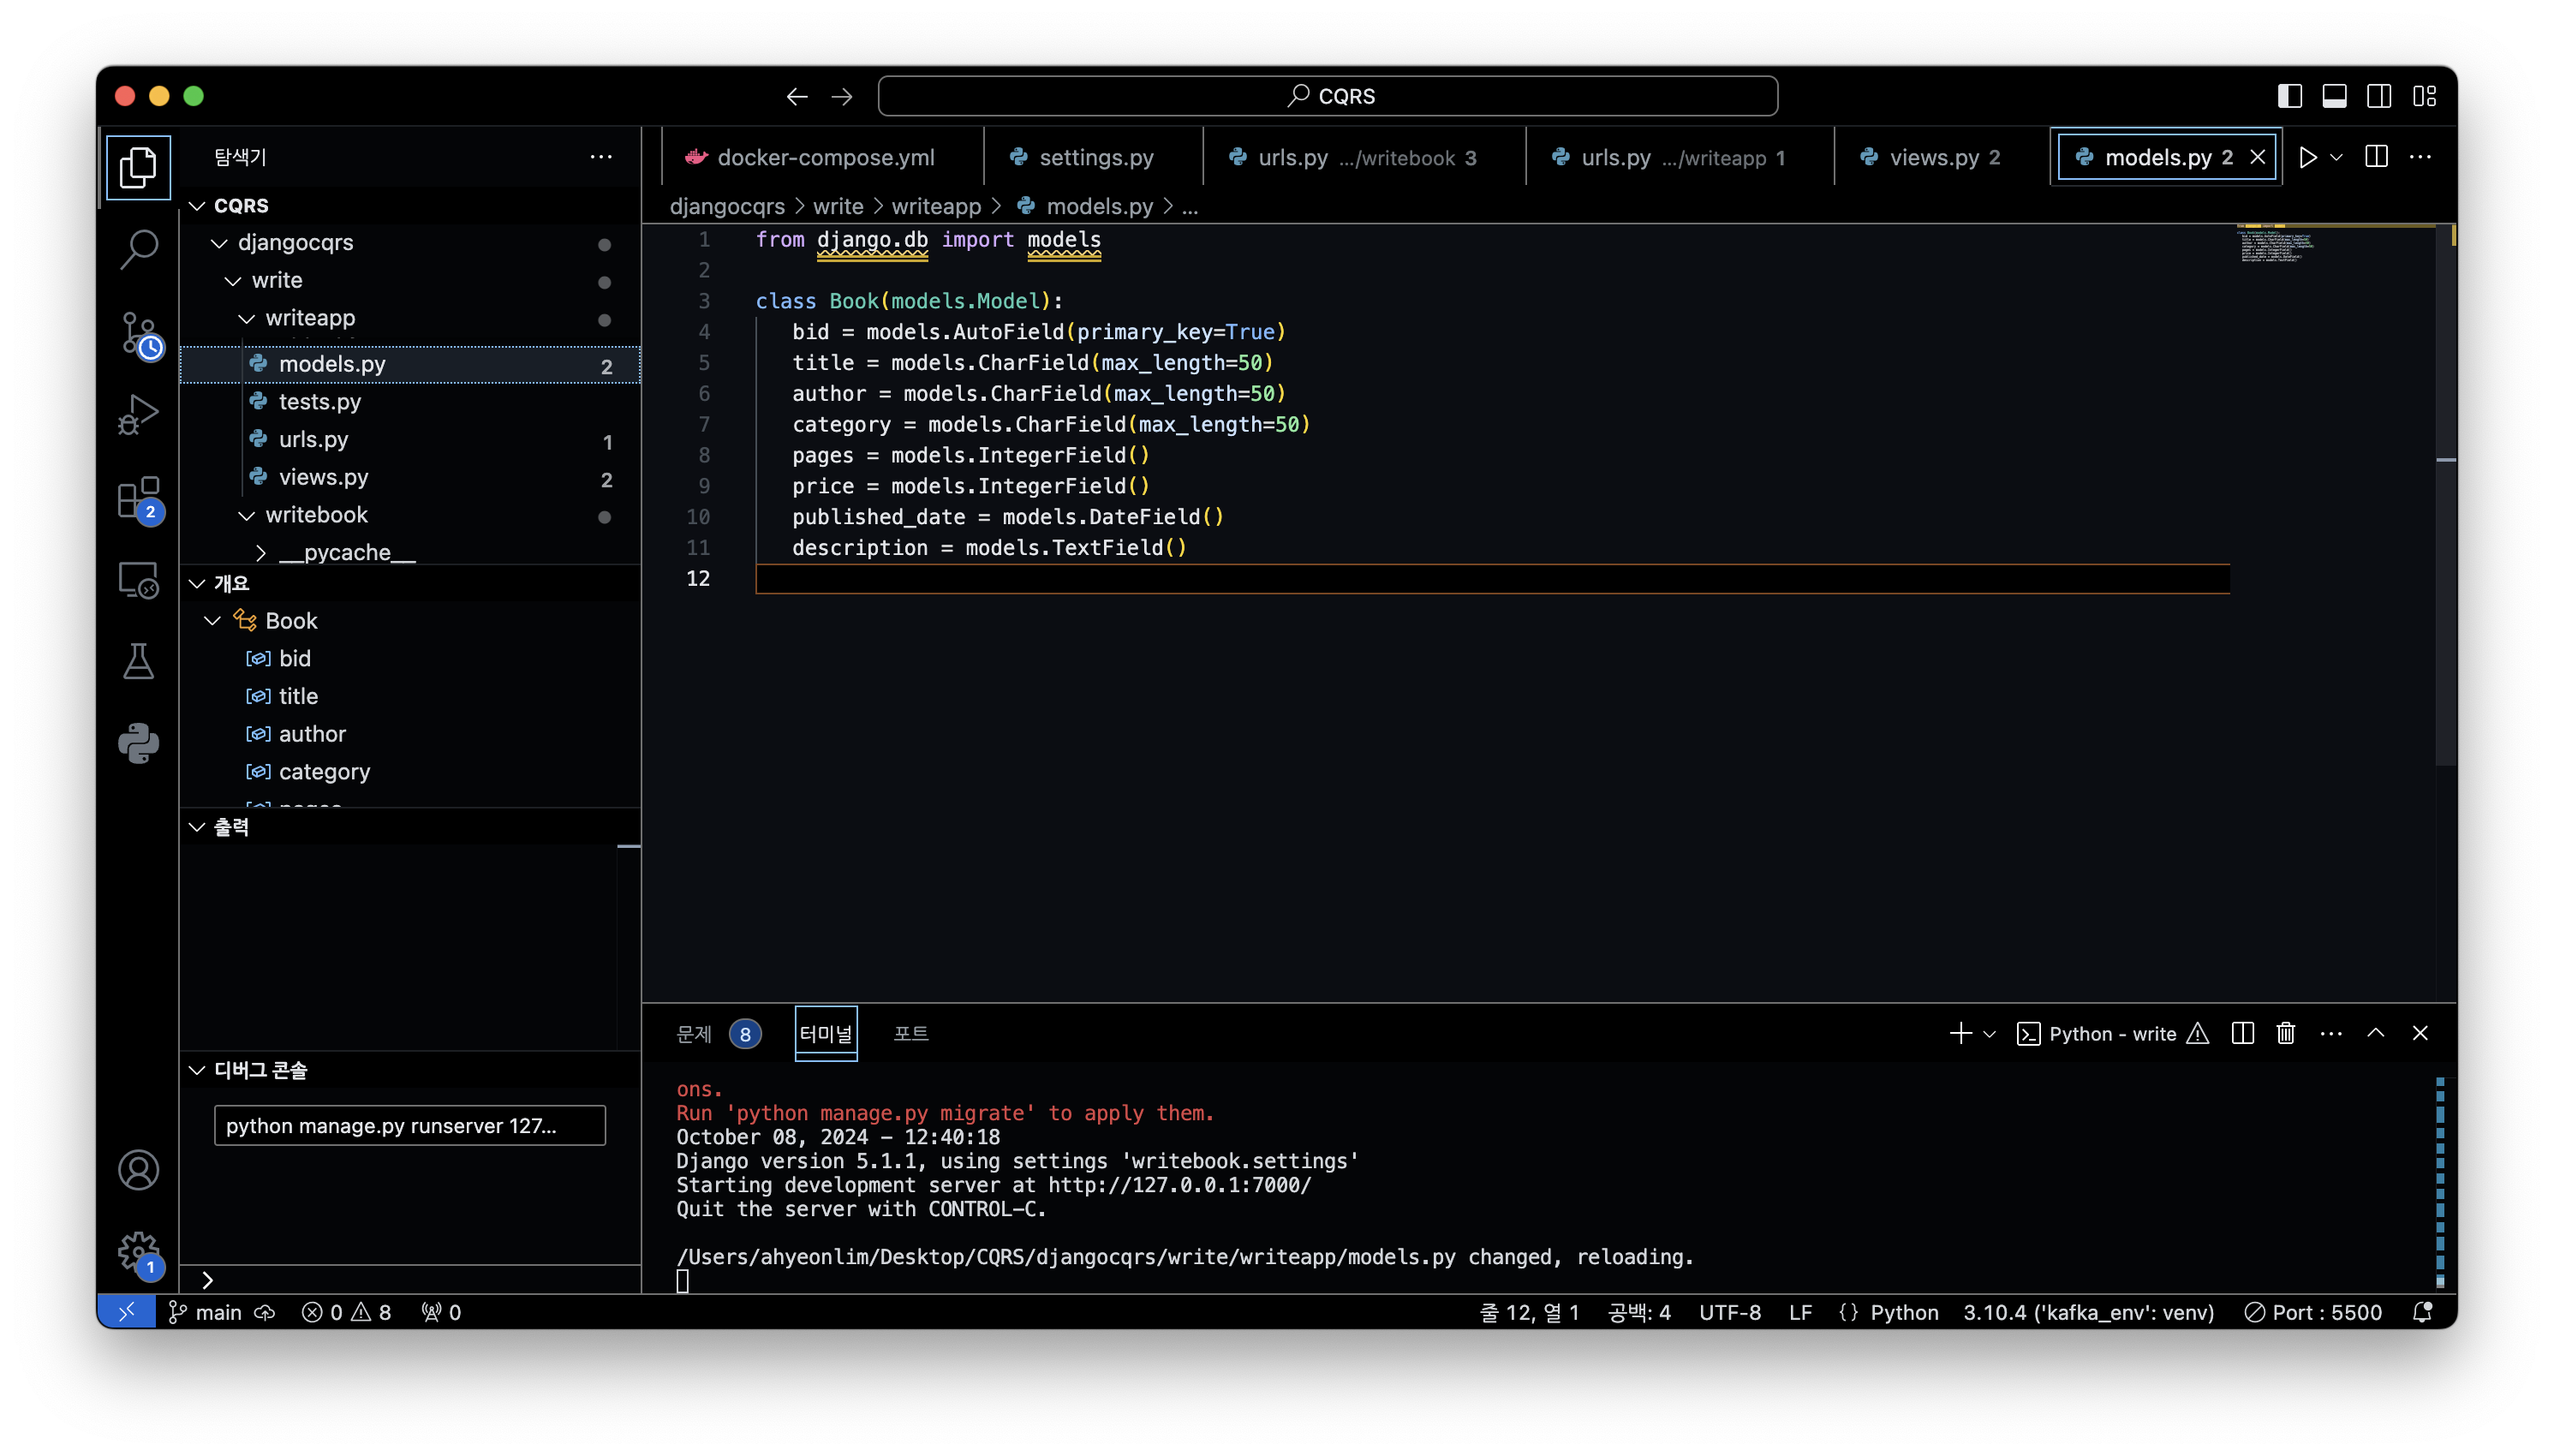
models.py 작성 후 데이터베이스에 반영
python manage.py makemigrations writeapp
python manage.py migrate
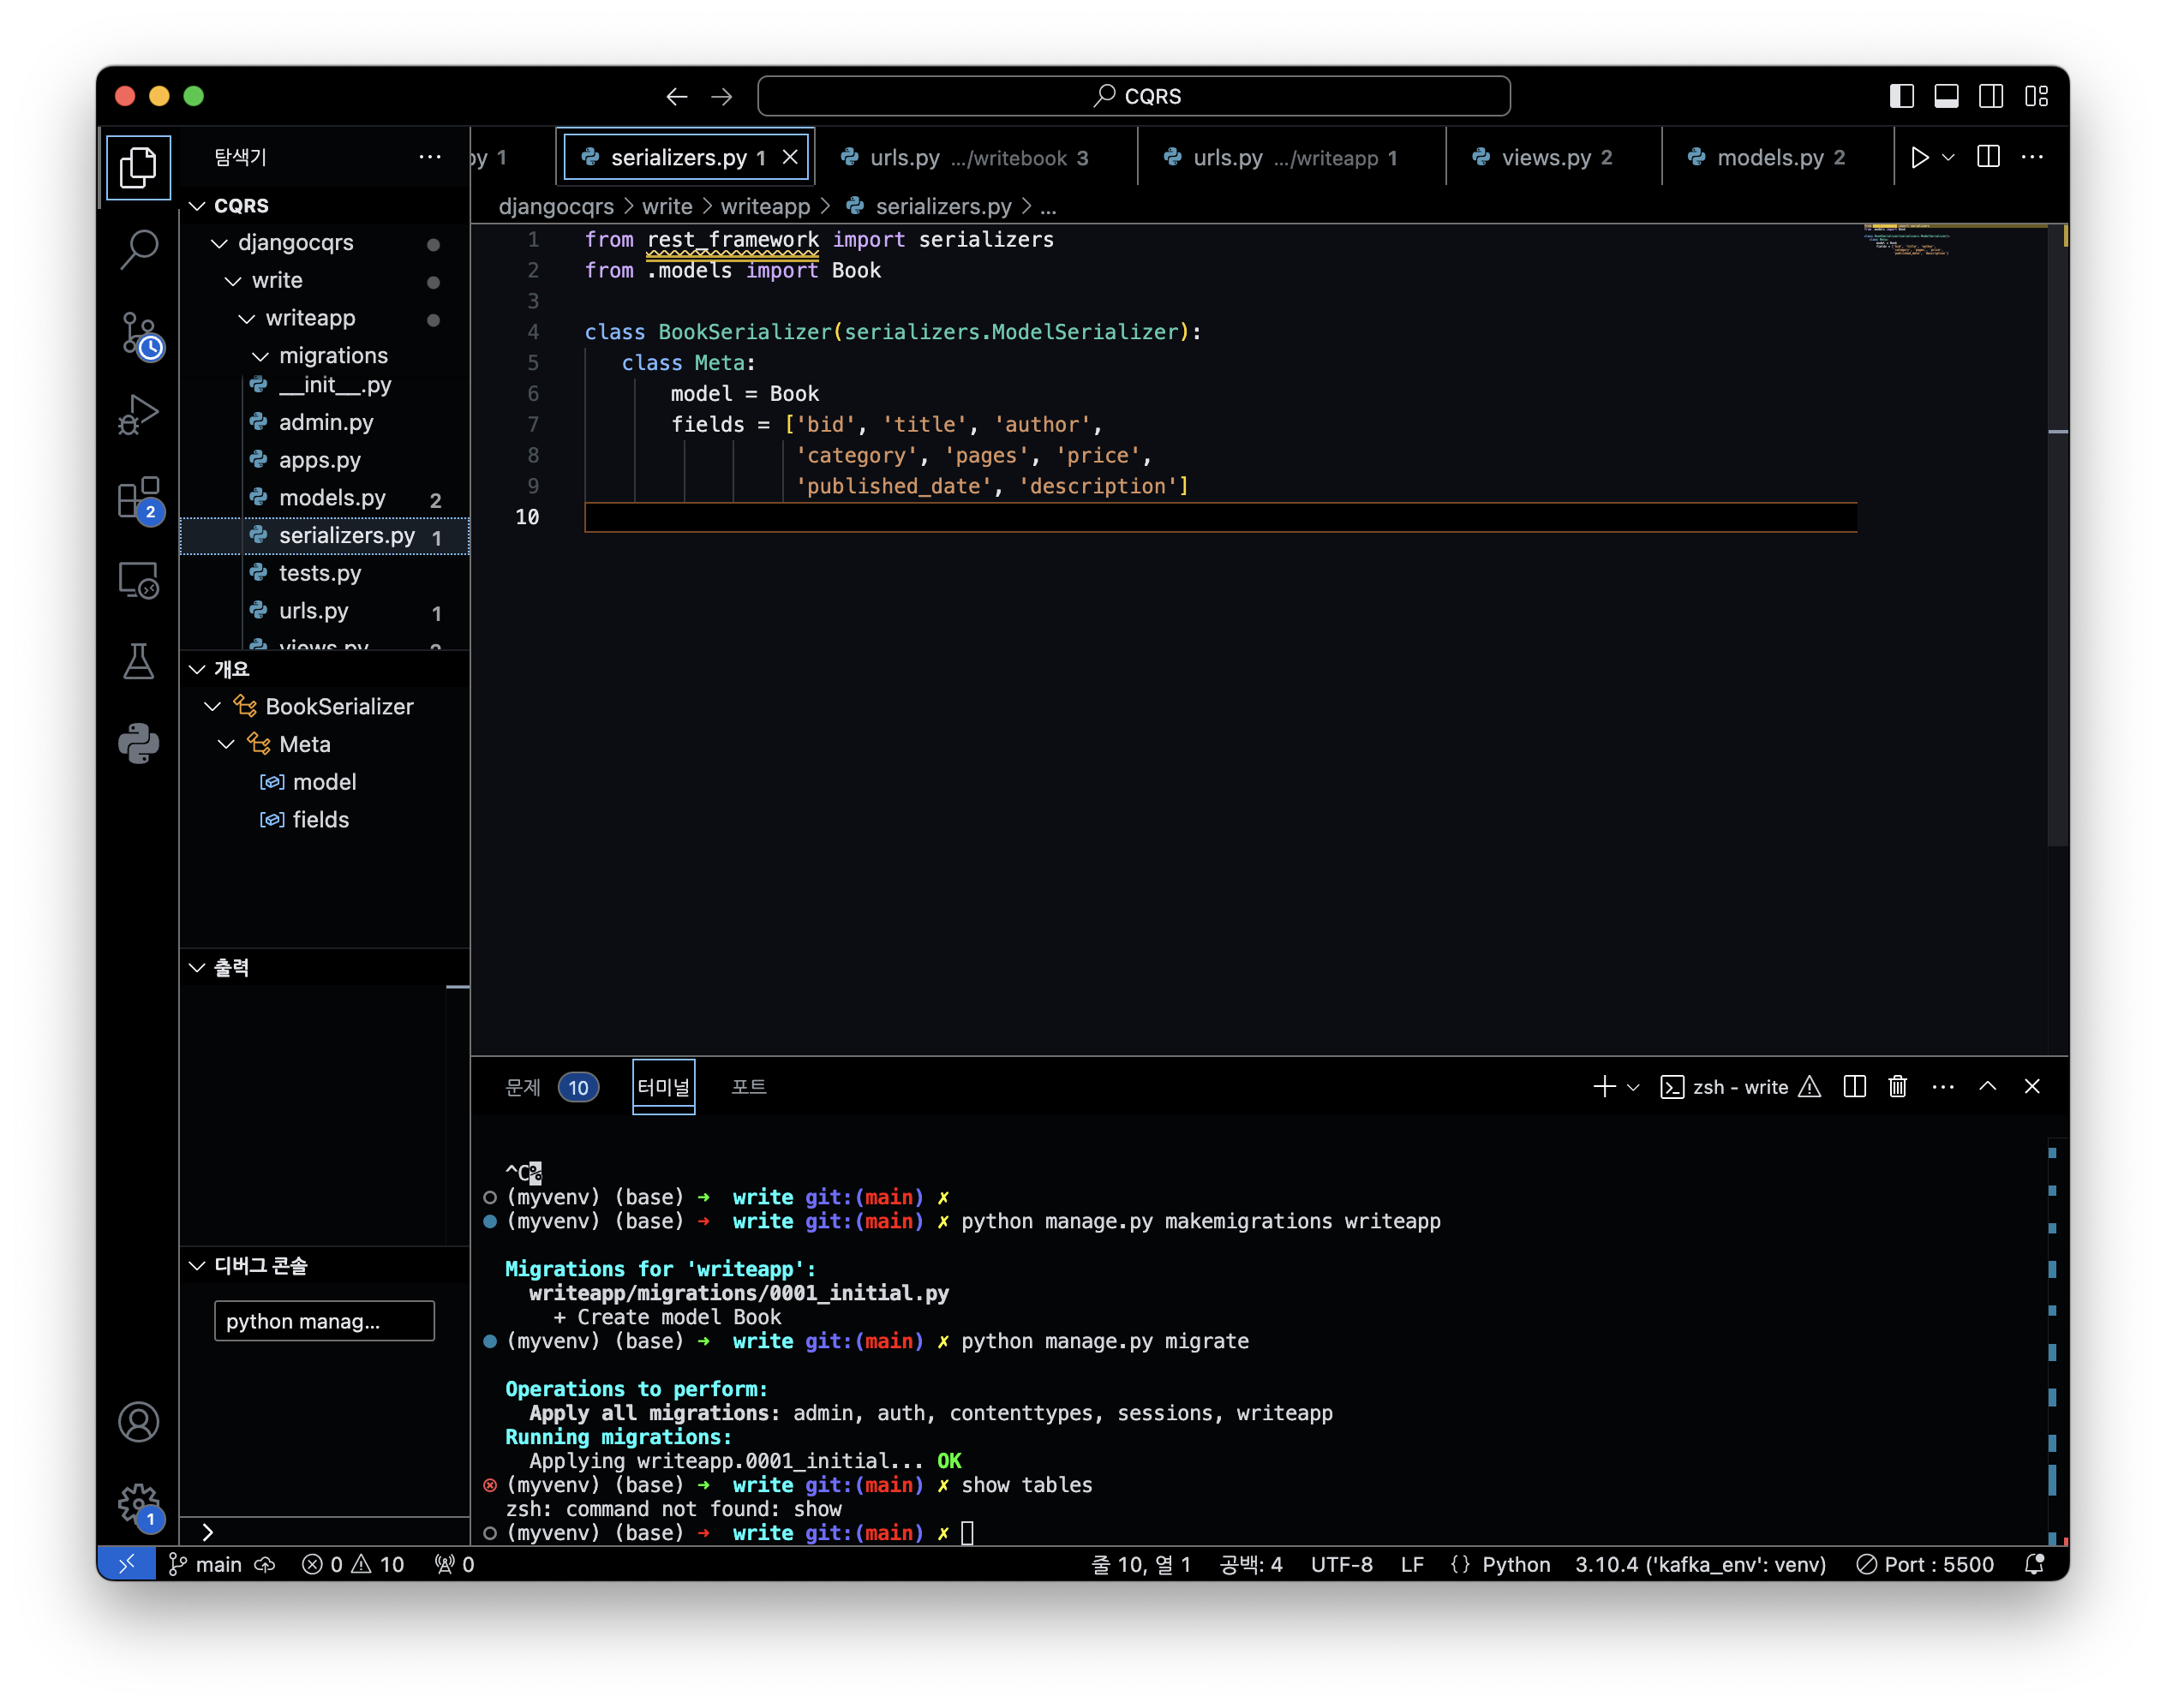
from rest_framework import serializers
from .models import Book

class BookSerializer(serializers.ModelSerializer):
   class Meta:
       model = Book
       fields = ['bid', 'title', 'author',
                 'category', 'pages', 'price',
                 'published_date', 'description']
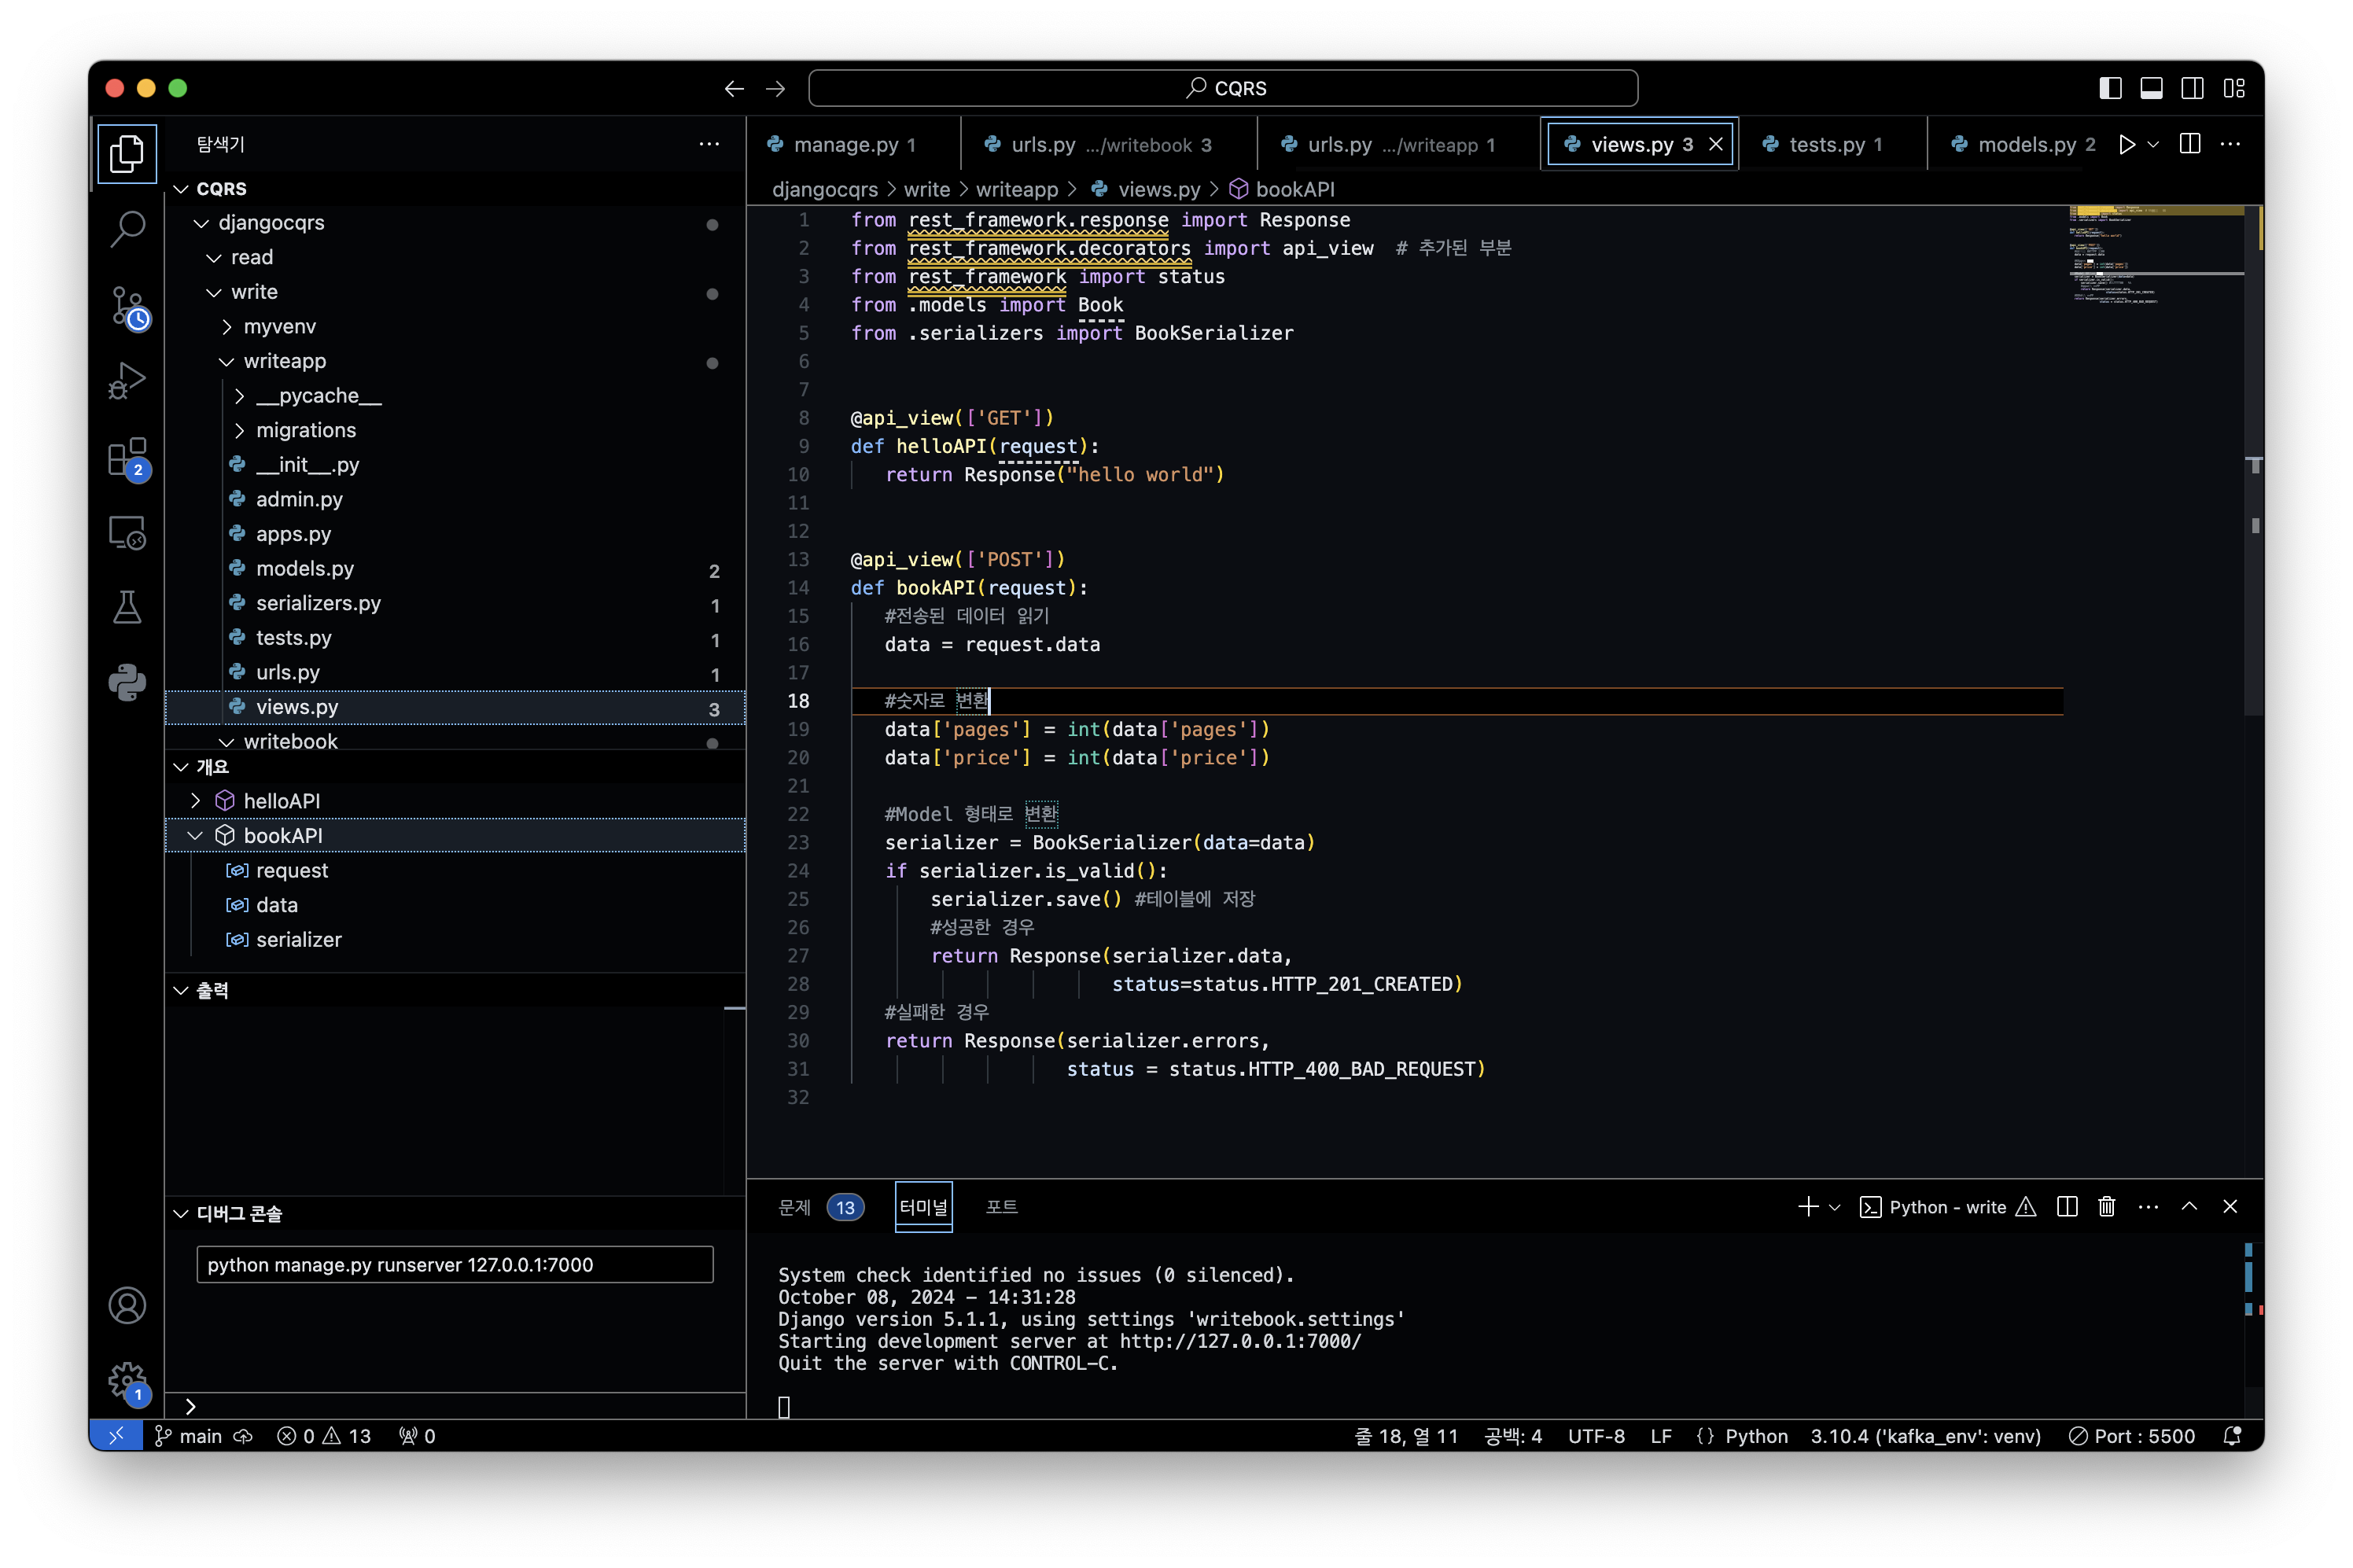
POST 방식으로 요청을 하면 데이터를 삽입하는 요청 처리 함수를 작성합니다.
views.py
from .models import Book
from .serializers import BookSerializer
from rest_framework import status

@api_view(['POST'])
def bookAPI(request):
   #전송된 데이터 읽기
   data = request.data

   #숫자로 변환
   data['pages'] = int(data['pages'])
   data['price'] = int(data['price'])

   #Model 형태로 변환
   serializer = BookSerializer(data=data)
   if serializer.is_valid():
       serializer.save() #테이블에 저장
       #성공한 경우
       return Response(serializer.data,
                       status=status.HTTP_201_CREATED)
   #실패한 경우
   return Response(serializer.errors,
                   status = status.HTTP_400_BAD_REQUEST)
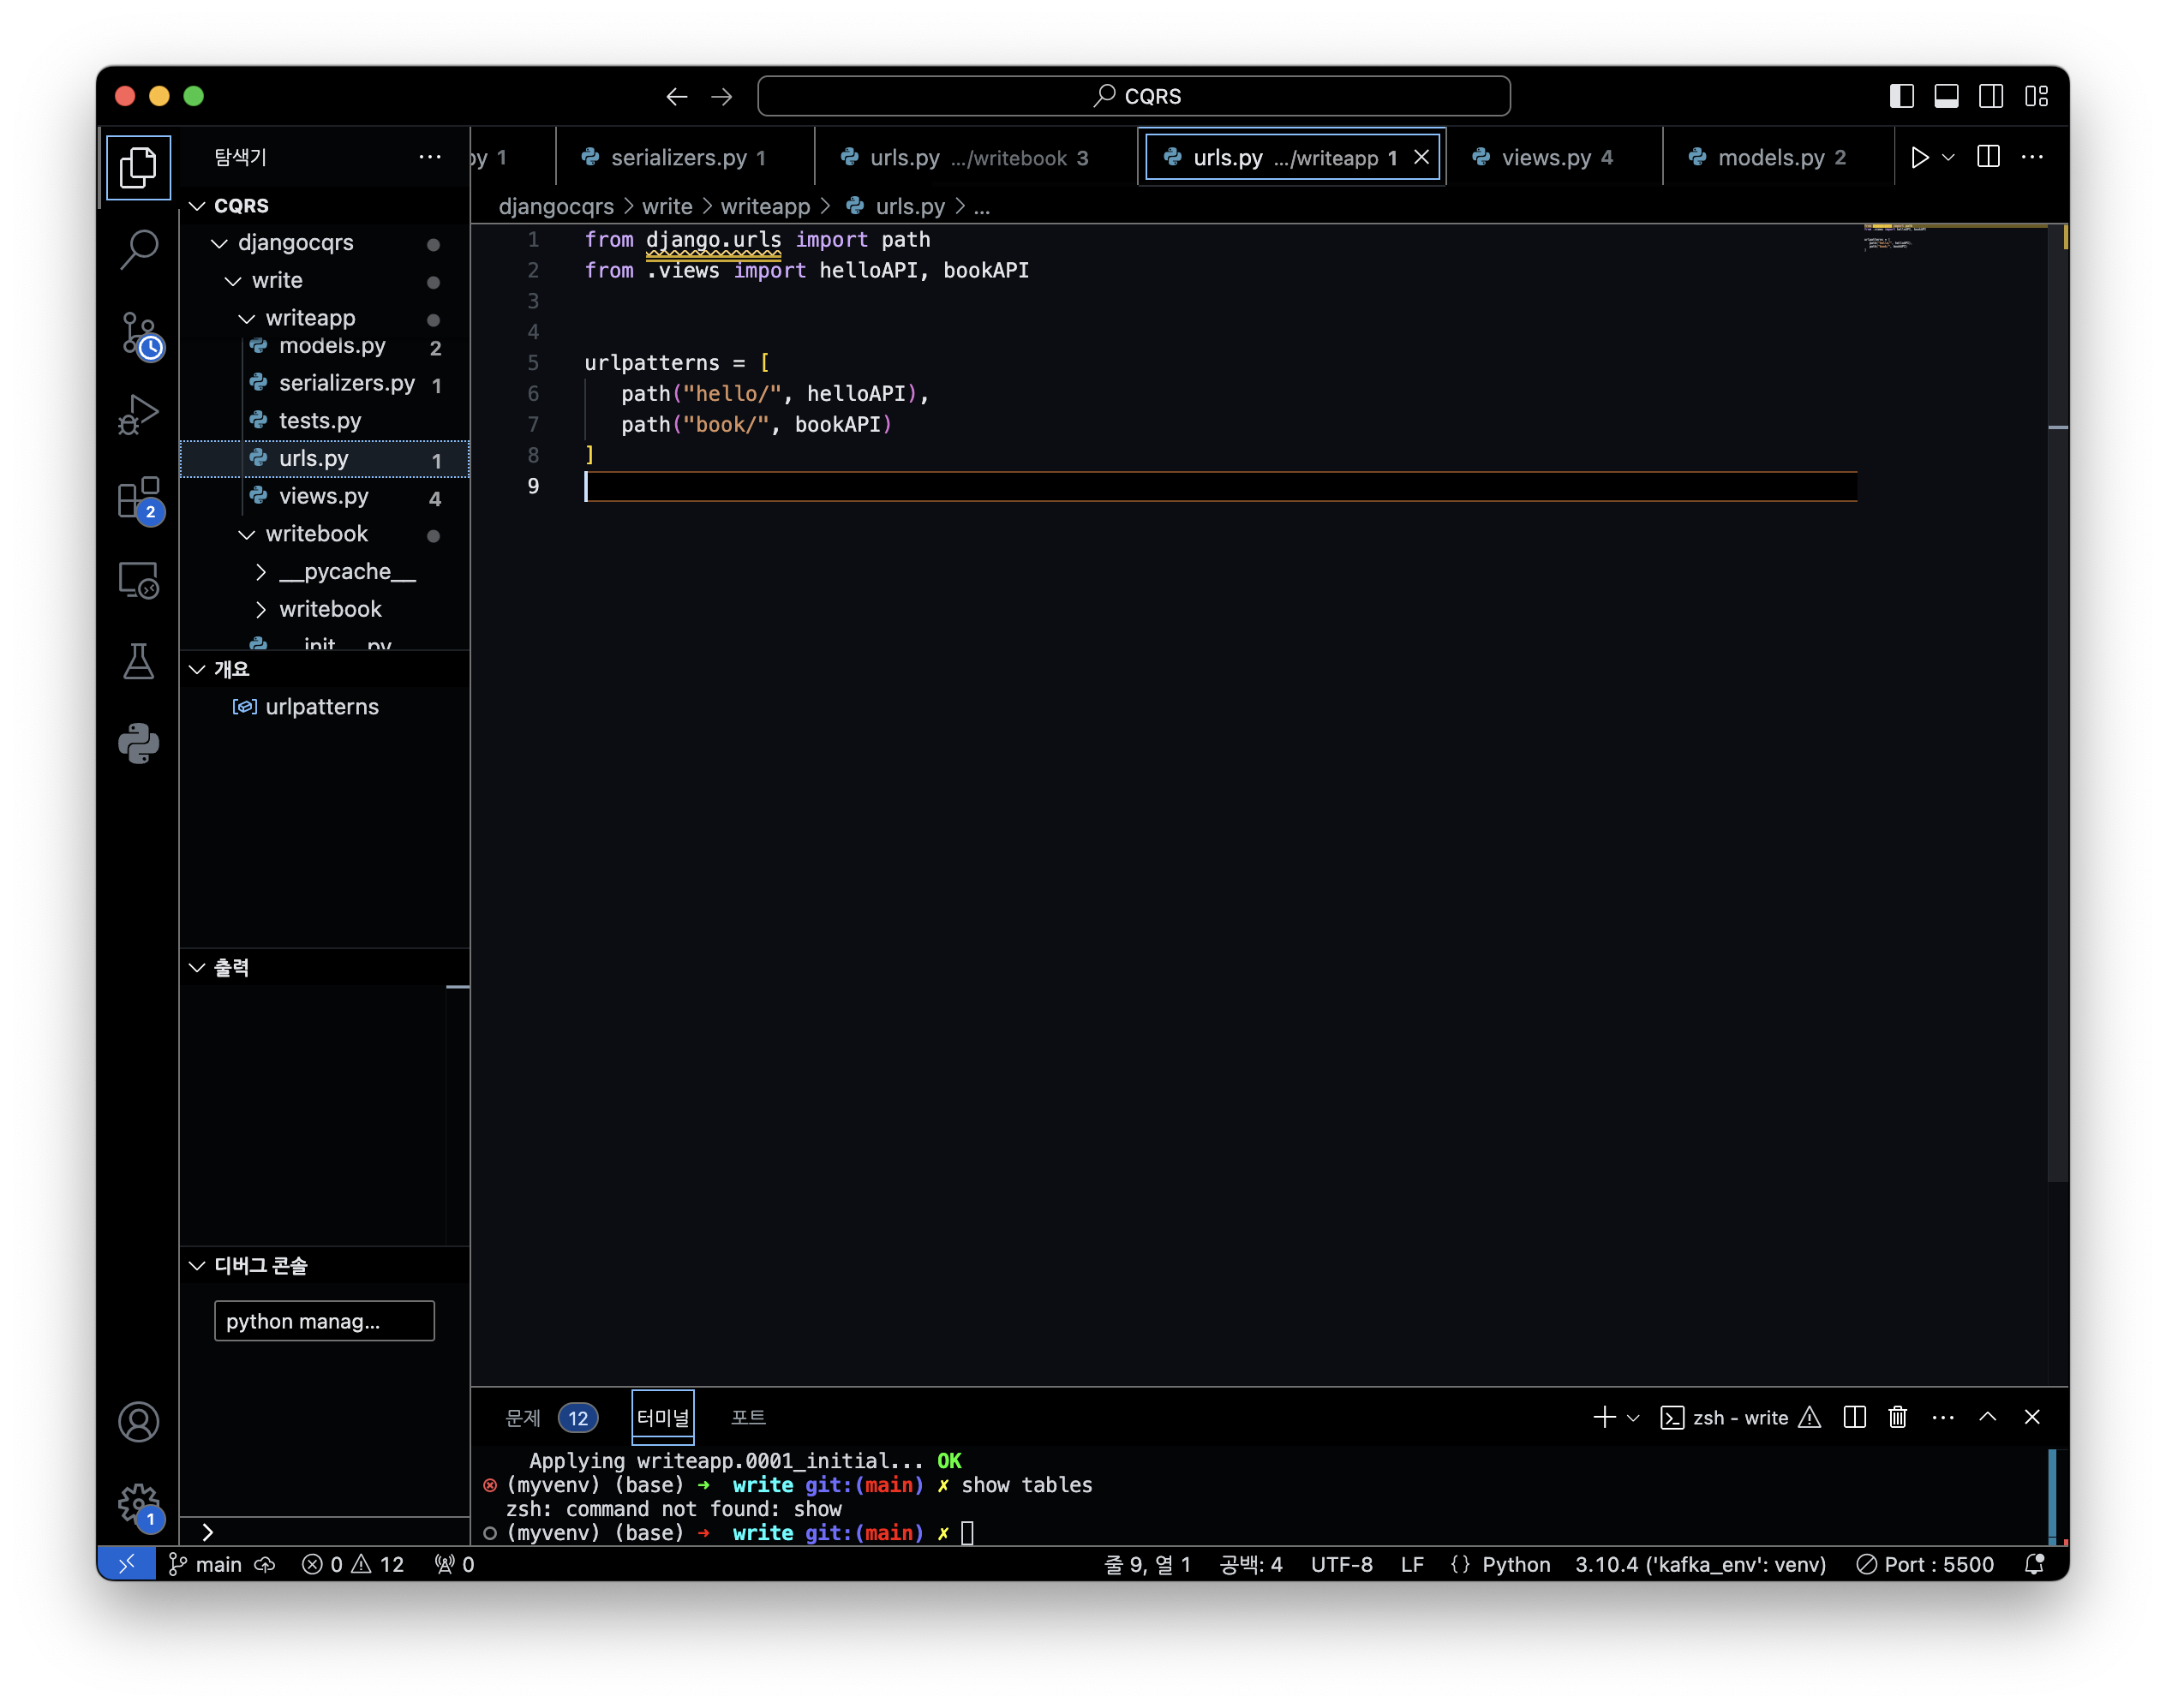
애플리케이션의 urls.py 파일에서 url 과 요청 처리 함수 연결
=>애플리케이션의 urls.py 파일에서 url 과 요청 처리 함수 연결
from django.urls import path
from .views import helloAPI, bookAPI

urlpatterns = [
   path("hello/", helloAPI),
   path("book/", bookAPI)
]
다시 python manage.py runserver 127.0.0.1:7000 으로 실행시키고
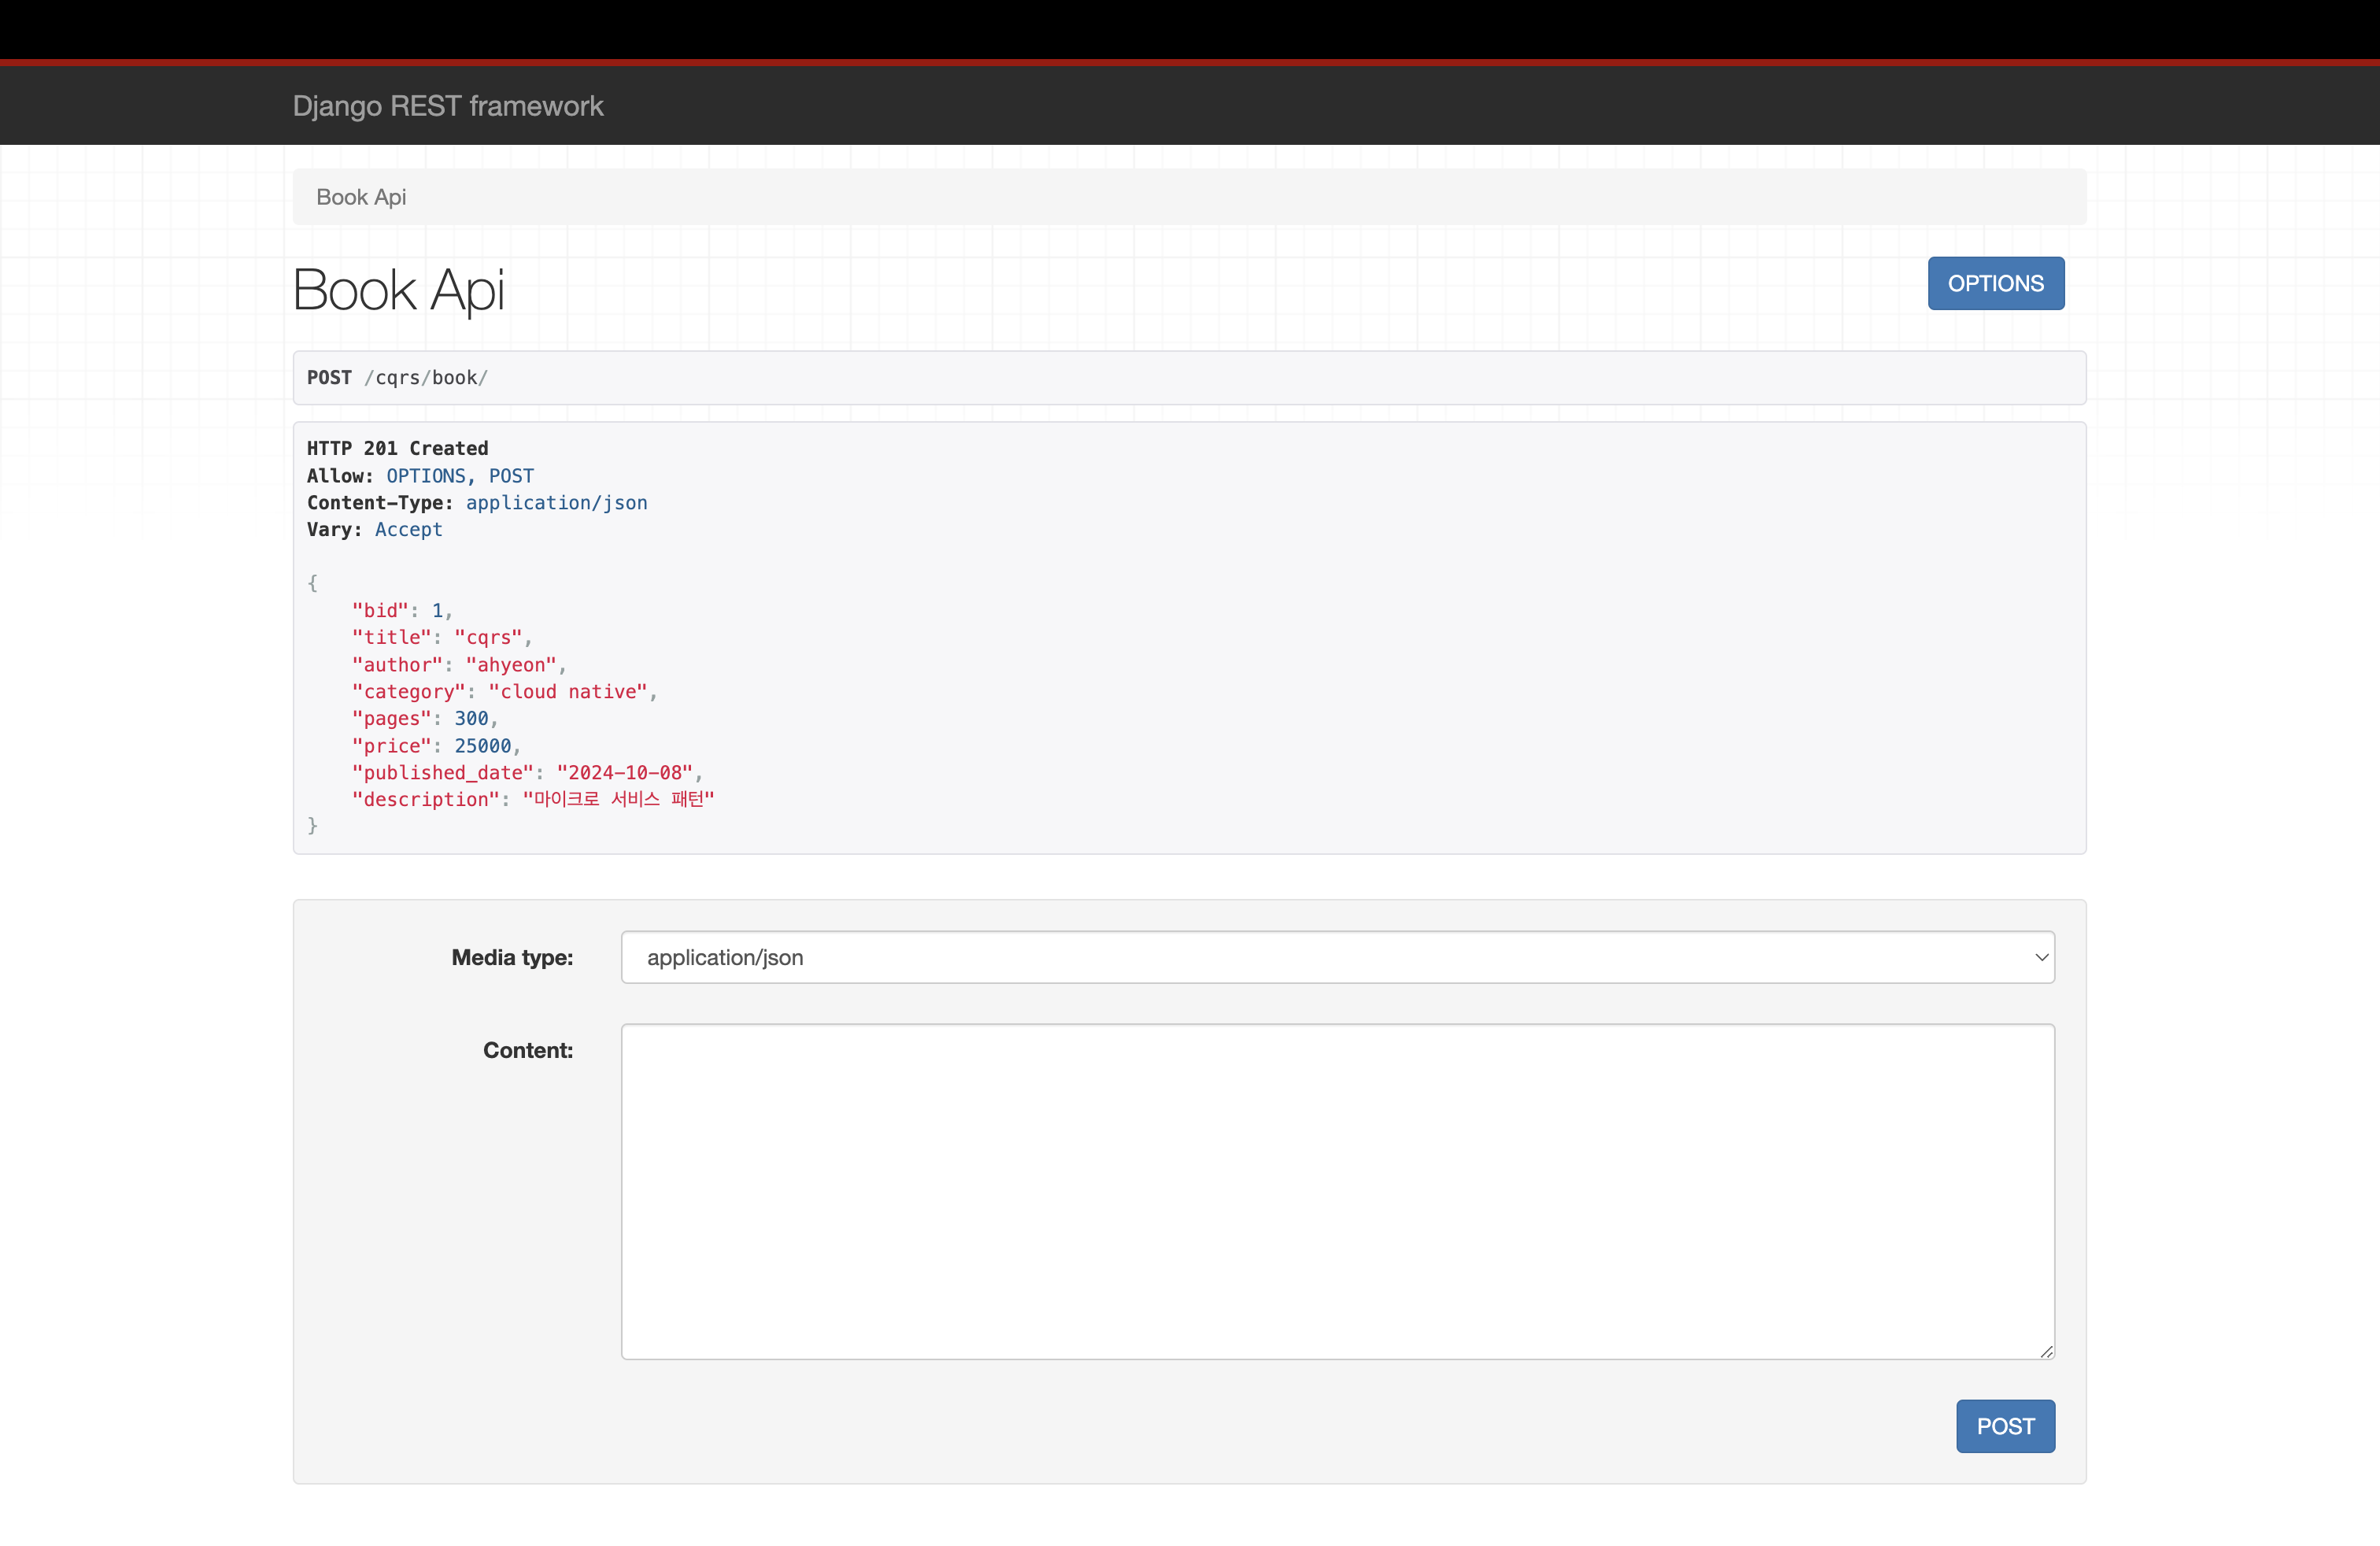
브라우저에서 http://127.0.0.1:7000/cqrs/book/ 으로 접속하면 다음과 같은 화면을 볼 수 있습니다.
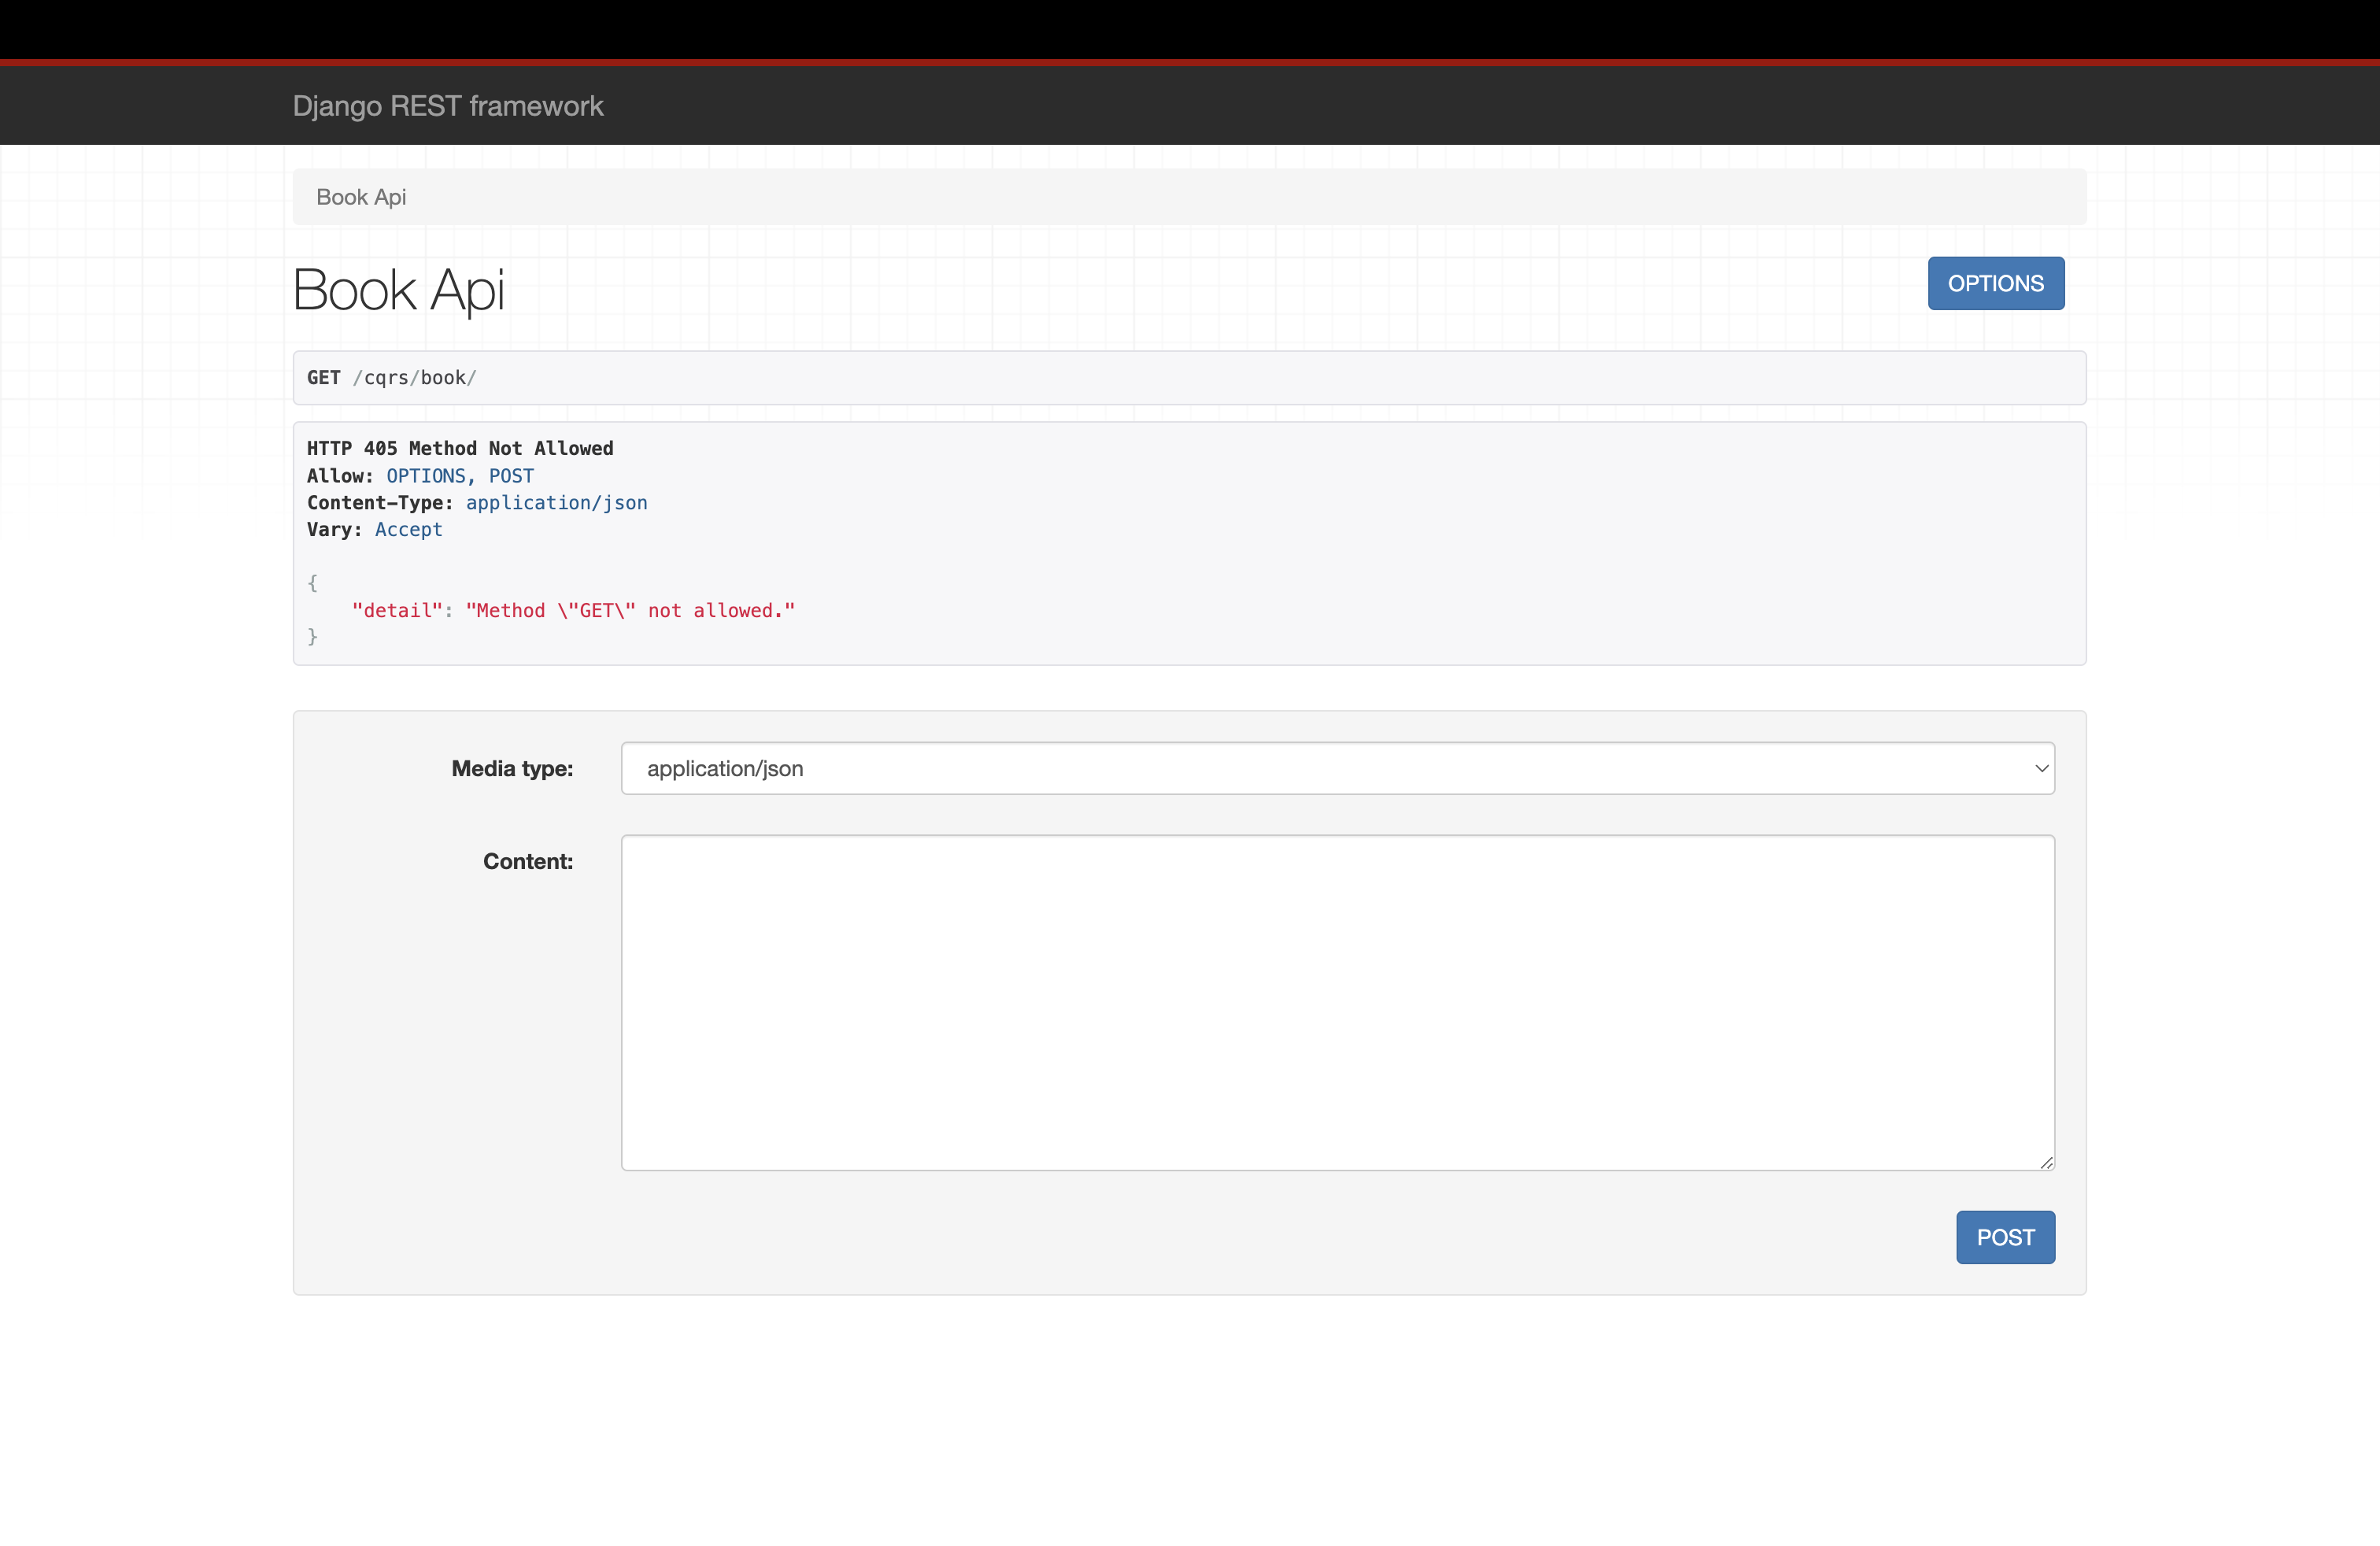
브라우저의 content 란에 아래와 같이 입력하고 POST 클릭하면
{
"title":"",
"author":"",
"category":"",
"pages": ,
"price": ,
"published_date":"",
"description":""
}
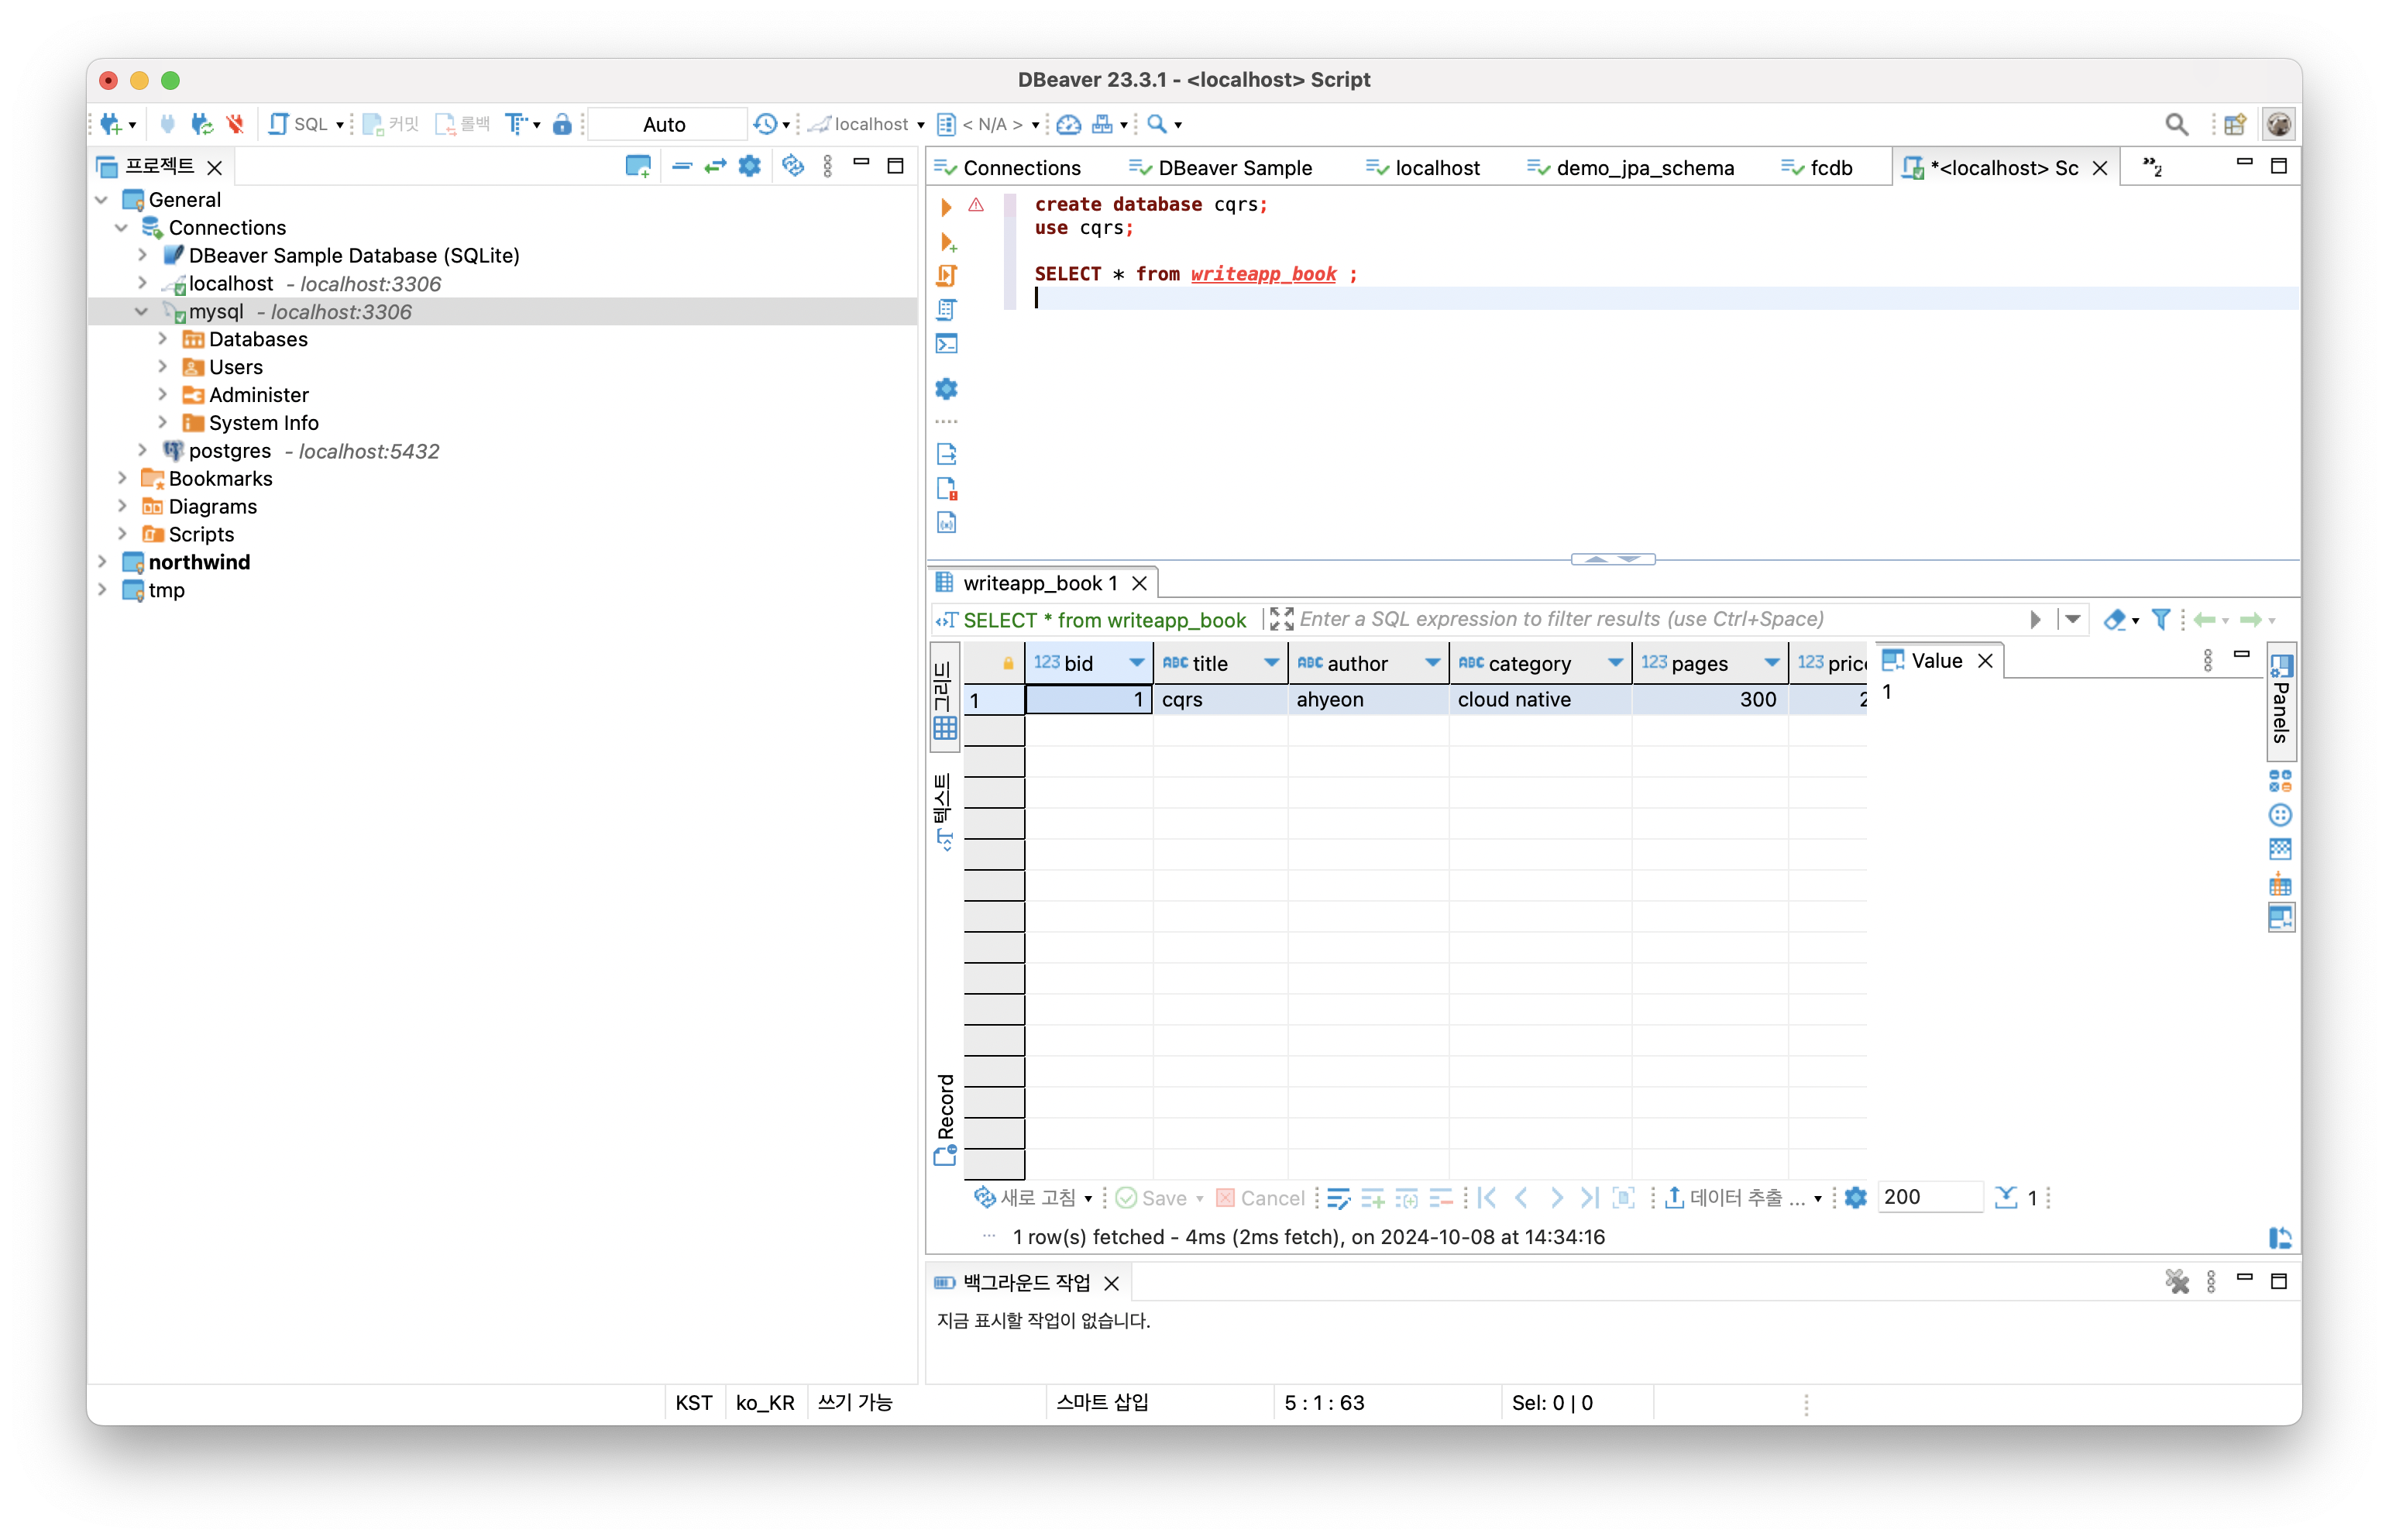
데이터베이스에서도 확인
Client Application 구현
yarn create react-app cqrsclient// react 애플리케이션 실행
yarn start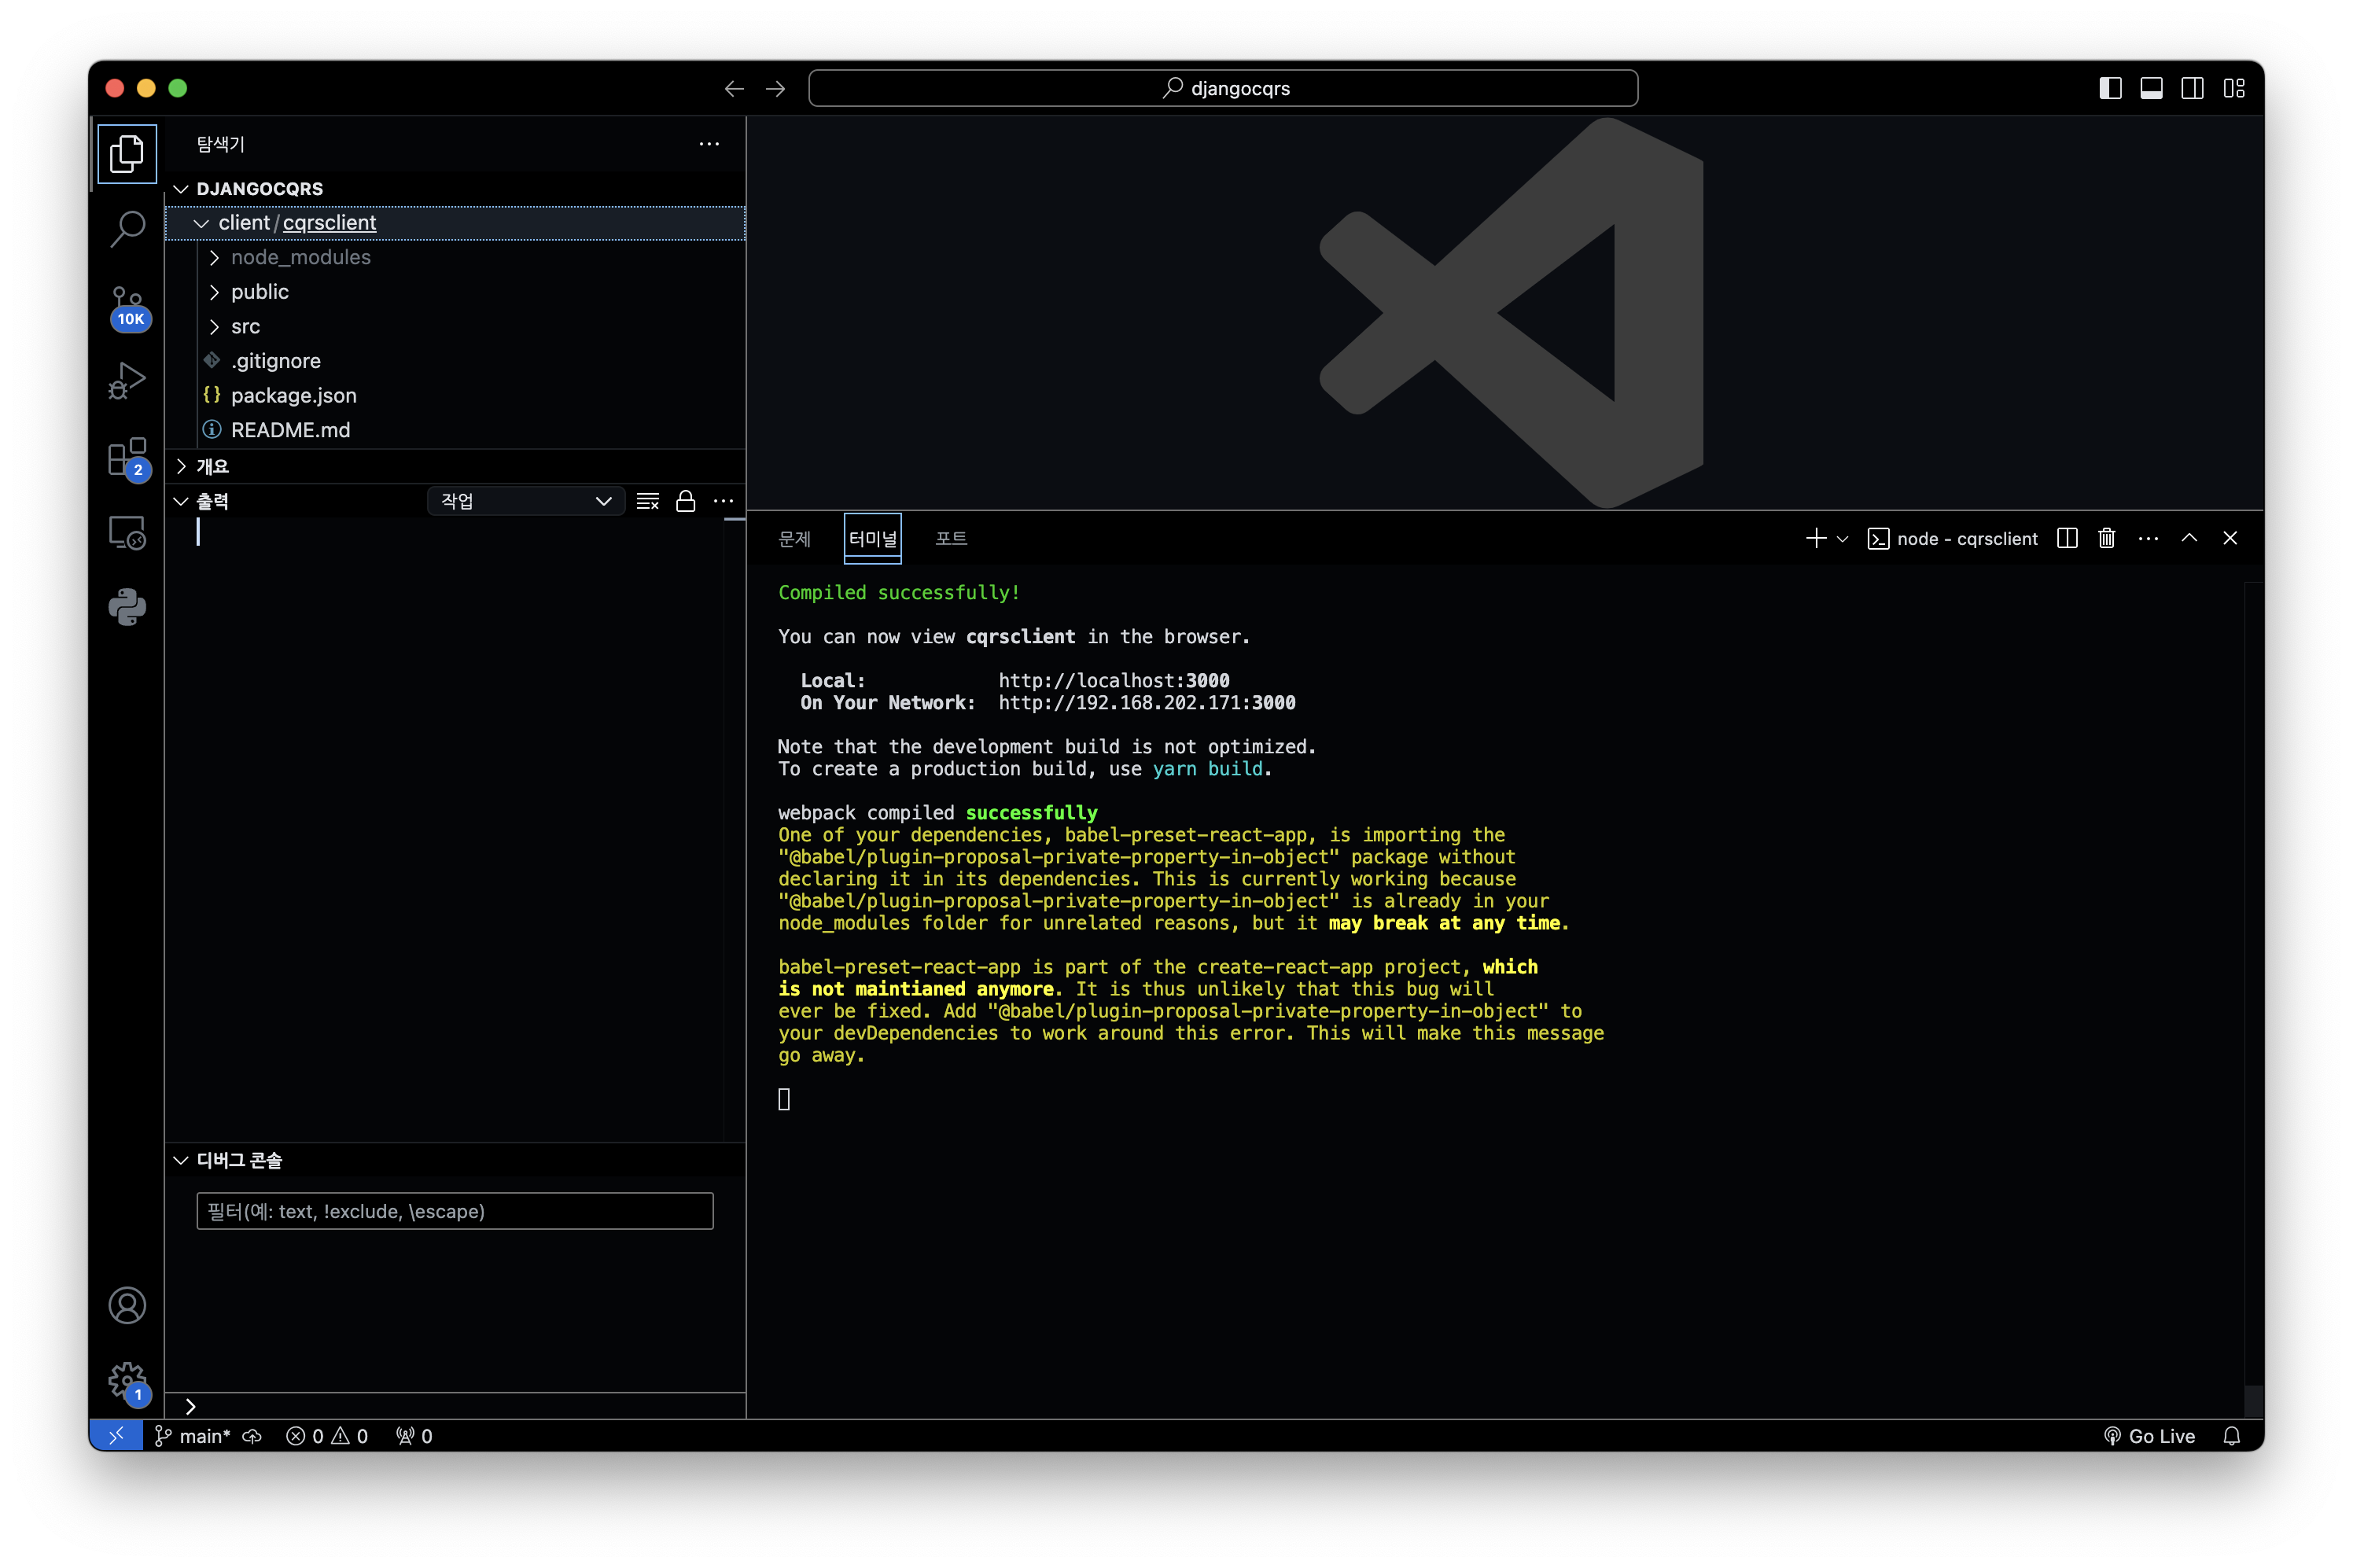
//아이콘 사용을 위한 패키지 설치
npm install --save --legacy-peer-deps @material-ui/core
npm install --save --legacy-peer-deps @material-ui/icons
// 비동기 데이터 요청을 쉽게 작성하기 위한 패키지를 설치
yarn add axios
AddBook.jsx
import React , { useState }from "react"
import { TextField, Paper, Button, Grid } from "@material-ui/core";

function AddBook(props) {
   const [title, setTitle] = useState("");
   const [author, setAuthor] = useState("");
   const [category, setCategory] = useState("");
   const [pages, setPages] = useState("");
   const [price, setPrice] = useState("");
   const [published_date, setPublished_date] = useState("");
   const [description, setDescription] = useState("");

   const onTitleChange = (event) => {
       setTitle(event.target.value);
   };
   const onAuthorChange = (event) => {
       setAuthor(event.target.value);
   };
   const onCategoryChange = (event) => {
       setCategory(event.target.value);
   };
   const onPagesChange = (event) => {
       setPages(event.target.value);
   };
   const onPriceChange = (event) => {
       setPrice(event.target.value);
   };
   const onPublished_dateChange = (event) => {
       setPublished_date(event.target.value);
   };
   const onDescriptionChange = (event) => {
       setDescription(event.target.value);
   };
   const onSubmit = (event) => {
       event.preventDefault();
       const book = {}
       book.title=title
       book.author = author
       book.category = category
       book.pages = pages
       book.price = price
       book.published_date = published_date
       book.description = description
       props.add(book)
       setTitle("")
       setAuthor("")
       setCategory("")
       setPages("")
       setPrice("")
       setPublished_date("")
       setDescription("")
   };

   return(
       <Paper style={{ margin: 16, padding: 16 }}>
       <Grid container>
         <Grid xs={6} md={6} item style={{ paddingRight: 16 }}>
           <TextField
             onChange={onTitleChange}
             value = {title}
             placeholder="Add Book Title"
             fullWidth
           />
         </Grid>
         <Grid xs={6} md={6} item style={{ paddingRight: 16 }}>
           <TextField
           onChange={onAuthorChange}
           value = {author}
             placeholder="Add Book Author"
             fullWidth
           />
         </Grid>
         <Grid xs={3} md={3} item style={{ paddingRight: 16 }}>
           <TextField
           onChange={onCategoryChange}
           value = {category}
             placeholder="Add Book Category"
             fullWidth
           />
         </Grid>
         <Grid xs={3} md={3} item style={{ paddingRight: 16 }}>
           <TextField
           onChange={onPagesChange}
           value = {pages}
             placeholder="Add Book Pages"
             fullWidth
           />
         </Grid>
         <Grid xs={3} md={3} item style={{ paddingRight: 16 }}>
           <TextField
           onChange={onPriceChange}
           value = {price}
             placeholder="Add Book Price"
             fullWidth
           />
         </Grid>
         <Grid xs={3} md={3} item style={{ paddingRight: 16 }}>
           <TextField
           onChange={onPublished_dateChange}
           value = {published_date}
             placeholder="Add Book Published_Date"
             fullWidth
           />
         </Grid>
         <Grid xs={11} md={11} item style={{ paddingRight: 16 }}>
           <TextField
           onChange={onDescriptionChange}
           value = {description}
             placeholder="Add Book Description"
             fullWidth
           />
         </Grid>
         <Grid xs={1} md={1} item>
           <Button
             fullWidth
             color="secondary"
             variant="outlined"
             onClick={onSubmit}
           >
             +
           </Button>
         </Grid>
       </Grid>
     </Paper>
   );
}

export default AddBook;
App.js
import './App.css';
import {Paper} from "@material-ui/core"
import AddBook from "./AddBook";
import Axios from "axios";
function App() {
//데이터 추가를 위한 함수
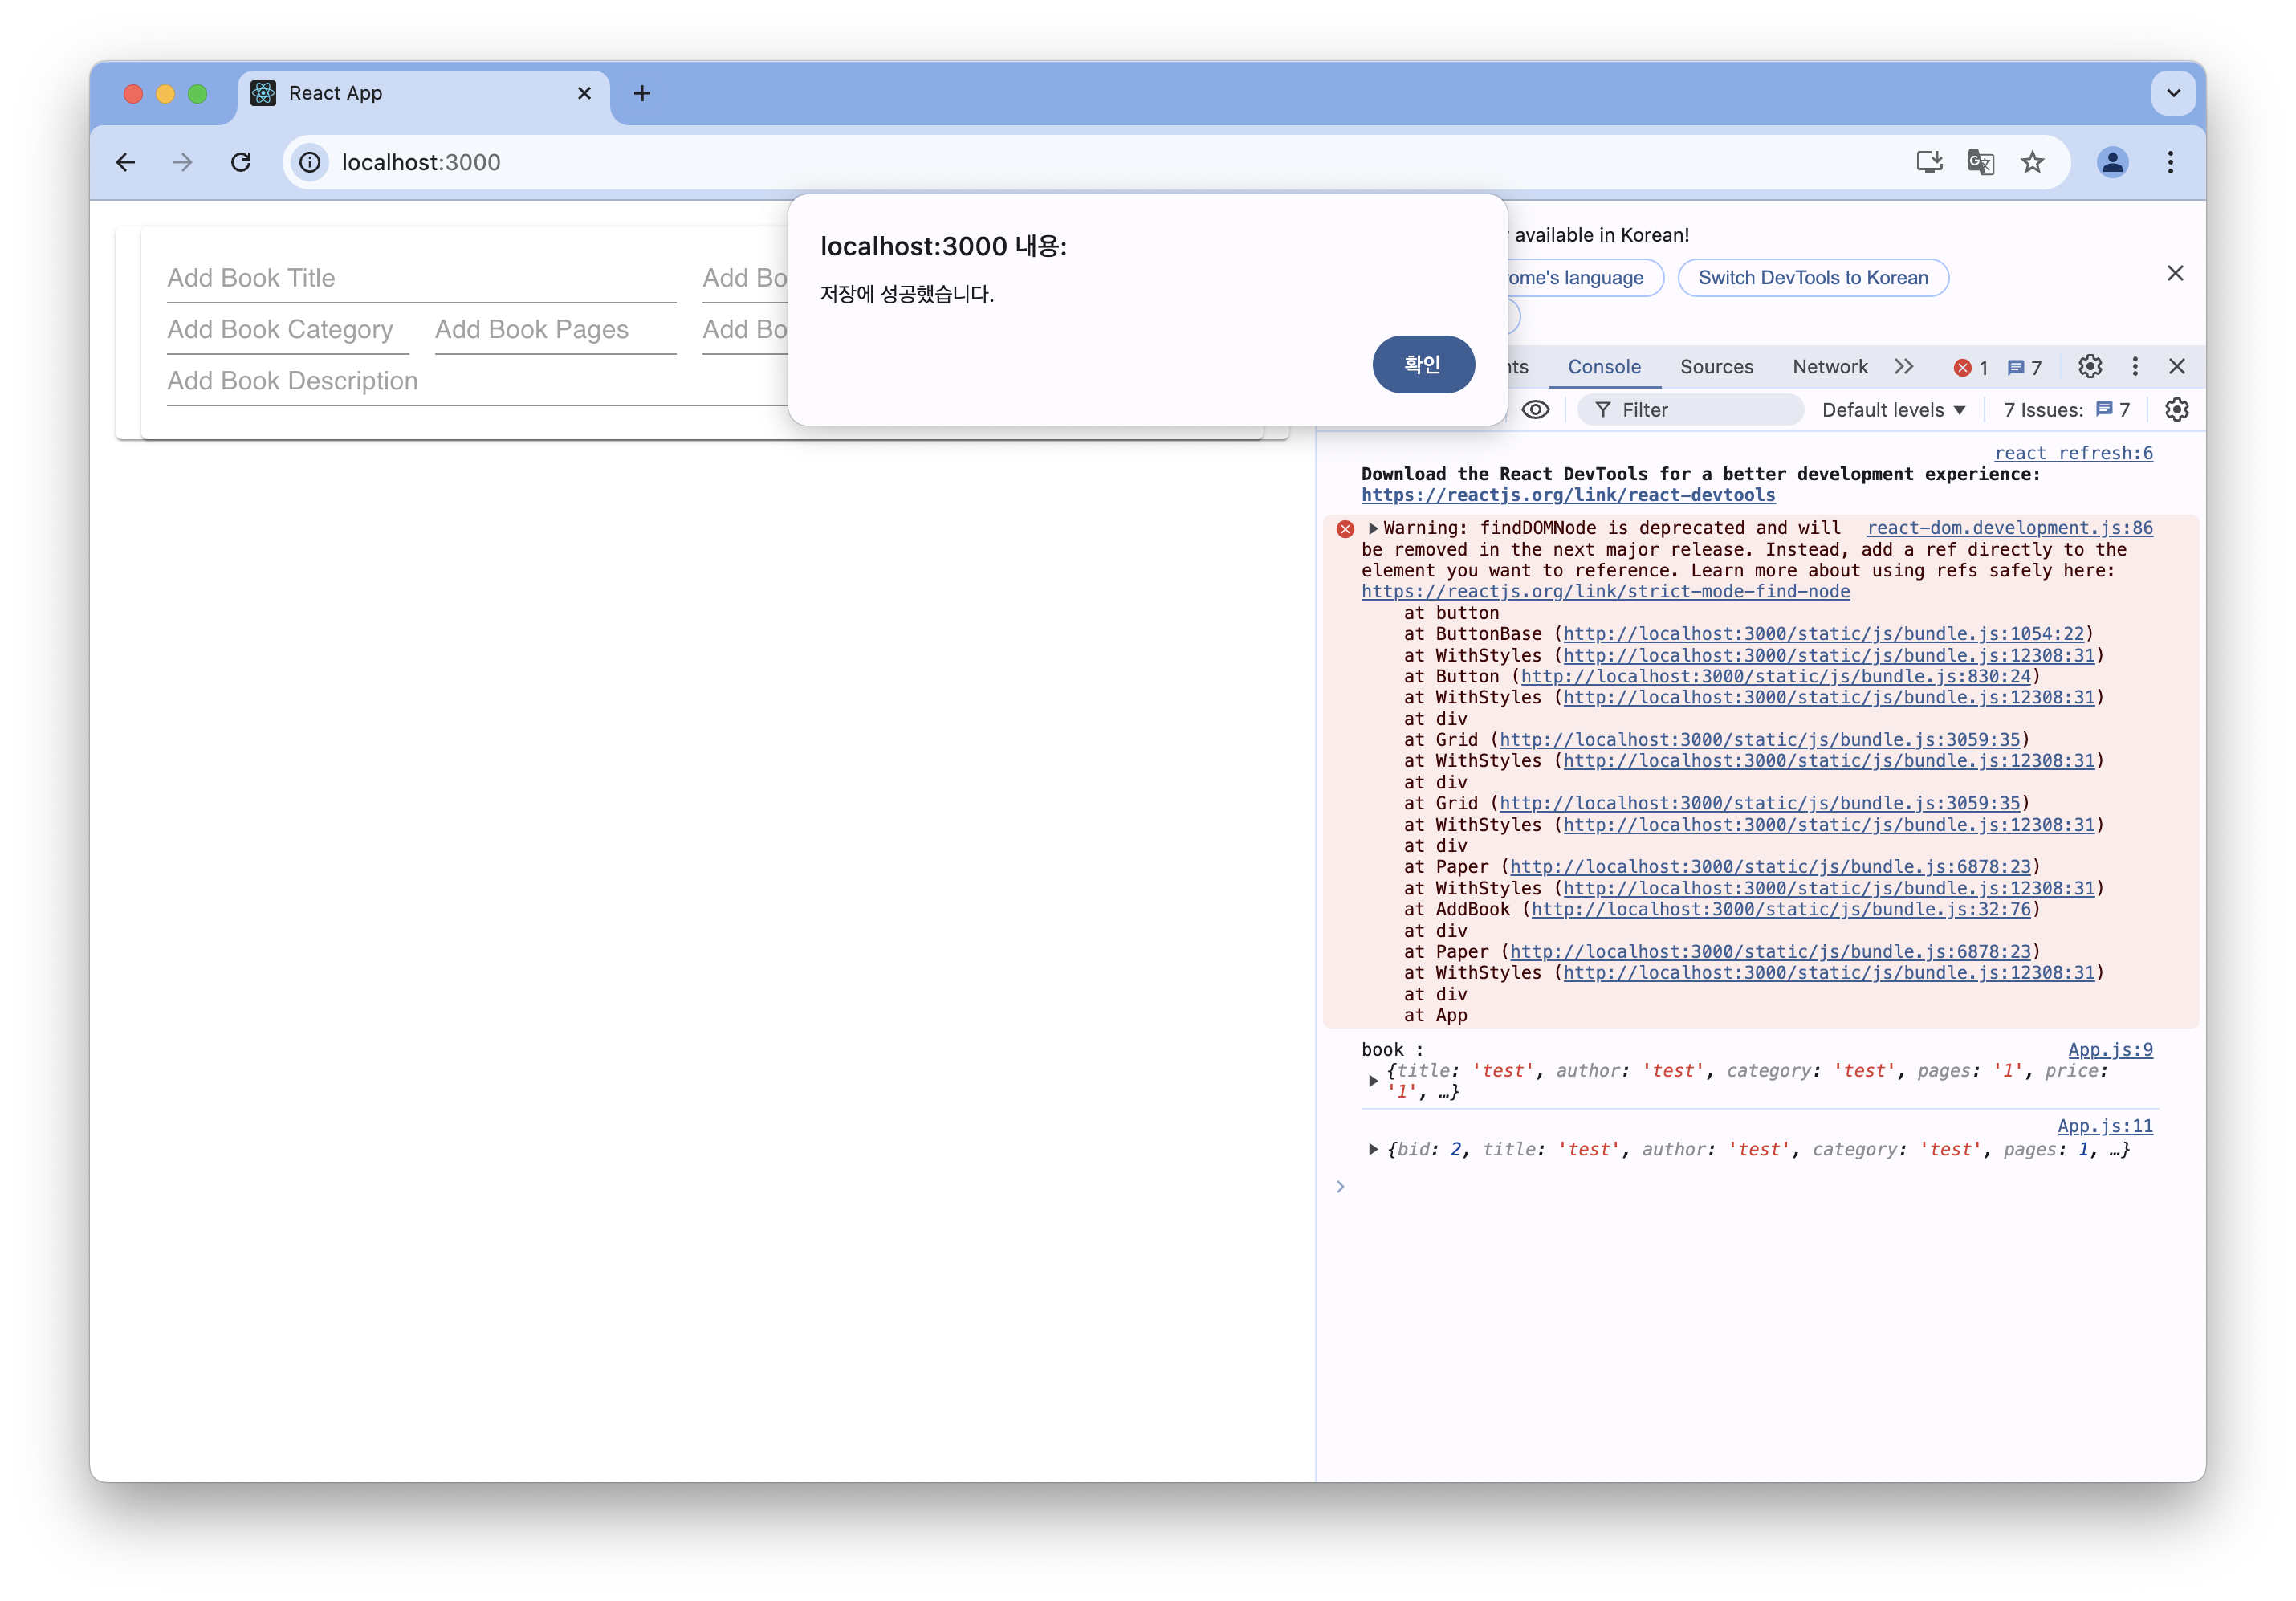
const add = (book) => {
console.log("book : ", book);
Axios.post("http://127.0.0.1:7000/cqrs/book/", book).then((response) => {
console.log(response.data)
if (response.data.bid) {
alert("저장에 성공했습니다.")
} else {
alert("코멘트를 저장하지 못했습니다.");
}
});
};
return (
<div className="App">
<Paper style={{ margin: 16 }}>
<AddBook add = {add}/>
</Paper>
</div>
);
}
export default App;
클라이언트 실행

서버 실행
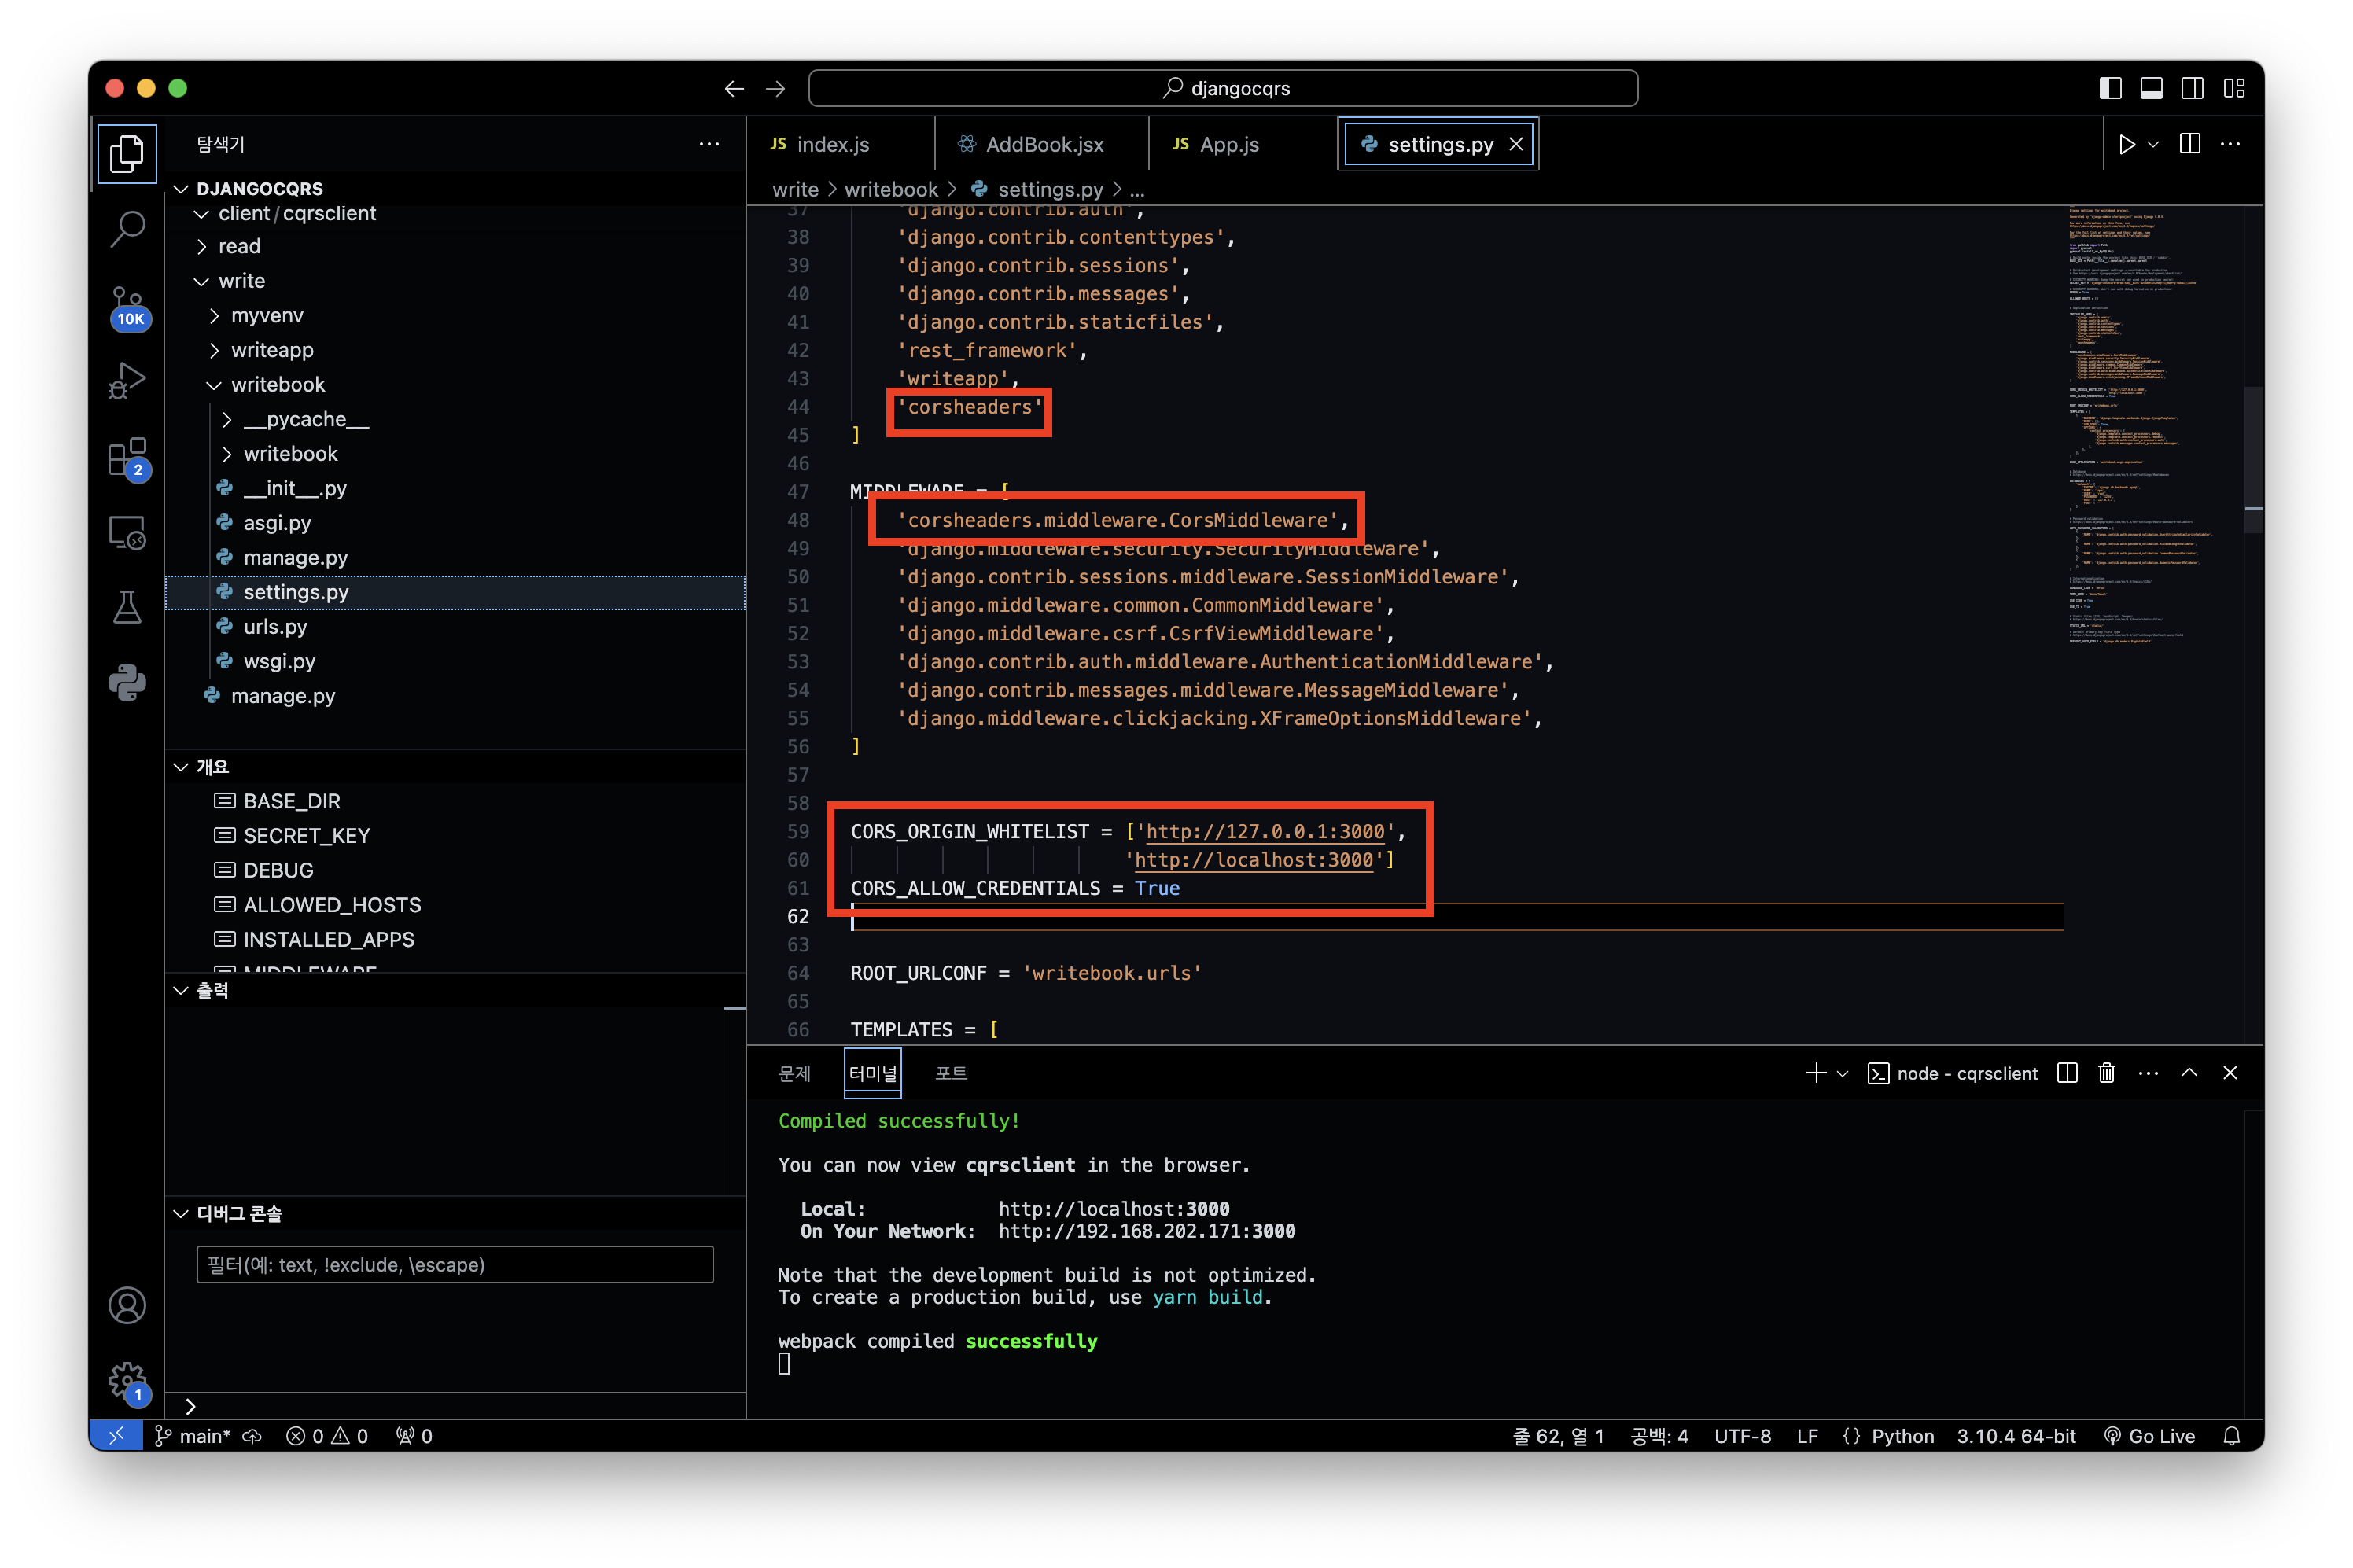
Client 수행 도중 CORS 에러
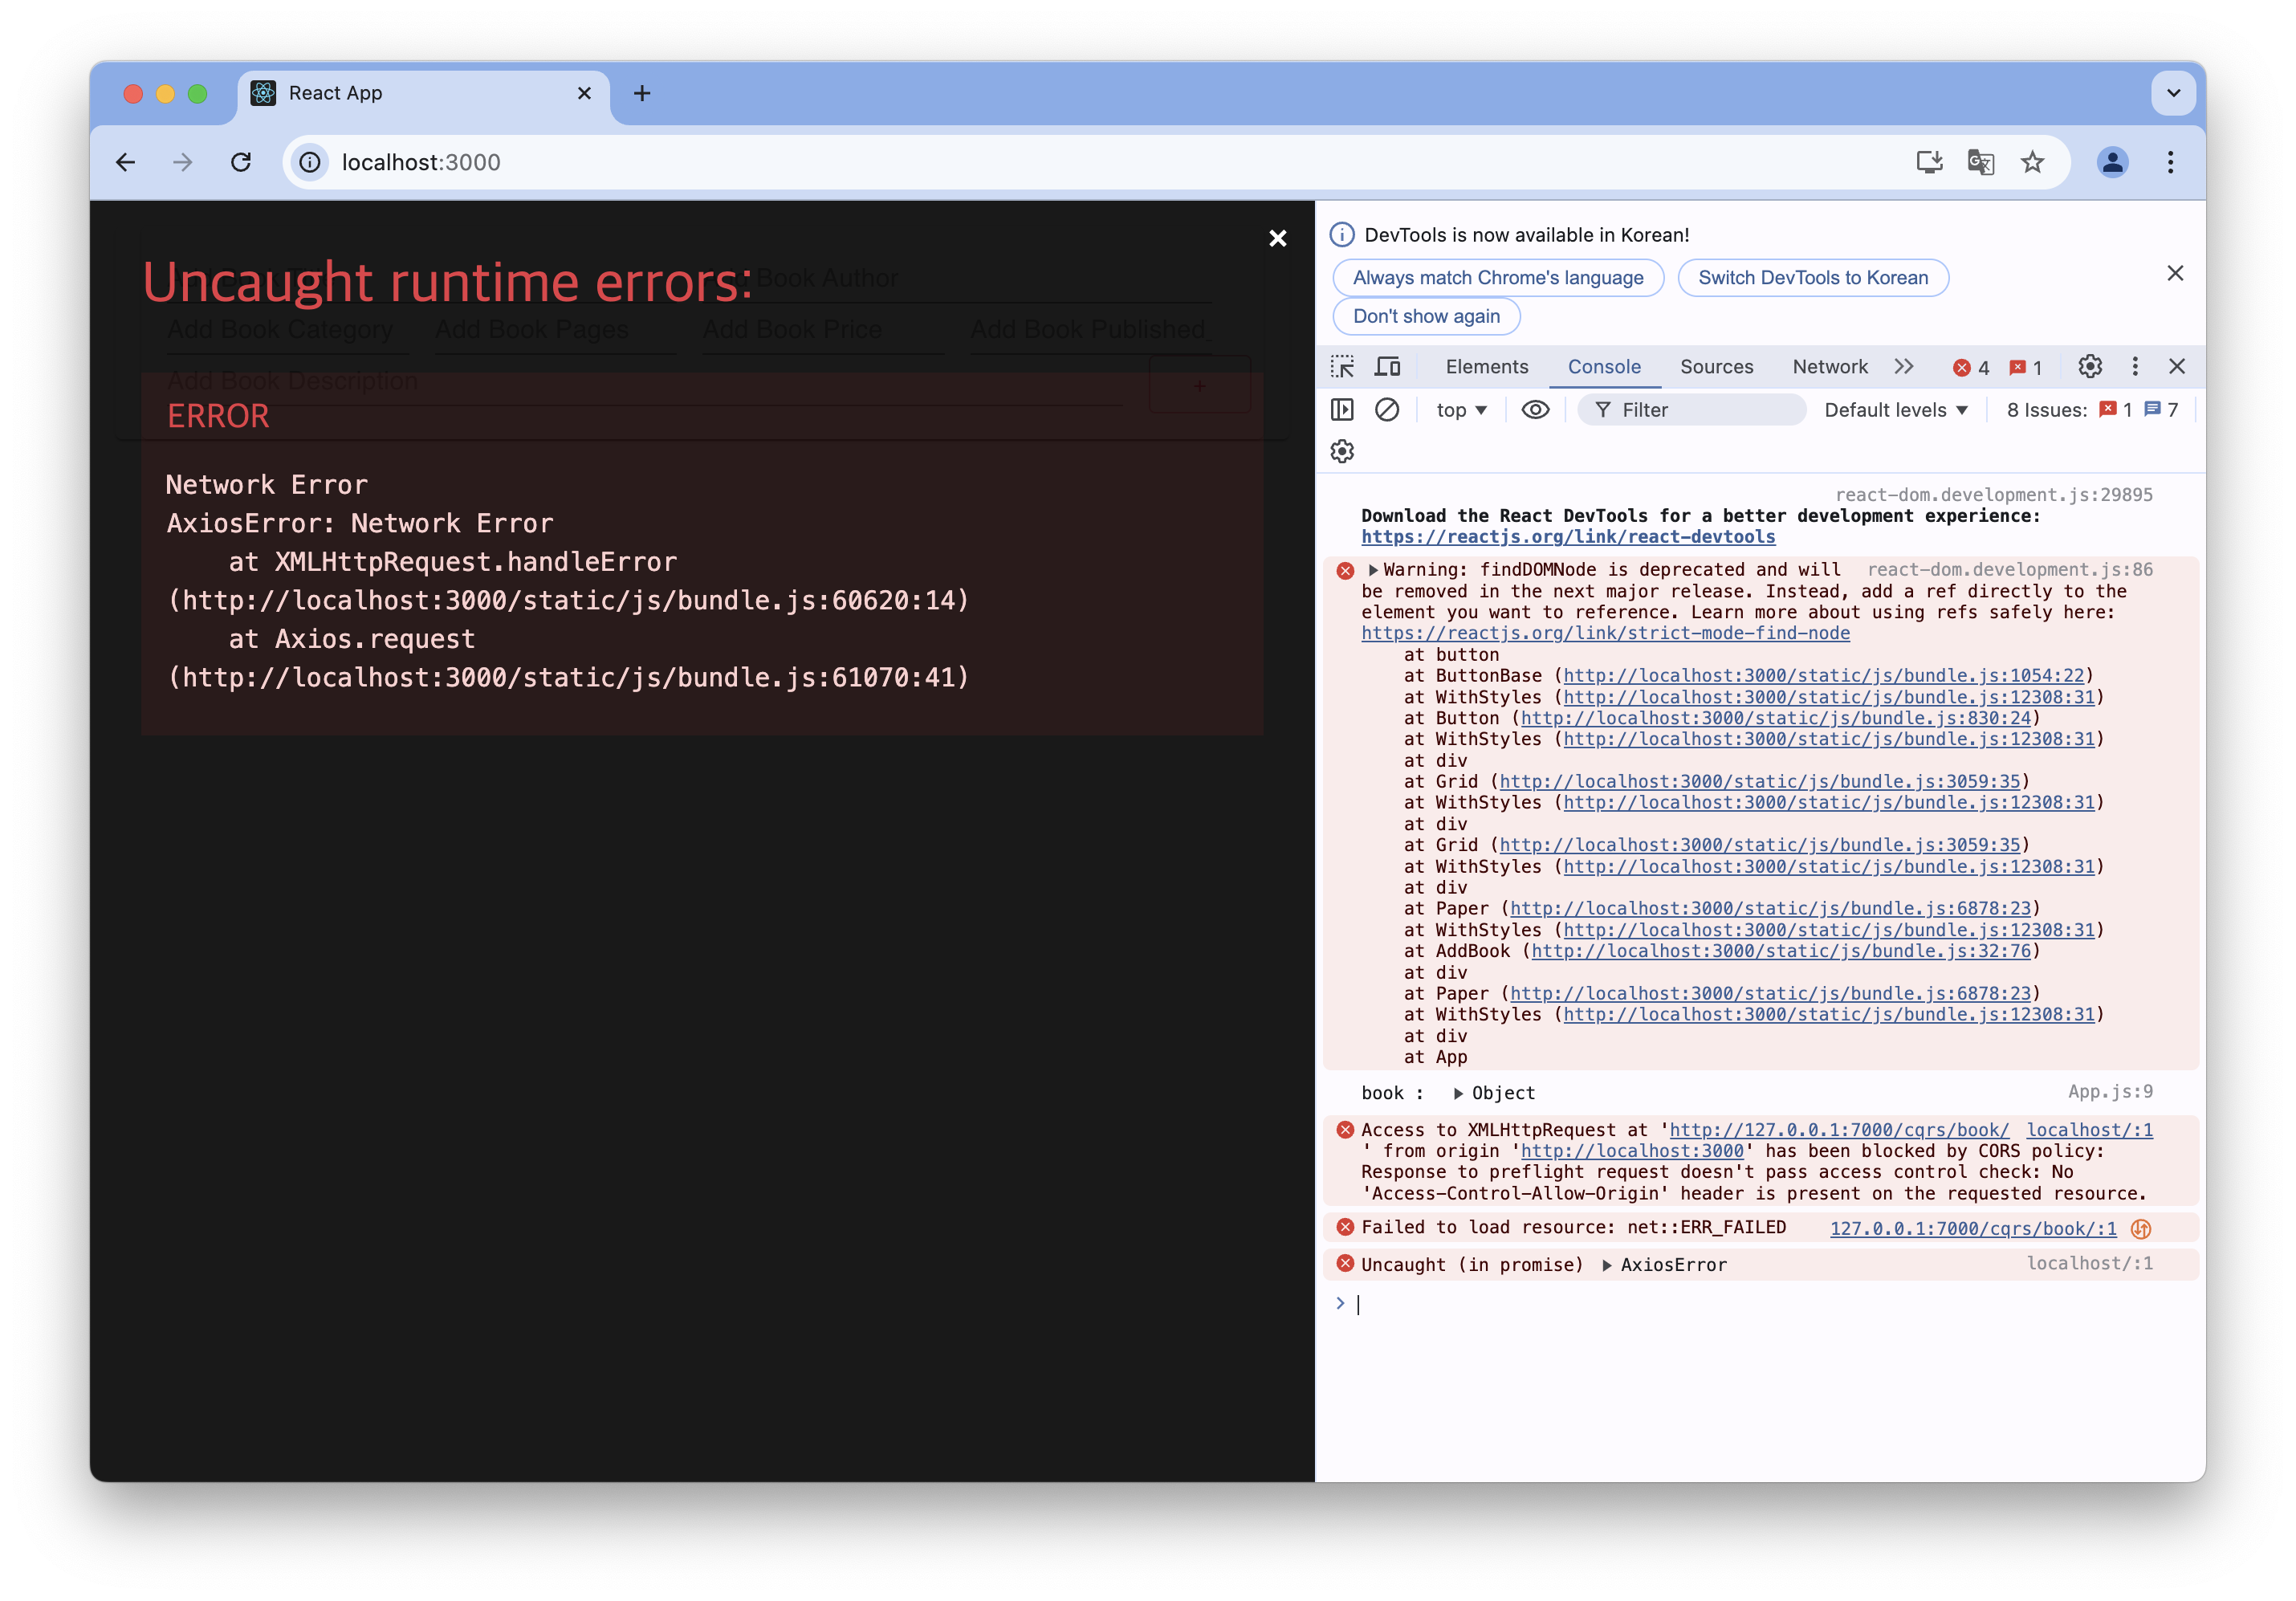
write 프로젝트에 패키지 설치
pip install django-cors-headers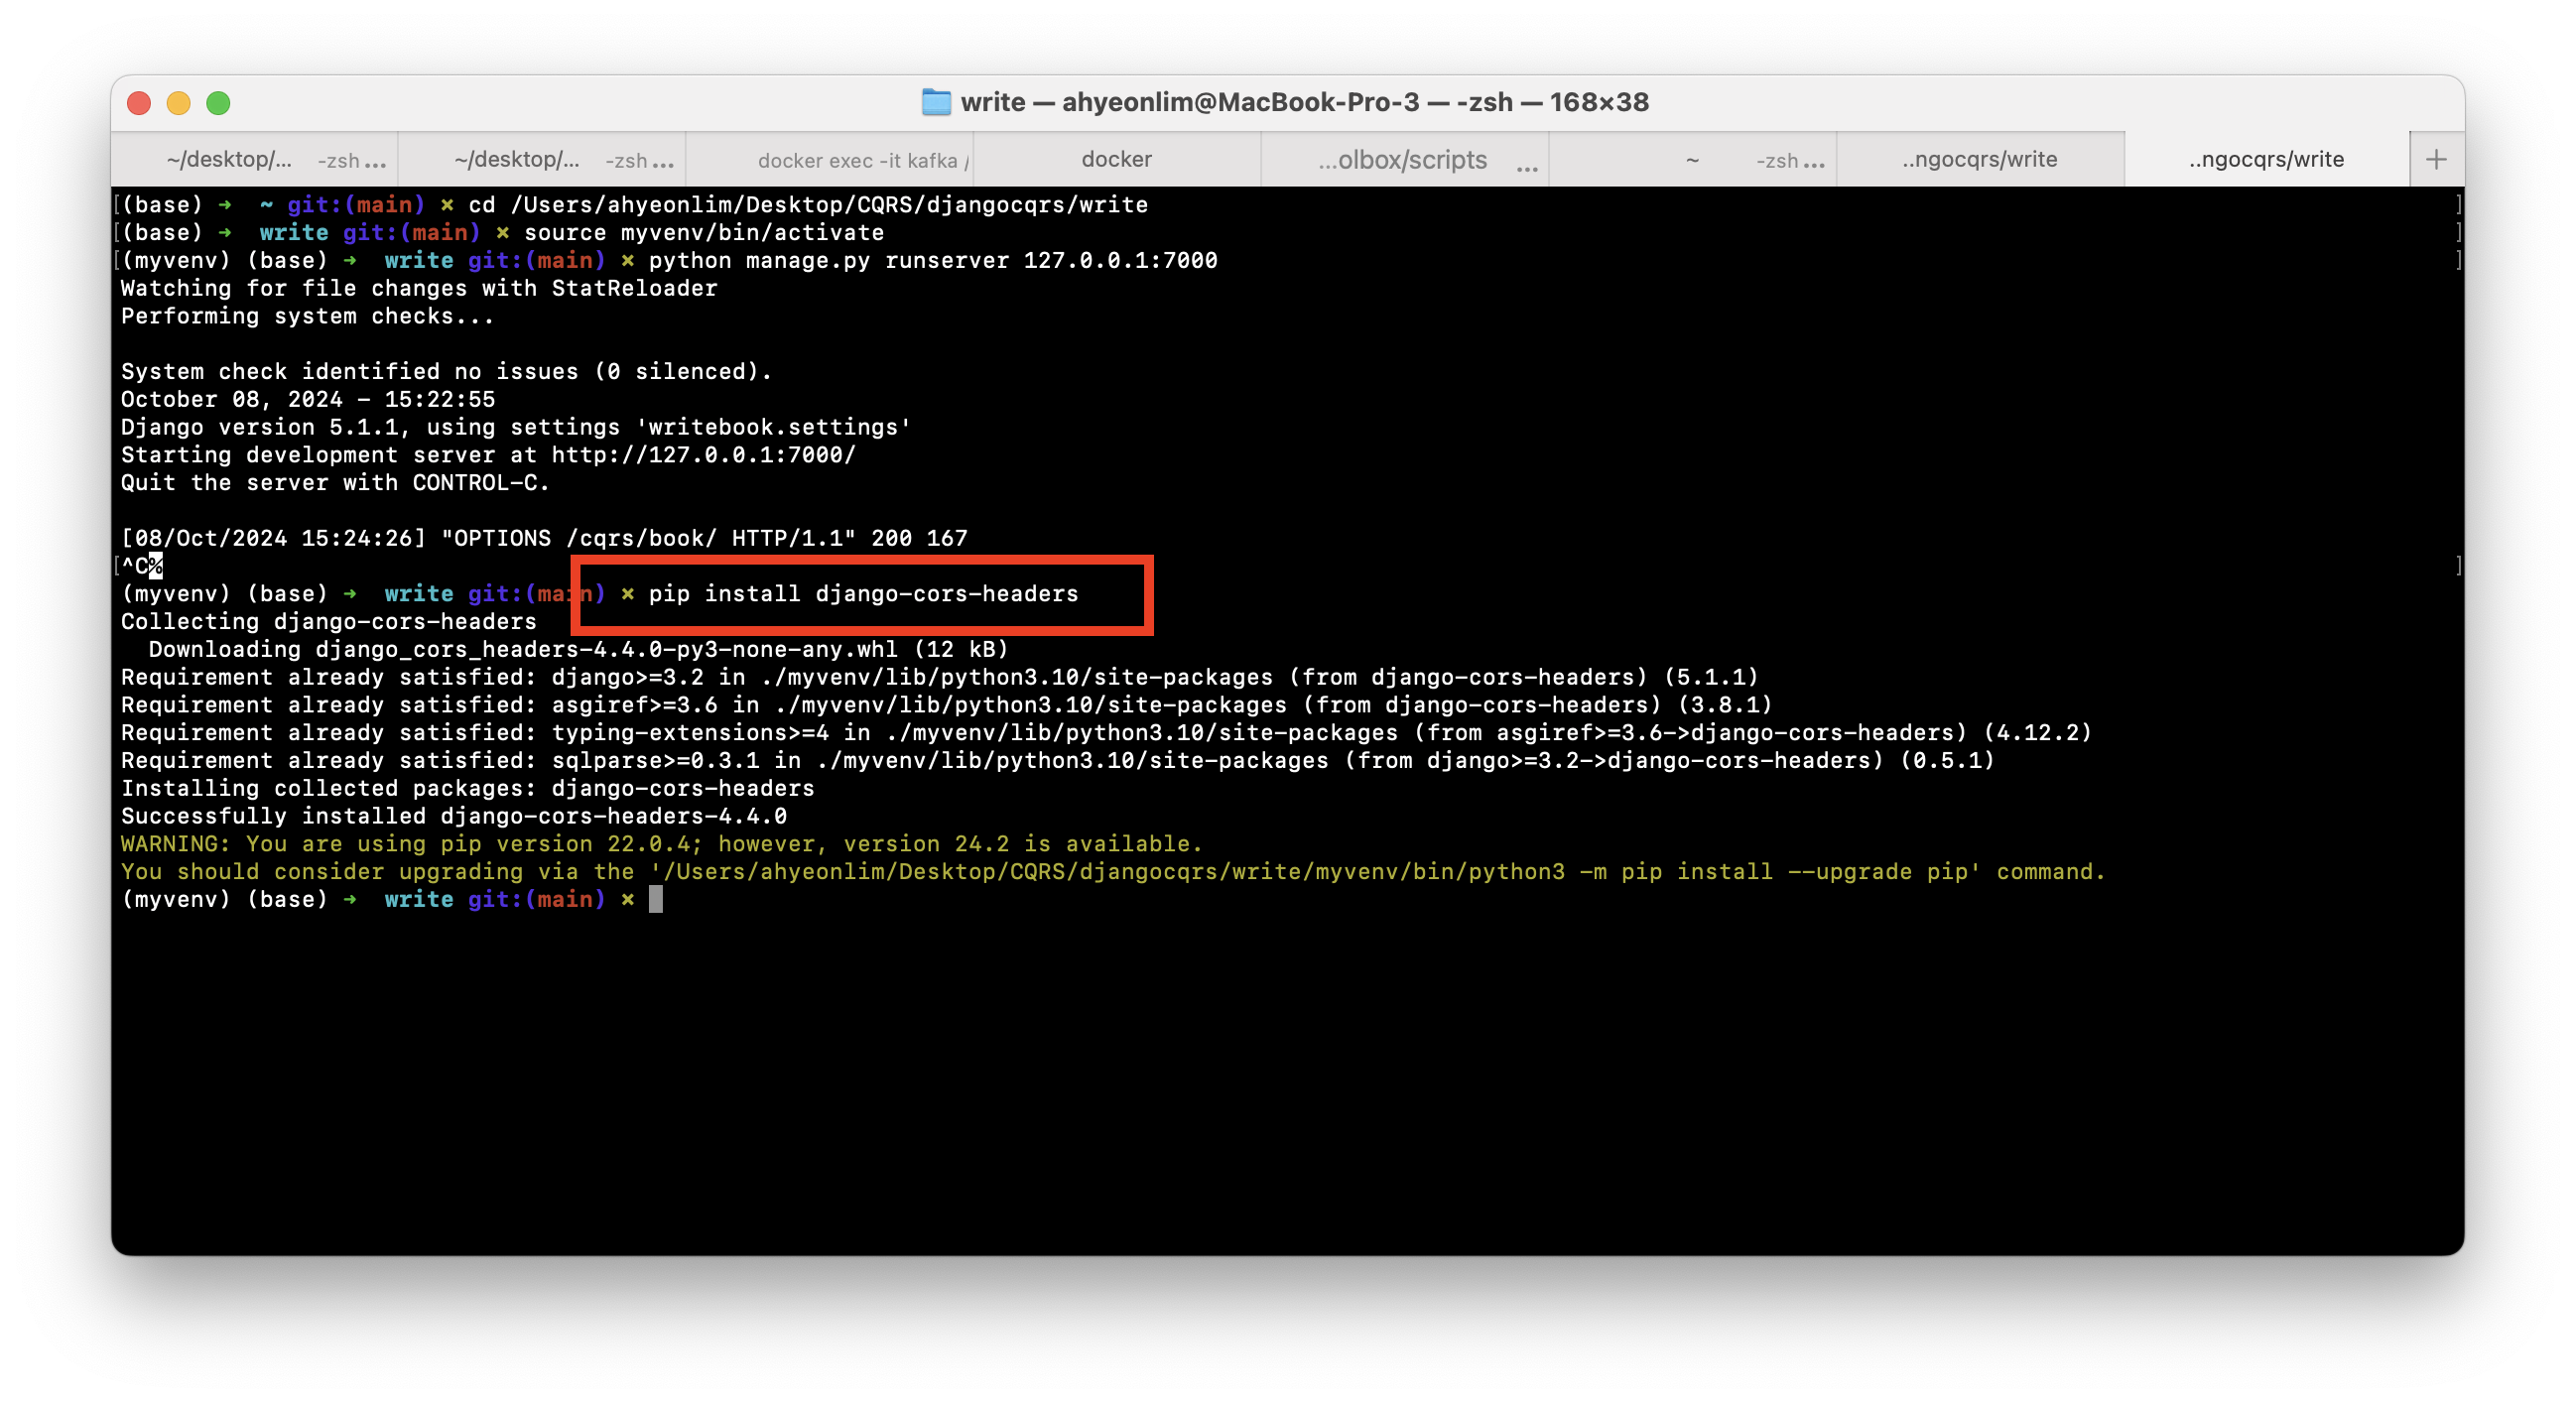
settings.py 파일의 INSTALLED_APP에 corsheaders를 추가
settings.py 파일의 MIDDLEWARE의 최상단에 'corsheaders.middleware.CorsMiddleware', 추가
settings.py 파일에 요청을 허락할 WHITELIST 작성
CORS_ORIGIN_WHITELIST = ['http://127.0.0.1:3000', 'http://localhost:3000']
CORS_ALLOW_CREDENTIALS = True